
Quick Answer: Drift is normal — every blade has a slight angle it wants to cut at. Find it (freehand cut on scrap following a line, measure the angle) and set the fence to match. Fighting drift with fence pressure just bends the blade. Work with the drift angle.
Every workshop has one machine that beginners walk past like it is a sleeping bear — the bandsaw. It looks complicated, it sounds serious, and the manual reads like it was written by someone who never wants you to touch it. So most people buy one, use it twice, and let it gather dust while they fight the same cuts on a jigsaw that takes four times as long.
Here is the secret the manual hides: the bandsaw is not the hard part. Fifteen minutes of setup — tension, guides, tracking, and one honest blade choice — turns it from sleeping bear into the most useful saw you own, the one that slices a thick board into two thin ones and curls around a curve like it is showing off. The practice cuts in this guide will prove it before your coffee goes cold.
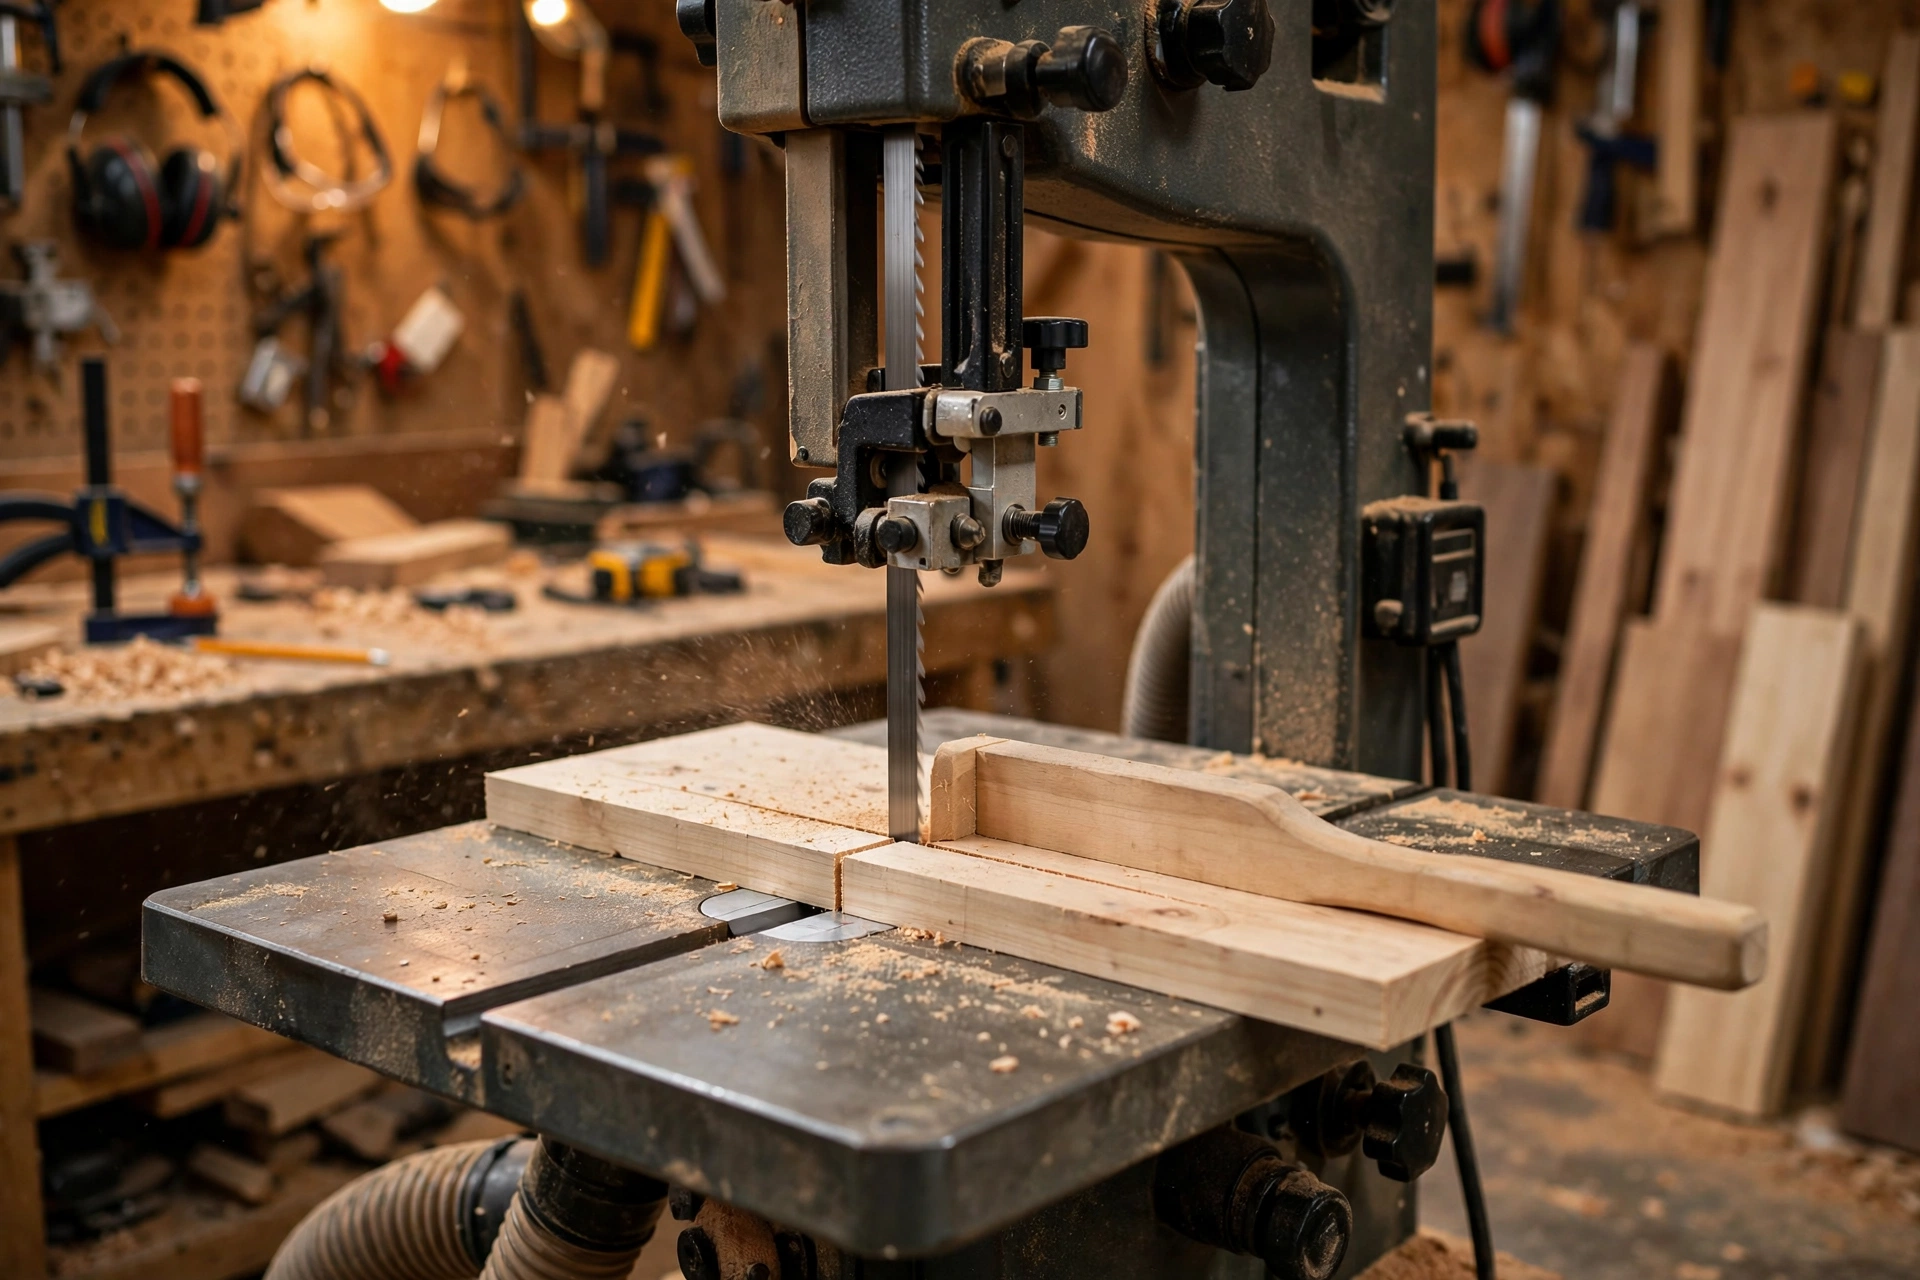
Safety first: Eye and hearing protection always. Hands clear of the blade (use push sticks for narrow work), never reach across the blade path, let the blade reach full speed before cutting, and unplug when changing blades or adjusting guides. The blade’s teeth point downward — respect the cutting zone.
Bookmark This Checklist — Tools & Materials for Bandsaw Setup
Everything a beginner needs on hand before the first bandsaw cut. Save this list — you’ll reuse it every time you set up a new blade.
- Safety glasses and hearing protection — wear for every cut, no exceptions.
- Push sticks — for any narrow work near the blade.
- The starter blade set: 1/4″ (6 mm), 6-TPI for curves; 1/2″ (13 mm), 3-TPI for general cuts and resawing. These two handle 90% of beginner bandsaw work.
- Featherboard — holds the workpiece against the fence during ripping.
- Pencil or marker — for marking cut lines on the workpiece.
- Combination square — to verify the table is 90° to the blade.
- Scrap wood — for the freehand drift-test cut before setting the fence to the blade’s drift angle.
- A spare blade — resawing with a dull blade guarantees wandering, so keep a fresh one on hand.
How it works (the 30-second version)
A continuous loop blade runs around two wheels — the exposed section between the table and the upper guide does the cutting, teeth pointing down. The blade’s thin kerf and continuous motion make it efficient, relatively safe (compared to table saws), and capable of cuts no other stationary saw manages: tight curves, deep resawing, and irregular shapes.
Setup: the part that determines everything
A poorly set up bandsaw cuts crooked, wanders, and frustrates. A well-set-up one is a joy. Setup is 80% of bandsaw success.
Blade tension
The blade must be tensioned correctly — too loose and it wanders and twists; too tight and it stresses the saw (and can snap blades).
- Use the saw’s tension gauge as a starting point (matched to blade width).
- The flutter test (the pro method): tension the blade, run the saw, back off tension until the blade flutters, then tension just past the flutter point. This finds the sweet spot empirically.
- Release tension when not using the saw for extended periods (preserves the blade and the saw’s tires/springs).
Guide bearings / blocks
The guides (above and below the table, plus the thrust bearing behind) support the blade:
- Side guides: positioned just behind the blade’s gullets (not touching the teeth!) — about a paper’s thickness from the blade.
- Thrust bearing: behind the blade — the blade should almost touch it but not quite (it engages under cutting pressure).
- Height: the upper guide assembly should be ~1/4″ above the workpiece — lower is better (less exposed blade, more support).
Adjust guides for every blade change and every significant thickness change. It’s fiddly; it’s essential.
Blade tracking
The blade should run centered on the wheels’ tires — adjust with the tracking knob while hand-turning the wheels (unplugged!). A blade that tracks off-center wears tires and cuts unpredictably.
Table square to blade
Check with a square — the table must be 90° to the blade for square cuts. Adjust the table trunnion per your manual.

Print This Before Your First Cut: The 5-Minute Bandsaw Setup Sequence
Run these six steps in order, every time you fit a new blade. Each one takes a minute or less — and skipping any of them is how crooked cuts happen.
- Tension, then prove it. Tension the blade using the saw’s gauge as a starting point (matched to blade width), then run the flutter test: back off tension until the blade flutters, then tension just past the flutter point. Release tension when the saw will sit unused for extended periods — it preserves the blade and the saw’s tires and springs.
- Set the side guides. Position them just behind the blade’s gullets — never touching the teeth — about a paper’s thickness from the blade. The thrust bearing sits behind the blade: almost touching, engaging only under cutting pressure.
- Drop the upper guide. Set the upper guide assembly about 1/4″ (6 mm) above the workpiece. Lower is better: less exposed blade, more support.
- Check tracking. The blade should run centred on the wheels’ tires. Adjust with the tracking knob while hand-turning the wheels — unplugged. A blade that tracks off-centre wears tires and cuts unpredictably.
- Square the table. Check with a square — the table must be 90° to the blade for square cuts. Adjust the table trunnion per your manual.
- Find the drift. Make a freehand cut on scrap following a marked line, measure the angle the blade wants to cut at, and set the fence to match that angle. Fighting drift with fence pressure just bends the blade.
Only now switch on and cut. If a cut still goes wrong, recheck this chain in order — tension, guides, tracking, table square, blade choice — before blaming yourself.
Blade selection (the second-most important thing)
Width
- Narrow (1/8″–1/4″): tight curves — the narrower the blade, the tighter the curve. 1/4″ is the versatile curve blade.
- Medium (3/8″–1/2″): general purpose — moderate curves, light resawing.
- Wide (3/4″+): resawing and straight ripping — the beam strength resists wandering in deep cuts.
The rule: use the widest blade the curve allows. Wide blades cut straighter; narrow blades turn tighter.
TPI (teeth per inch)
- Thick stock: low TPI (2–4) — clears sawdust from deep cuts without clogging.
- Thin stock: higher TPI (6–14) — more teeth engaged = smoother cut.
- The rule: minimum 3 teeth in the workpiece at all times. Too few teeth engaged = grabbing and rough cuts.
Tooth type
- Hook tooth: aggressive, fast — for resawing and ripping thick stock.
- Skip tooth: good all-rounder — efficient chip clearance.
- Regular tooth: finer work, thinner stock.
The starter set: 1/4″ 6-TPI (curves), 1/2″ 3-TPI (general/resaw). These two handle 90% of beginner bandsaw work.
Mistakes to Avoid — Bookmark This Checklist
Every crooked cut, wandering blade, and ruined board on a bandsaw traces back to one of these. Tape this list to the wall above the saw:
- Fighting drift instead of testing for it. Drift is normal — every blade has a slight angle it wants to cut at. Find it (freehand cut on scrap, measure the angle) and set the fence to match. Pushing against drift with fence pressure just bends the blade.
- The wrong blade width for the cut. Use the widest blade the curve allows — wide blades cut straighter, narrow blades turn tighter. A narrow blade wandering in a deep resaw cut isn’t a bad blade; it’s the wrong blade for the job.
- Forcing the cut. Forcing twists the blade and ruins the cut. Steady feed — let the blade cut at its pace, especially in curves.
- Cutting before full speed. Let the blade reach full speed before the workpiece touches it. A slow blade grabs instead of cutting.
- No push stick on narrow work. Hands clear of the blade, never reach across the blade path — a push stick on narrow pieces is the same 6″ rule as the table saw.
- Skipping the setup. Setup determines everything on a bandsaw — blade tension and guide bearings are the parts beginners find most mysterious and most skip. Don’t.
The three fundamental operations
1. Cutting curves
- Narrow blade appropriate to the curve radius.
- Mark clearly, cut just outside the line (sand to the line after).
- Relief cuts for tight curves — cut away waste in sections so the blade doesn’t bind.
- Steady feed — don’t force the turn; let the blade cut at its pace. Forcing twists the blade and ruins the cut.
- Guide height low — 1/4″ above the work, always.
2. Resawing (cutting thick boards into thinner ones)
The bandsaw’s superpower — turning a 2″ board into two 1″ boards (bookmatching, veneer, thin stock).
- Widest blade you have (3/4″+ ideal) — beam strength prevents wandering.
- Low TPI hook tooth (2–3 TPI) — clears the deep cut.
- Fence set for the desired thickness — use a tall resaw fence or a single-point fence (which lets you steer against drift).
- Drift compensation — bandsaw blades don’t cut perfectly parallel to the fence (drift). Find your blade’s drift angle on scrap (mark a line, cut freehand following it, note the angle), then set the fence to that angle.
- Steady, even pressure — consistent feed prevents the blade wandering. Don’t stop mid-cut if avoidable.
- Sharp blade — resawing with a dull blade guarantees wandering. Fresh blade for critical resawing.
3. Ripping (straight cuts along the grain)
- Medium-wide blade, fence set (with drift compensation).
- Featherboard against the fence for consistent pressure.
- Push stick for narrow pieces — same 6″ rule as the table saw.
- Steady feed — the bandsaw is more forgiving than the table saw for ripping (no kickback in the same way), but consistent technique still matters.
Keep Reading
Mastered the bandsaw? These sharpen the rest of your saw game:
- Circular Saw Blade Tooth Count Guide — blade-selection rules that transfer straight to the bandsaw.
- How to Clean & Maintain Power Tools — a bandsaw that’s never cleaned cuts like a tired one.
- Essential Power Tools for Beginners — where the bandsaw fits in your first real kit.
Why does my bandsaw cut crooked (drift)?
Drift is normal — every blade has a slight angle it wants to cut at. Find it (freehand cut on scrap following a line, measure the angle) and set the fence to match. Fighting drift with fence pressure just bends the blade. Work with the drift angle.
Why is my blade wandering in deep cuts?
Usually: too-narrow blade for the depth (use wider), dull blade (resawing demands sharp), too-fast feed (forcing twists the blade), or inadequate tension. In that order of likelihood.
How tight should the blade be?
Tensioned per the gauge for the blade width, verified by the flutter test. The “pluck it like a guitar string” advice is unreliable — use the gauge and the flutter method. When in doubt: slightly tighter is better than too loose (loose blades wander dangerously).
Can a bandsaw replace a table saw?
Partially — it rips (less precisely), crosscuts (with a sled/miter gauge, adequately), and does things the table saw can’t (curves, resawing thick stock). But for precision ripping and joinery, the table saw’s accuracy is unmatched. They’re complementary; many woodworkers consider the bandsaw the safer primary saw.
Why does my blade keep coming off the wheels?
Usually: tracking misadjusted, inadequate tension, or damaged tires (cracked/worn rubber tires don’t grip). Check tracking first (blade centered on tires), then tension, then inspect tires.
How do I cut a perfect circle?
Circle-cutting jig (pivot pin at the center, workpiece rotates into the blade) — or mark, cut outside the line with a narrow blade, sand to the line. The jig is worth building if you cut circles often.
Keep This Chart Handy — Bandsaw or Table Saw? Pick the Right Saw for the Job
The two saws are complementary, not rivals — and the fastest way to a bad cut is reaching for the wrong one. Match the job to a row before you switch anything on. Screenshot this for the next time you stand in front of both saws wondering which one to use.
| The job | Reach for | Why |
|---|---|---|
| Tight curves and shapes | Bandsaw | Narrow blades (1/8–1/4 in / 3–6 mm) turn where a table saw cannot follow |
| Resawing a thick board into thin ones | Bandsaw | The bandsaw’s superpower — a 2 in (51 mm) board becomes two 1 in (25 mm) boards |
| Cutting circles | Bandsaw | With a circle-cutting jig, or a narrow blade cut outside the line and sanded to it |
| Straight ripping along the grain | Either — the bandsaw is the forgiving pick | The bandsaw rips with no kickback in the same way; the table saw rips more precisely |
| Precision ripping and joinery | Table saw | For precision work the table saw’s accuracy is unmatched |
| Crosscuts | Table saw (the bandsaw manages adequately) | The table saw crosscuts with a sled or miter gauge; the bandsaw does it adequately, not precisely |
Bandsaw blade quick-reference table
Match the blade to the job. Using the wrong TPI is the single most common beginner mistake.
| Task | Blade width | TPI | Why this works |
|---|---|---|---|
| Resawing thick stock | 1/2–3/4 in | 3–4 | Wide blade resists drift; coarse teeth clear sawdust fast |
| General ripping | 3/8–1/2 in | 4–6 | Good balance of speed and control |
| Gentle curves | 1/4 in | 6–10 | Narrow enough to turn without binding |
| Tight curves / detail work | 1/8 in | 10–14 | Maximum maneuverability |
| Cutting metal | 1/2 in | 14–24 | Fine teeth for thin stock; use slow speed |
Why Is My Cut Going Wrong? — Keep This Chart Handy
On a bandsaw, a bad cut is almost never bad luck — it’s a setup setting crying for help. Before you blame yourself (or the saw), match your symptom to the culprit below. Every fix here comes from the setup section of this guide, so nothing here asks you to learn a new skill mid-cut.
| Symptom | Likely setup culprit | Fix |
|---|---|---|
| Cut wanders off the line, even with the fence | Drift not compensated — every blade has a slight angle it wants to cut at | Find it with a freehand cut on scrap following a line, measure the angle, and set the fence to match. Fighting drift with fence pressure just bends the blade. |
| Blade wanders in deep cuts (resawing) | Wrong blade width, or a dull blade | Use the widest blade you have (3/4 in / 19 mm and up is ideal) with low TPI hook tooth (2–3 TPI), and a sharp blade — resawing with a dull blade guarantees wandering. |
| Blade twists or the cut binds in curves | Forcing the turn, or the wrong blade for the curve | Use the widest blade the curve allows (narrow blades turn tighter), cut just outside the line, add relief cuts for tight curves, and feed steadily — forcing twists the blade and ruins the cut. |
| Blade grabs instead of cutting at the start | Cutting before full speed | Let the blade reach full speed before the workpiece touches it. A slow blade grabs instead of cutting. |
| Cut feels unstable, blade flexes | Upper guide assembly too high | Set the upper guide about 1/4 in (6 mm) above the workpiece — lower is better: less exposed blade, more support. |
| Blade wanders and twists generally | Tension wrong — too loose and it wanders and twists, too tight and it stresses the saw | Use the saw’s tension gauge as a starting point (matched to blade width), then the flutter test: back off tension until the blade flutters, then tension just past the flutter point. Release tension when not using the saw for extended periods. |
| Rough, grabbing cuts in thin stock | Too few teeth engaged in the workpiece | Follow the rule: minimum 3 teeth in the workpiece at all times. Thin stock needs higher TPI (6–14); thick stock needs low TPI (2–4) to clear sawdust. |
| Cut goes crooked even though the fence looks right | Table not square to the blade, or guides out of adjustment | Check with a square — the table must be 90° to the blade. Side guides sit just behind the gullets (not touching the teeth), about a paper’s thickness from the blade, and the blade should run centered on the wheels’ tires. |
If a symptom survives its fix, recheck the whole setup chain in order — tension, guides, tracking, table square, blade choice — before blaming yourself. On this saw, setup determines everything.
Your First Hour on the Bandsaw — Keep This Chart Handy
Don’t start on your good lumber. Work through these four practice cuts in order, on scrap, and you’ll have felt every skill in this guide before lunch.
| Practice step | Blade to use | Do this | “Good” looks like |
|---|---|---|---|
| 1. Find your drift | Whatever blade is fitted | Make a freehand cut on scrap following a marked line, measure the angle the blade wants to cut at, and set the fence to match that angle | The fence now agrees with the blade instead of fighting it — fighting drift with fence pressure just bends the blade |
| 2. A gentle curve | 1/4″ (6 mm), 6-TPI | Mark clearly, cut just outside the line, add relief cuts so the waste falls away on tighter turns, keep the upper guide 1/4″ above the work, feed steadily | A smooth curve you can sand to the line — no forcing, no twisting, no burned smell of a bound blade |
| 3. A straight rip | Medium-wide blade, fence set with drift compensation | Hold the work against the fence with a featherboard, use a push stick for narrow pieces, feed steadily | A straight, even board with no wandering — and both hands well clear of the blade |
| 4. A mini resaw | Widest blade you have (3/4″+ ideal), low TPI hook tooth (2–3 TPI) | Set the fence for the desired thickness, feed with steady, even pressure, don’t stop mid-cut if avoidable, and use a sharp blade — resawing with a dull blade guarantees wandering | Two thinner boards from one thick one, with the cut staying true through the full depth |
Safety thread through all four: eye and hearing protection always, hands clear of the blade, never reach across the blade path, let the blade reach full speed before the workpiece touches it, and unplug when changing blades or adjusting guides. If any step feels like a fight, stop — recheck tension (gauge, then the flutter test), guides (side guides a paper’s thickness from the blade, just behind the gullets), and tracking (blade centred on the wheels’ tires) before blaming yourself.
The verdict: the setup-first saw
Correct tension + properly set guides + right blade (width and TPI for the task) + drift-compensated fence + steady feed = bandsaw success.
The bandsaw punishes poor setup more than any other saw — but rewards good setup with capabilities nothing else offers. Spend the 15 minutes on tension, guides, and tracking before every critical cut. Choose the blade for the specific operation. And remember: the bandsaw is patient — feed steadily, don’t force, and it cuts true.
Tool Worth Lab provides research-based technique guidance. Always wear eye and hearing protection, keep the upper guide 1/4″ above the work, use push sticks for narrow cuts, and unplug when changing blades or adjusting guides.
For official specifications and support documentation, see DeWalt’s official site.
For power tool safety standards, refer to OSHA’s guidelines.