
Look at your lawn the morning after a mow. If the grass tips are brown and frayed, like they have been chewed rather than cut, your mower is not broken and your grass is not dying — your blade is just dull, and it has been quietly shredding every blade of grass for weeks. The good news? The fix costs about the price of a takeaway coffee and takes less time than mowing the lawn itself.
Twenty minutes, twice a season, one file, and a trick with a nail that takes thirty seconds — that is the whole job. This guide shows you the file method and the grinder method, how to tell when the blade is done for good, and the one step almost everyone skips that turns a smooth mower into a vibrating mess. Your lawn will look like a different garden by next weekend.
Best of all, the job has one step almost everyone skips, and skipping it is exactly why mowers shake, rattle, and wear out early. Read on, and your next mow will look — and feel — completely different.
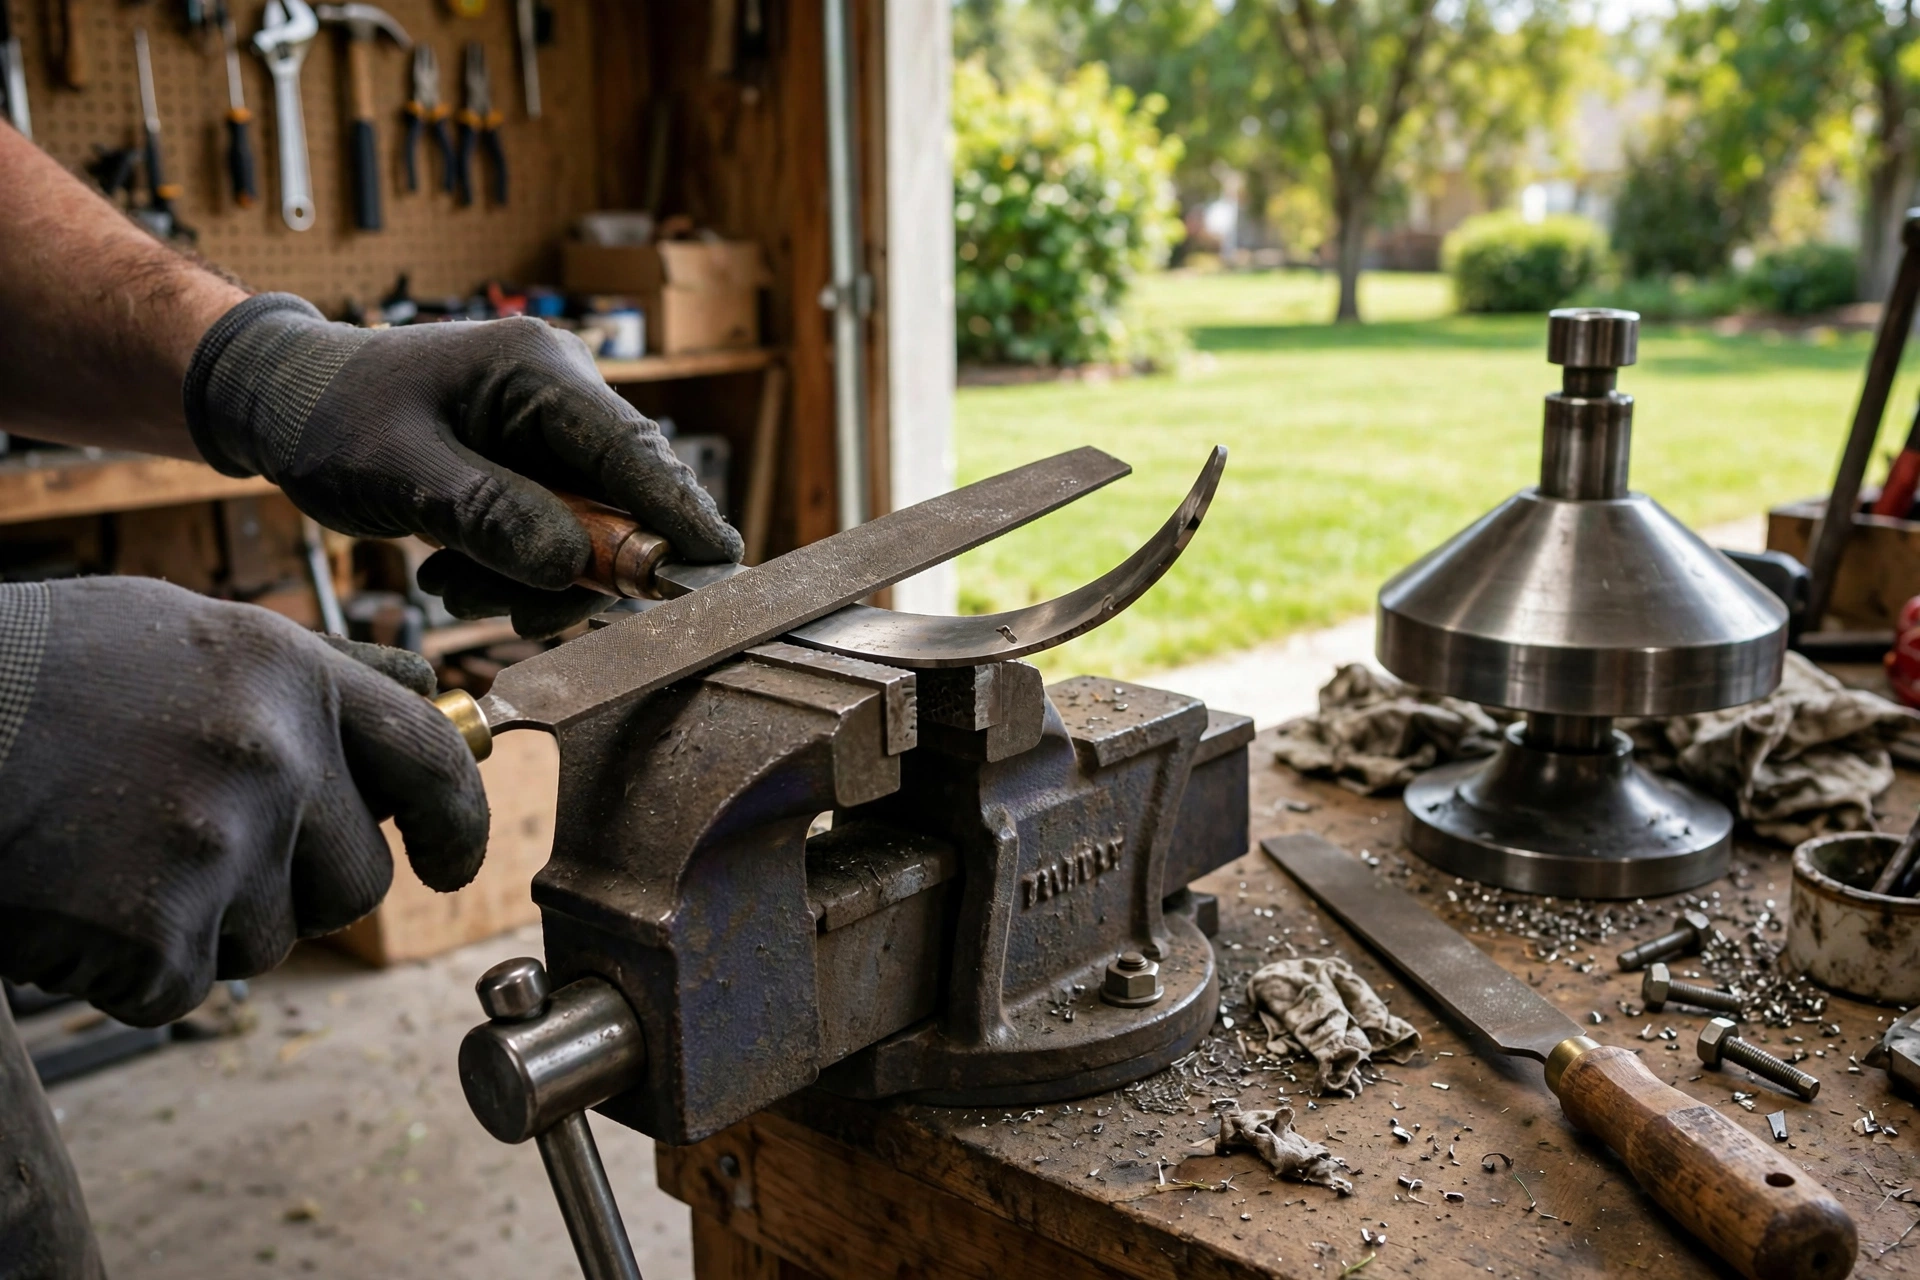
Safety first: Disconnect the spark plug wire (gas) or remove the battery (electric) before touching the blade — the engine can turn the blade unexpectedly. Wear heavy gloves (mower blades are sharp and heavy), eye protection for grinding, and secure the blade in a vise — never hold it by hand while sharpening.

Signs your blade needs sharpening
- Brown/ragged grass tips after mowing — the #1 indicator. Clean cuts stay green; tears brown.
- Uneven cut — dull blades push grass over instead of cutting it.
- Mower working harder — increased vibration, slower mowing, more fuel.
- The thumbnail test — a sharp blade bites a thumbnail dragged gently across the edge; a dull one slides.
Frequency: every 20–25 hours of mowing (roughly twice per season for most homeowners), or immediately after hitting rocks, roots, or debris.
Removal (step by step)
- Disconnect power — spark plug wire off (gas) or battery removed (electric). Non-negotiable.
- Tip the mower correctly — air filter UP (tipping filter-down floods it with oil). For most mowers: spark plug facing up.
- Secure the blade — block it with a 2×4 or wear heavy gloves and hold firmly. The bolt is tight; the blade will try to spin.
- Remove the bolt — usually standard right-hand thread (counterclockwise to loosen), but check your manual — some are reverse-thread. A breaker bar or impact wrench helps; these bolts are torqued hard.
- Note the orientation — mark which side faces down (paint mark or photo). Installing upside-down is a classic mistake — the blade cuts with the sharpened edge leading, angled fins up.
Sharpening: file vs grinder
Hand file (the controlled method)
- Pros: impossible to overheat the blade (overheating ruins the temper — blue steel = soft edge that dulls instantly), precise, quiet, no power needed.
- How: secure the blade in a vise, file at the existing bevel angle (usually ~30°), push strokes only, work from one end to the other, count strokes for evenness.
- Best for: regular touch-ups, beginners, anyone without a grinder.
Angle grinder / bench grinder (the fast method)
- Pros: fast — restores a badly dull or nicked blade in minutes.
- Cons: easy to overheat (dip in water frequently — if the steel turns blue, you’ve ruined the temper in that spot), removes metal aggressively (shortens blade life if overdone).
- How: light passes, keep moving, quench in water every few seconds, maintain the original bevel angle.
The verdict: file for maintenance sharpening (preserves the blade, no heat risk); grinder for damaged blades (nicks, very dull) with careful heat management. Most homeowners can file-maintain indefinitely and rarely need the grinder.
What about “universal” sharpening?
The goal isn’t razor-sharp — it’s “butter-knife sharp.” A mower blade at razor sharpness dulls in one mowing (grass is abrasive). The ideal edge: clean, even, sharp enough to cut paper but not shaving-sharp. Over-sharpening just means more frequent sharpening.
Balancing (the step everyone skips)
An unbalanced blade vibrates — destroying bearings, loosening bolts, and making the mower shake itself apart over time. Always balance after sharpening.
The nail test: hang the blade on a nail through the center hole (or use a $5 blade balancer — the cone type). If one side drops: that side is heavier — remove a bit more metal from it (not from the cutting edge — from the non-cutting trailing area or the heavy end).
Why it matters: you removed metal unevenly during sharpening (everyone does). The balance check corrects it. Two minutes, prevents hundreds in bearing damage.
Reinstallation
- Clean the mounting area — grass, rust, debris on the mounting surface cause wobble.
- Correct orientation — cutting edge leading, fins up (check your mark/photo).
- Torque the bolt properly — check your manual for the spec (typically 35–60 ft-lbs). Too loose: the blade slips or flies off. Too tight: stripped threads. A torque wrench is the right tool.
- Reconnect power — spark plug wire / battery.
- Test — brief run, listen for vibration (vibration = balance issue or mounting problem — stop and check).
Bookmark This Checklist — The Twice-a-Season Blade Ritual
- ☐ Sharpening need checked first: brown or ragged grass tips after mowing, an uneven cut where grass gets pushed over instead of cut, a mower working harder with more vibration and fuel use, or a thumbnail test where a sharp blade bites a thumbnail dragged gently across the edge and a dull blade slides.
- ☐ Sharpening timed right: every 20–25 hours of mowing, roughly twice per season for most homeowners, or immediately after hitting rocks, roots, or debris — sandy soil dulls blades faster, since sand is abrasive.
- ☐ Power disconnected before touching the blade: spark plug wire off for a gas mower, battery removed for an electric mower — the engine can turn the blade unexpectedly.
- ☐ Mower tipped correctly: air filter UP, with the spark plug facing up for most mowers — tipping filter-down floods the air filter with oil.
- ☐ Blade secured safely: block the blade with a 2×4 or hold firmly with heavy gloves, since the bolt is torqued hard and the blade will try to spin.
- ☐ Orientation marked before removal: mark which side faces down with paint or a photo, since installing a blade upside-down is a classic mistake — the sharpened edge leads, with angled fins up.
- ☐ Sharpening method chosen: hand file for regular touch-ups and beginners (no heat risk, precise, quiet), angle grinder or bench grinder for badly dull or nicked blades (fast, but quench in water every few seconds, since blue steel means ruined temper).
- ☐ Factory bevel angle matched: file at the existing bevel angle, usually about 30°, with push strokes only, working from one end to the other and counting strokes for evenness.
- ☐ Sharpness target kept realistic: aim for butter-knife sharp, clean and even and sharp enough to cut paper, not shaving-sharp — a razor edge dulls in one mowing, since grass is abrasive.
- ☐ Balance checked every time: hang the blade on a nail through the centre hole, or use a $5 cone-type blade balancer — if one side drops, that side is heavier, so remove a little more metal from the non-cutting trailing area or the heavy end, never from the cutting edge.
- ☐ Mounting area cleaned: grass, rust, and debris on the mounting surface cause wobble, so clean the surface before refitting.
- ☐ Bolt torqued to the manual specification: typically 35–60 ft-lbs / 47–81 Nm, using a torque wrench — too loose risks the blade slipping or flying off, too tight risks stripped threads.
- ☐ Test run listened to: run briefly and listen for vibration — vibration means a balance issue or a mounting problem, so stop and check.
- ☐ Spare blade kept ready: swap in a sharp spare and sharpen the dull blade at leisure, so mowing with a dull blade “just this once” never tempts anyone.
When to replace instead of sharpen
- Blade worn thin — if the cutting edge is paper-thin or the blade has lost significant width from repeated sharpening.
- Cracked or bent — never straighten and reuse a bent blade (metal fatigue — it can fracture at speed). Replace.
- Excessive nicks — if grinding out damage would remove too much metal.
- Age — blades are $15–$30. If you’ve sharpened it many times and it’s getting thin, replacement is cheaper than the risk.
Keep a spare blade — swap in the sharp spare, sharpen the dull one at your leisure. Zero downtime, and you’re never tempted to mow with a dull blade “just this once.”
The summer I mowed with a dull blade and blamed the grass
For a full summer I mowed a lawn that always looked slightly ragged, and I blamed everything except the blade. I blamed the grass seed, I blamed a dry spell, I blamed the mower being a budget model, and I bought a bag of lawn feed that cost 24 dollars and changed nothing. The tips of the grass were brown a day after every mow, the lawn looked tired no matter how often I cut it, and a neighbour finally walked over, picked up a blade of grass, and showed me the torn, frayed end. A sharp blade cuts. A dull blade tears. My blade had not been sharpened in two seasons, and the edge was rounded over like a butter knife. I took the blade off that evening, filed it for fifteen minutes, balanced it on a nail through the centre hole, and mowed the next morning. The difference was visible from the street: clean green tips, no browning, and a lawn that finally looked like the one in the seed packet photographs. The file cost 9 dollars. The lawn feed had cost 24 dollars and fixed nothing, because the problem was never nutrition. It was a dull edge, and it had been a dull edge all along.
The second lesson was about balance, which I skipped the first time because it sounded like fussiness. I sharpened one side more than the other, bolted the blade back on, and spent a month wondering why the mower vibrated at full throttle and my hands went numb after twenty minutes. An unbalanced blade shakes the whole mower, wears the bearings, and turns a twenty-minute job into an endurance test. Balancing takes thirty seconds: hang the blade on a nail or a cheap cone balancer, see which side drops, and take a few more file strokes off the heavy side until it hangs level. The cone balancer cost 7 dollars and lives on a hook in the garage next to the file. I have never skipped the step since, and the mower runs smooth enough that I can hear the engine note change when the grass gets thick, which is a far better guide to mowing speed than guessing.
The third lesson cost me a bolt and a Saturday morning. I removed the blade with the mower tipped on its side the wrong way, petrol leaked into the air filter, and the mower refused to start until I had cleaned the filter and let it dry. Tip the mower with the air filter and carburettor side up, or drain the tank first, and the whole job stays clean. I also learned to wedge a block of wood against the blade instead of holding it with a gloved hand while loosening the bolt, after the blade slipped once and the file I was holding gouged a knuckle. A block of scrap wood costs nothing and holds better than any glove. My seasonal ritual now takes twenty minutes, twice a season, and costs nothing beyond the file and the balancer I already own. A new blade costs 22 dollars and is worth buying when the old one is nicked deeply or bent, but sharpening the blade you already have is free, and it is the single highest-return maintenance job on the whole mower.
Keep This Chart Handy — Sharpen It or Replace It? The 10-Second Call
Blade off and in your hands? Run down this table before you file a single stroke — some blades are done, and no amount of sharpening brings them back.
| What you see | The call | Why |
|---|---|---|
| Edge just rounded or dull, no damage | Sharpen it | A file restores the factory bevel (usually about 30°) in minutes — this is the normal twice-a-season job |
| Minor nicks along the edge | Sharpen it — with the grinder | Light grinder passes restore a nicked edge fast; quench in water every few seconds so the steel never turns blue |
| Cutting edge paper-thin, or the blade has lost significant width from repeated sharpening | Replace it | There is not enough metal left to hold an edge — a new blade costs $15–$30 |
| Cracked or bent | Replace it — never straighten and reuse | Metal fatigue means it can fracture at speed; a bent blade is a safety risk, not a repair job |
| Excessive nicks — grinding them out would remove too much metal | Replace it | Over-grinding shortens blade life and thins the edge past the point of usefulness |
| Sharpened many times and getting thin | Replace it | Replacement is cheaper than the risk — and keep a sharp spare on hand so you are never tempted to mow with a dull blade “just this once” |
How often should I sharpen my mower blade?
Every 20–25 mowing hours — roughly twice per season for typical homeowners. Sandy soil dulls faster (sand is abrasive); inspect after hitting any debris.
Can I sharpen the blade without removing it?
You can touch up the edge in place with a file, but you can’t properly balance it, inspect it, or maintain the bevel angle. Removal takes 5 minutes and enables the full job — do it right.
What’s the correct sharpening angle?
Match the existing bevel — typically around 30°. You’re restoring the factory angle, not inventing a new one. Follow the original grind lines.
Why is my mower vibrating after sharpening?
Unbalanced blade (the #1 cause — did you balance it?), blade mounted incorrectly (upside down or not seated flat), or a bent blade/crankshaft (if you hit something hard). Stop and diagnose — vibration destroys mowers.
Mulching blade vs regular blade — different sharpening?
Same technique, but mulching blades have extended cutting surfaces (the curved “wings”) — sharpen the full cutting length, not just the straight section. The principle is identical.
Is it worth paying someone to sharpen?
Shops charge $10–$20 — reasonable if you lack tools or time. But a file is $10 (one-time), the skill takes 20 minutes to learn, and you’ll do it twice a season for years. DIY pays for itself immediately.
The verdict: the 20-minute seasonal ritual
| Step | Time |
|---|---|
| Disconnect power, remove blade | 5 min |
| Sharpen (file) | 8–10 min |
| Balance | 2 min |
| Reinstall, torque, test | 5 min |
| Total | ~20 min |
Twice a season, 20 minutes, and your lawn gets clean cuts instead of torn tips — better looking, healthier grass, less mower strain. Keep a spare blade for zero downtime. It’s the highest-ROI maintenance in lawn care, and now you know the whole system: sharpen to butter-knife, balance always, torque correctly.
Tool Worth Lab provides research-based maintenance guidance. Always disconnect the spark plug wire or remove the battery before touching the blade, wear heavy gloves, and never reuse a bent or cracked blade.
Keep Reading: sharpening skills that save real money
Blade sharp? These keep every other edge in the garage just as keen:
- Sharpen Chainsaw Chain Like a PRO (Step-by-Step)! — the 10-minute file routine that turns a fighting saw back into a cutting one.
- Sharpen Drill Bits in 60 Seconds (3 Methods That WORK)! — the same save-money logic, applied to the bits drawer.
- Clean Power Tools Like THIS (And Make Them Last Longer!) — the maintenance routine that keeps sharp tools sharp for years.