
Quick Answer: Almost every table saw injury traces back to a violated safety rule, not bad luck. The CPSC counts over 30,000 emergency-room-treated table saw injuries in America every year, and kickback — a board snatched and hurled back at you at over 100 mph — is one of the main causes. Each of the 15 rules below exists because it prevents a specific, common injury.
Thirty seconds. That is roughly how long it takes for a routine rip cut to turn into an emergency-room visit — and it happens to more than 30,000 Americans every single year. Not beginners. Not careless people. Experienced woodworkers, halfway through a cut they have made a thousand times, when a board pinches the blade and comes flying back at them faster than they can blink.
Here is what makes this different from every other workshop danger: you cannot dodge kickback, you cannot out-react it, and no fancy saw saves you from it. What you CAN do is switch it off almost completely — with fifteen short habits that take seconds each. This guide shows you the three ways kickback starts, the rules that stop each one, and the mistakes that send even careful woodworkers to the ER.
Safety first: This entire article IS the safety warning. Read all 15 rules before your next cut. If your saw is missing its guard, riving knife, or anti-kickback pawls, stop using it until they’re replaced — those aren’t optional accessories.

What kickback actually is (understand the enemy)
Kickback happens when the workpiece binds against the spinning blade or gets caught by the rising teeth at the back of the blade. In a fraction of a second, the blade converts its rotational energy into launching the wood directly back at you — at speeds that can exceed 100 mph.
Three things cause it: 1. The kerf closes behind the blade (internal wood stress pinching the cut) — the #1 cause 2. The workpiece twists into the back of the blade during the cut 3. The workpiece lifts and the rising rear teeth catch it
Every rule below exists to prevent one of these three things. Understand the mechanism and the rules stop feeling arbitrary.
The 15 rules
1. Never remove the guard, riving knife, or anti-kickback pawls
The riving knife — that fin of metal behind the blade — is the single most important anti-kickback device ever invented. It rides in the kerf and physically prevents the wood from pinching the back of the blade (cause #1 above). The anti-kickback pawls dig in if wood starts moving backward. The guard keeps your hands off the blade.
Removing them for “better visibility” or because they’re “in the way” is the most common precursor to serious injury. Modern guards are vastly better than the clunky ones of 20 years ago — if yours is awful, upgrade it; don’t remove it.
2. Stand to the side, never directly behind the blade
If kickback happens, the wood travels in a straight line back from the blade. Don’t be in that line. Stand slightly to the left of the blade (for right-tilt saws), so a kicked-back board misses your torso. This costs nothing and saves everything.
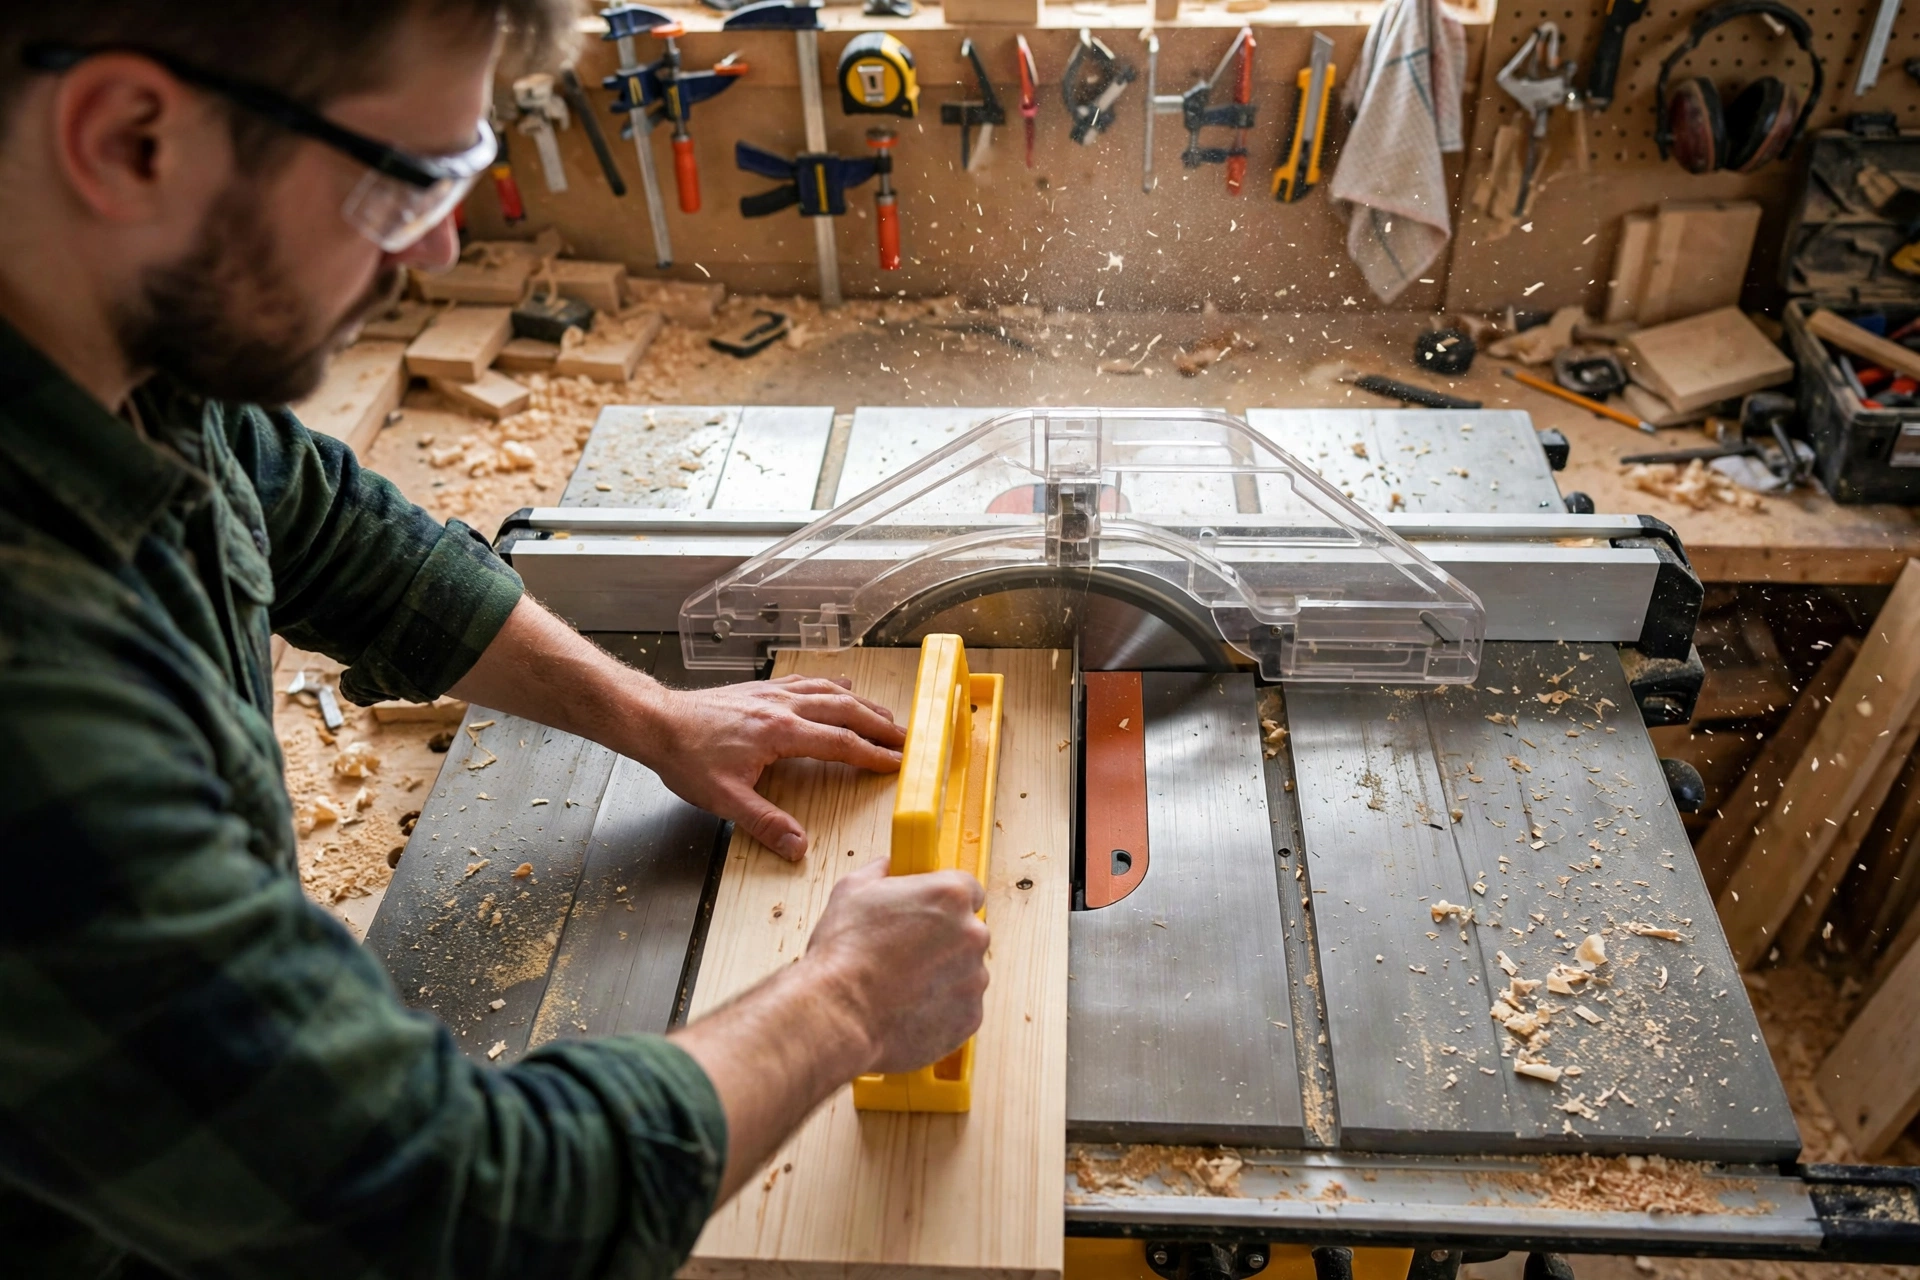
3. Use a push stick — always, for narrow cuts
When the cut leaves less than ~6 inches between the blade and the fence, your hands have no business being there. A push stick keeps your fingers 8+ inches from the blade while maintaining forward and downward pressure. Keep several by the saw — if you have to walk across the shop to get one, you won’t use it.
4. Never reach over or behind the spinning blade
To grab a cutoff, adjust the fence, or clear debris — never reach across the blade’s path while it’s spinning. Turn the saw off, wait for the blade to stop completely, then reach. “The blade was almost stopped” is famous last words.
5. Keep the fence parallel to the blade
A fence that toes inward at the back pinches the workpiece against the blade — manufacturing kickback conditions on every cut. Check fence alignment periodically with a dial indicator or careful measurement: the distance from fence to blade must be identical at the front and back of the blade. Even 1/32″ of inward toe at the back is dangerous.
6. Don’t cut warped, twisted, or cupped boards flat
A twisted board rocks during the cut, twists into the blade, and kicks back. Joint one face flat first (jointer or planer), or don’t rip it on the table saw. If the board won’t sit flat on the table without rocking, it doesn’t belong on the table saw.
7. Support long workpieces
A long board hanging off the back of the saw tips, binds, and kicks. Use outfeed support — roller stands, a sawhorse, an outfeed table — for anything extending more than a couple feet past the saw. Same for wide sheet goods on the infeed side. Unsupported = unstable = dangerous.
8. Let the blade reach full speed before cutting
Starting the cut with the blade still spinning up means the teeth aren’t cutting cleanly — they grab and chatter instead. Wait for full RPM, then feed the wood. Similarly, don’t shut off mid-cut and try to pull the wood back through a slowing blade.
9. Feed at a steady pace — don’t force, don’t stall
Pushing too hard overloads the blade and increases binding risk. Feeding too slowly lets the blade rub and burn (and increases the time your hands are near the blade). Find the steady pace where the saw sounds happy — a consistent pitch, no laboring. Let the blade cut; your job is guidance, not force.
10. Never make freehand cuts
Every cut on a table saw is guided — by the fence (rip cuts), the miter gauge (crosscuts), or a sled/jig. Freehanding (pushing wood through unguided) lets the workpiece rotate into the blade with zero control. There is no safe freehand cut on a table saw. Ever.
11. Keep the blade height just above the workpiece
Set the blade so the gullets (the valleys between teeth) just clear the top of the wood — roughly 1/4″ to 1/2″ of blade above the workpiece. More exposed blade = more kickback energy available + more blade to contact. Less blade above the wood also means less of you exposed if something goes wrong.
12. Don’t stand where the cutoff falls — control it
On rip cuts, the cutoff piece (between blade and fence… no wait, the keeper piece is between blade and fence; the cutoff is the off-fall side) — manage it. Don’t let it pile against the blade, don’t reach for it mid-cut, and be aware that thin offcuts can get thrown by the blade. A zero-clearance insert helps enormously with thin pieces.
13. Use a zero-clearance insert for thin or small pieces
The stock insert has a wide slot that small offcuts fall into — where the spinning blade grabs them and throws them. A zero-clearance insert (a shop-made or purchased insert with a slot exactly the blade’s width) supports the workpiece fully and prevents pieces from dropping in. Cheap, easy, and one of the highest-value safety upgrades.
14. Disconnect power for blade changes and adjustments
Unplug the saw (or lock out the breaker) before changing blades, adjusting the fence mechanism internally, or clearing a jam. Switches get bumped. “Off” isn’t safe enough when your hands are around the blade.
15. Don’t cut when tired, rushed, or distracted
This sounds soft. It’s the hardest rule. A huge share of injuries happen at the end of a long day, when rushing to finish, or when interrupted mid-cut. The table saw demands full attention — if you can’t give it, walk away. The cut will wait. Your fingers won’t grow back.
Bookmark This Checklist — Table Saw Safety Essentials
Screenshot this and tape it to your saw stand — run through it before every cut.
- Guard, riving knife, anti-kickback pawls — all installed. Never remove them, ever.
- Push stick within reach — keep 2–3 by the saw; hands stay 6+ in (15 cm) from the blade.
- Fence parallel to the blade — same distance front and back (back may be a hair wider, never narrower).
- Blade height — gullets just clearing the wood, roughly 1/4–1/2 in (6–12 mm) above the workpiece.
- Stand to the side — never in the kickback line directly behind the blade.
- Workpiece flat and supported — no warped or rocking boards; outfeed support for long pieces.
- Eye protection — always. Kickback throws wood; normal cutting throws chips.
- Hearing protection — table saws run 95–105 dB; damage is cumulative and permanent.
- No gloves, no loose clothing, no jewelry, hair tied back — the blade grabs all of these and pulls you in.
- Dust mask — fine wood dust on every cut.
Bookmark This Chart — Kickback Warning Signs — Keep This Handy
Kickback rarely happens without warning — it happens after warnings you missed. Learn to read these mid-cut signals and you’ll almost never meet the business end of the three causes explained above:
| Warning sign | What it means | What to do |
|---|---|---|
| Kerf closing / wood pinching the blade behind the cut | Kickback cause #1 — internal wood stress pinching the back of the blade | Stop feeding; never force it through. Confirm the riving knife is installed and riding in the kerf. |
| Burning smell or smoke while feeding | The blade is rubbing, not cutting — feeding too slowly or the blade is dull | Back off and find the steady pace where the saw “sounds happy”: consistent pitch, no laboring. |
| Board rocking or twisting mid-cut | Kickback cause #2 — the workpiece is about to twist into the back of the blade | Stop immediately. Joint one face flat before ripping; never force a warped board. |
| Cutoff piece piling against the blade, thin offcuts rattling | Small pieces can drop into the insert slot, where the blade grabs and throws them | Fit a zero-clearance insert; control the offcut and never reach for it mid-cut. |
| Blade pitch dropping, saw laboring under load | Overfeeding — pushing too hard, which increases binding risk | Ease off the pressure. Your job is guidance, not force; let the blade cut at its pace. |
| Workpiece lifting off the table | Kickback cause #3 — the rising rear teeth can catch and launch it | Hold the work down firmly with a push stick or shoe; stop if it won’t stay flat. |
The 2-second rule: if anything feels wrong — a sound change, a smell, a wobble — stop the feed, hold the wood steady, and shut the saw off. Restarting a cut is free; recovering from kickback is not.
What does kickback feel like? Can you react in time?
You can’t react — it happens in milliseconds. That’s the entire point of prevention: the rules above exist because reaction is impossible. People who’ve experienced it describe a bang and then finding the board across the shop (or in their stomach). Prevention is the only defense.
Is a SawStop worth it?
SawStop’s flesh-detection technology stops the blade on skin contact — it’s genuinely saved thousands of fingers. Whether it’s “worth it” depends on your budget and risk tolerance, but it’s the only table saw with an active injury-prevention system. All the rules above still apply with a SawStop — it prevents blade-contact injuries, not kickback.
Can beginners use a table saw safely?
Yes — beginners who learn the rules first and follow them rigidly are safer than experienced users who’ve gotten complacent. Complacency causes more injuries than inexperience. Start with the rules above as non-negotiable habits.
Why no gloves? Every other tool says wear gloves.
Because a table saw blade doesn’t cut gloves — it grabs them. A spinning blade catching a glove pulls the hand into the blade faster than you can react. For most other tools, gloves protect against abrasion and vibration; at the table saw, they create a worse hazard than they prevent.
My saw didn’t come with a riving knife — what do I do?
Older saws have splitters instead (which don’t rise/lower with the blade). Use the splitter — it’s far better than nothing. If the saw has neither, aftermarket riving knives/splitters exist for most models. A saw with no kerf-spreading device at all shouldn’t be used for rip cuts until one is fitted.
How do I know if my fence is aligned?
Measure from the fence to the same tooth at the front of the blade and the back of the blade (mark the tooth, rotate it). The measurements must match — or the back can be a hair wider (never narrower). Check this a few times a year; fences drift.
60-Second Pre-Cut Safety Check — Keep This Handy
Run through this list before every cut. Each item comes from one of the 15 rules above — it takes under a minute and it is the habit that keeps kickback from ever starting.
- Guard, riving knife, and anti-kickback pawls fitted — if any one of them is missing, stop and replace it before cutting.
- Fence parallel to the blade — a skewed fence pinches the workpiece into the back of the blade.
- Blade height just above the workpiece — less exposed blade means less to catch you.
- Push stick within reach — required for every narrow cut, before the cut starts, not mid-cut.
- Workpiece flat and true — never cut a warped, twisted, or cupped board flat.
- Long workpieces supported — outfeed support stops the board tipping and binding at the end of the cut.
- Stand off to one side, out of the blade’s line — keep your body out of the kickback path.
- Cutoff path clear and controlled — know where the cutoff piece will fall and keep your hands away from it.
Bookmark This Chart — Kickback Cause → Rules That Stop It — Keep This Handy
Every one of the 15 rules exists to defeat one of the three kickback causes — or to keep you out of the way when prevention fails. If you remember this chart, you will never have to memorize the rules blindly.
| Kickback cause | What happens | Rules that stop it |
|---|---|---|
| Kerf closes behind the blade (internal wood stress pinching the cut) — the #1 cause | The pinched wood binds on the back of the blade and gets thrown back at you | Never remove the guard, riving knife, or anti-kickback pawls; keep the fence parallel to the blade (same distance front and back, back never narrower); never force a binding board through. |
| Workpiece twists into the back of the blade during the cut | The twisting board contacts the rising rear teeth and launches | Never cut a warped, twisted, or cupped board flat — joint one face flat first; keep the fence parallel; never make freehand cuts. |
| Workpiece lifts and the rising rear teeth catch it | The lifted board is grabbed and hurled back in a fraction of a second | Use a push stick for every narrow cut and keep hands 6 in (15 cm) or more from the blade; set blade height so the gullets just clear the wood, roughly 1/4-1/2 in (6-12 mm) above the workpiece; feed at a steady pace without forcing or stalling. |
| Cutoff piece drops or piles against the blade | Small offcuts get grabbed by the blade and thrown, or jam the cut | Use a zero-clearance insert for thin or small pieces; control the cutoff — know where it will fall and never reach for it mid-cut; support long workpieces so they cannot tip and bind. |
| Blade rubbing instead of cutting (dull blade or wrong feed rate) | Burning smell or smoke while feeding; the saw labors and binding risk climbs | Feed at the steady pace where the saw “sounds happy” — consistent pitch, no laboring; let the blade reach full speed before cutting; keep the blade sharp. |
| Your body is standing in the kickback path | Even a prevented kickback cannot hurt you if you are not in its line — but if one happens, position decides the injury | Stand to the side, never directly behind the blade; never stand where the cutoff falls; full attention or no cutting — never cut tired, rushed, or distracted. |
Keep This Chart Handy — 7 Rookie Mistakes That Cause Most Table Saw Injuries
Every one of these mistakes is covered by the 15 rules below — this chart is the shortcut version. Tape it to your saw stand: a kicked-back board can exceed 100 mph (160 km/h), and it gives no warning.
| The mistake | What happens | The rule that stops it |
|---|---|---|
| Removing the guard or riving knife “for better visibility” | The kerf closes behind the blade and the board launches back at you | Rule 1 — the riving knife is the single most important anti-kickback device ever invented |
| Standing directly behind the blade | A kicked-back board travels straight back — right into your torso | Rule 2 — stand slightly to the side, out of the kickback line |
| Reaching over the spinning blade for a cutoff | “Almost stopped” is famous last words | Rule 4 — switch off, wait for a full stop, then reach; keep hands 6 in (15 cm) or more from the blade |
| Ripping a warped, twisted, or cupped board flat | The board rocks, twists into the blade, and kicks back | Rule 6 — joint one face flat first, or don’t rip it |
| Cutting freehand, with no fence or gauge | The workpiece rotates into the blade with zero control | Rule 10 — every cut is guided; there is no safe freehand cut, ever |
| Wearing gloves at the table saw | The blade doesn’t cut gloves — it grabs them and pulls your hand in | No gloves, no loose clothing, no jewelry; hair tied back |
| Cutting when tired, rushed, or distracted | A huge share of injuries happen at the end of a long day | Rule 15 — if you can’t give the cut full attention, walk away; the cut will wait |
The verdict: the non-negotiable five
If 15 rules feel like a lot, these five prevent the overwhelming majority of injuries:
- Riving knife stays on. Always.
- Stand to the side. Never in the kickback line.
- Push stick for narrow cuts. Hands stay 6″+ from the blade.
- Fence parallel, workpiece flat, cuts guided. No freehand, no warped boards, no misaligned fences.
- Full attention or no cutting. Tired/rushed/distracted = walk away.
The table saw is the most capable tool in the shop and the most unforgiving. Respect it with habits, not fear — the rules above turn a dangerous machine into a safe, precise, joyful one. Build the habits on day one and they’ll protect you for decades.
Keep Reading
- How to Use an Angle Grinder Safely (The Beginner’s Guide)
- Circular Saw KICKBACK: How to NOT Get Hurt!
- Clean Power Tools Like THIS (They’ll Last 2x Longer)!
Tool Worth Lab provides research-based safety guidance. This article is educational, not a substitute for hands-on training. Consider a woodworking class for supervised table saw instruction.