
Quick Answer: Most fences don’t die from bad pickets — they die underground. The difference between a fence straight for 15 years and one leaning in five is about a foot of post depth plus concrete technique: posts set too shallow, concrete poured straight around the wood, and moisture trapped at the ground line are what kill fences. Post setting is the real skill.
Picture this: you have just spent two weekends digging, mixing, and levelling, your neighbours are already complimenting the new boundary — and three winters later the whole run is leaning like a tired conga line. I have seen that exact heartbreak on my own street, and the cruel part is that the failure started on day one, underground, where nobody was looking.
Picture this: you have just spent two weekends digging, mixing, and levelling, your neighbours are already complimenting the new boundary — and three winters later the whole run is leaning like a tired conga line. I have seen that exact heartbreak on my own street, and the cruel part is that the failure started on day one, underground, where nobody was looking.
Most of the fence is built before a single picket goes up. The real work is a tape measure, a string line, and a phone call to the utility locator — then holes deep enough, gravel where water can escape, and posts checked plumb twice before the concrete sets. Do that part right and the pretty part is easy; skip it and no amount of beautiful pickets will save you from the lean.
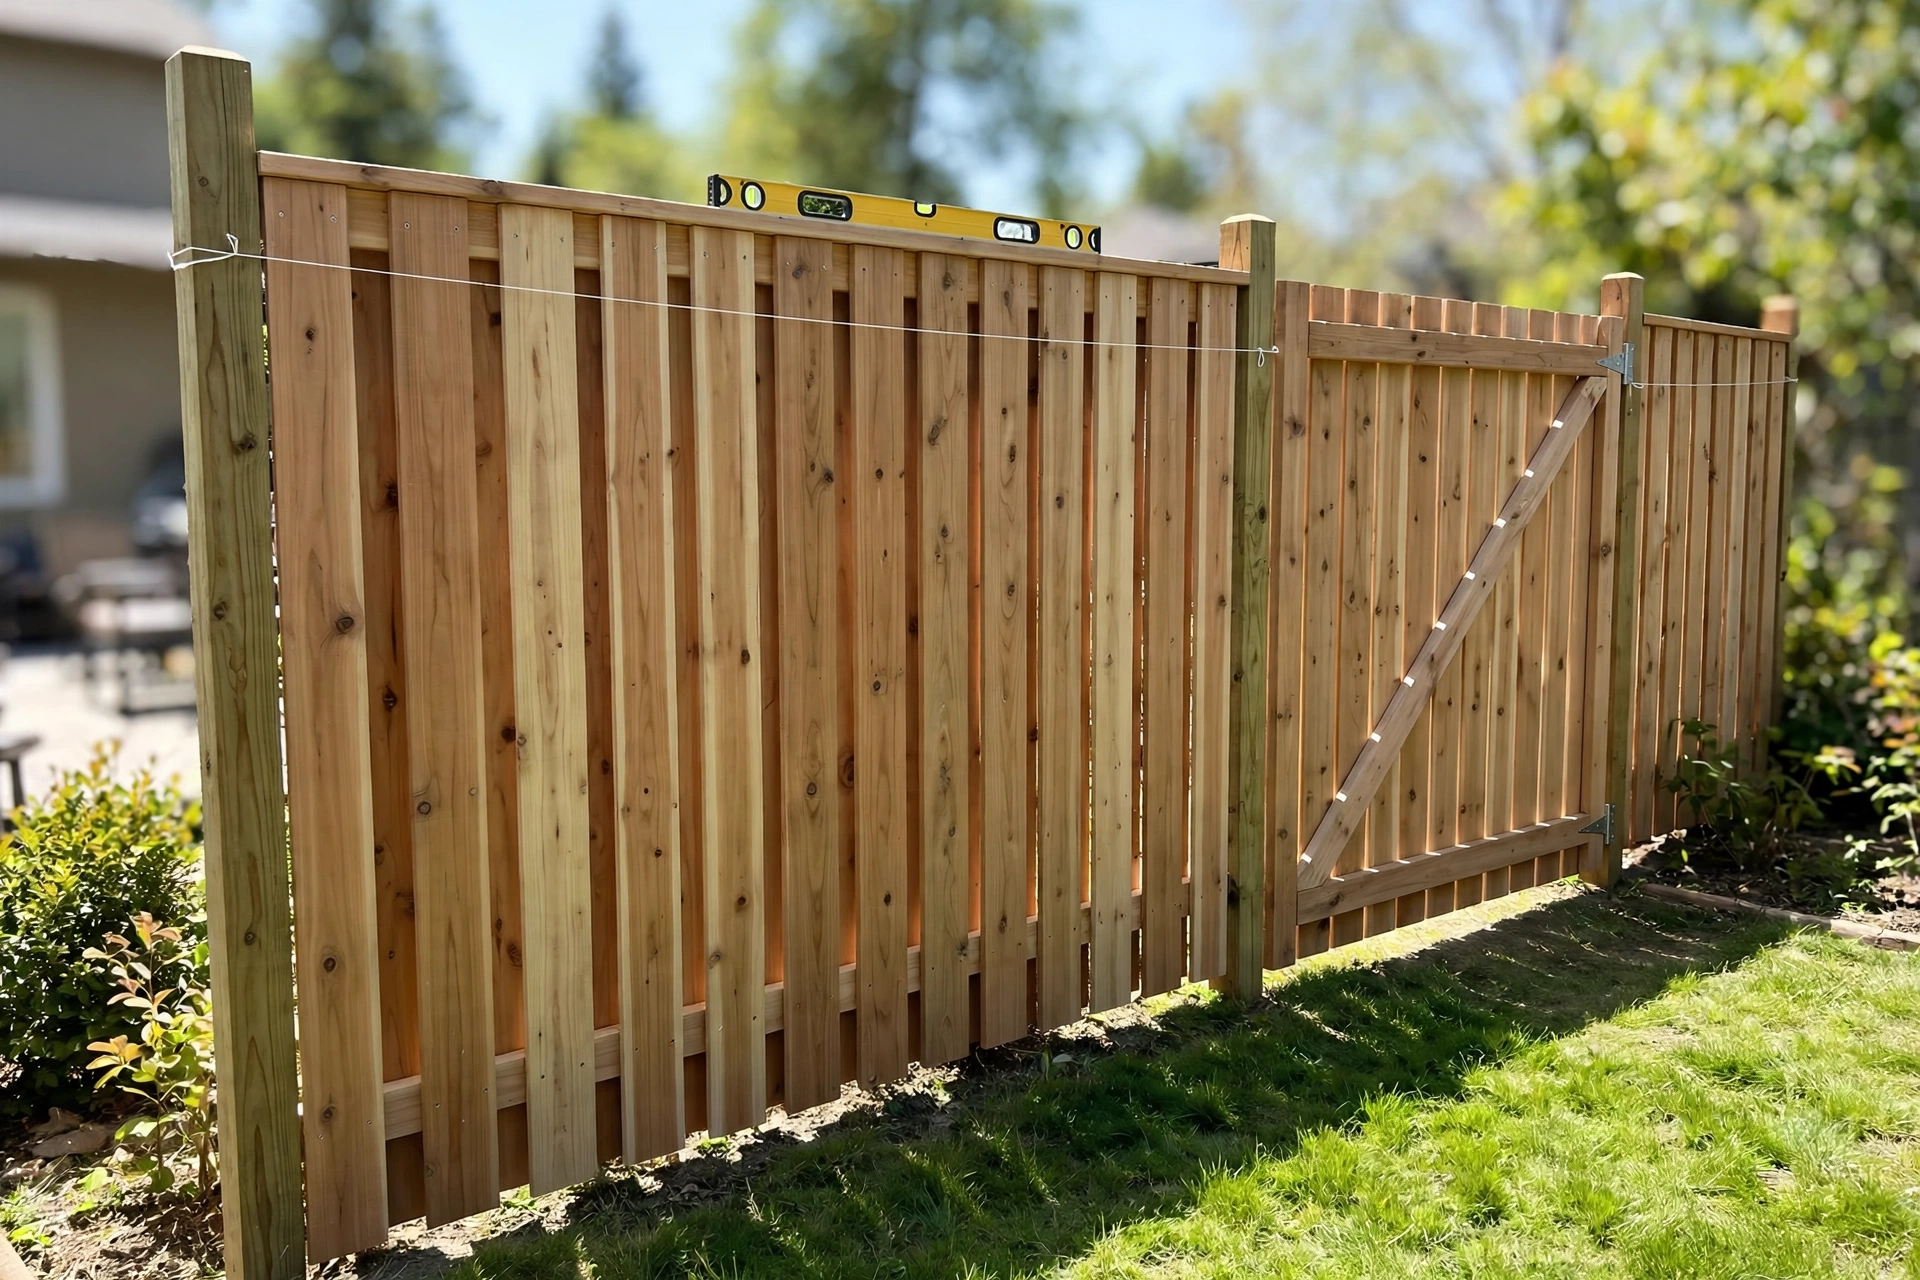
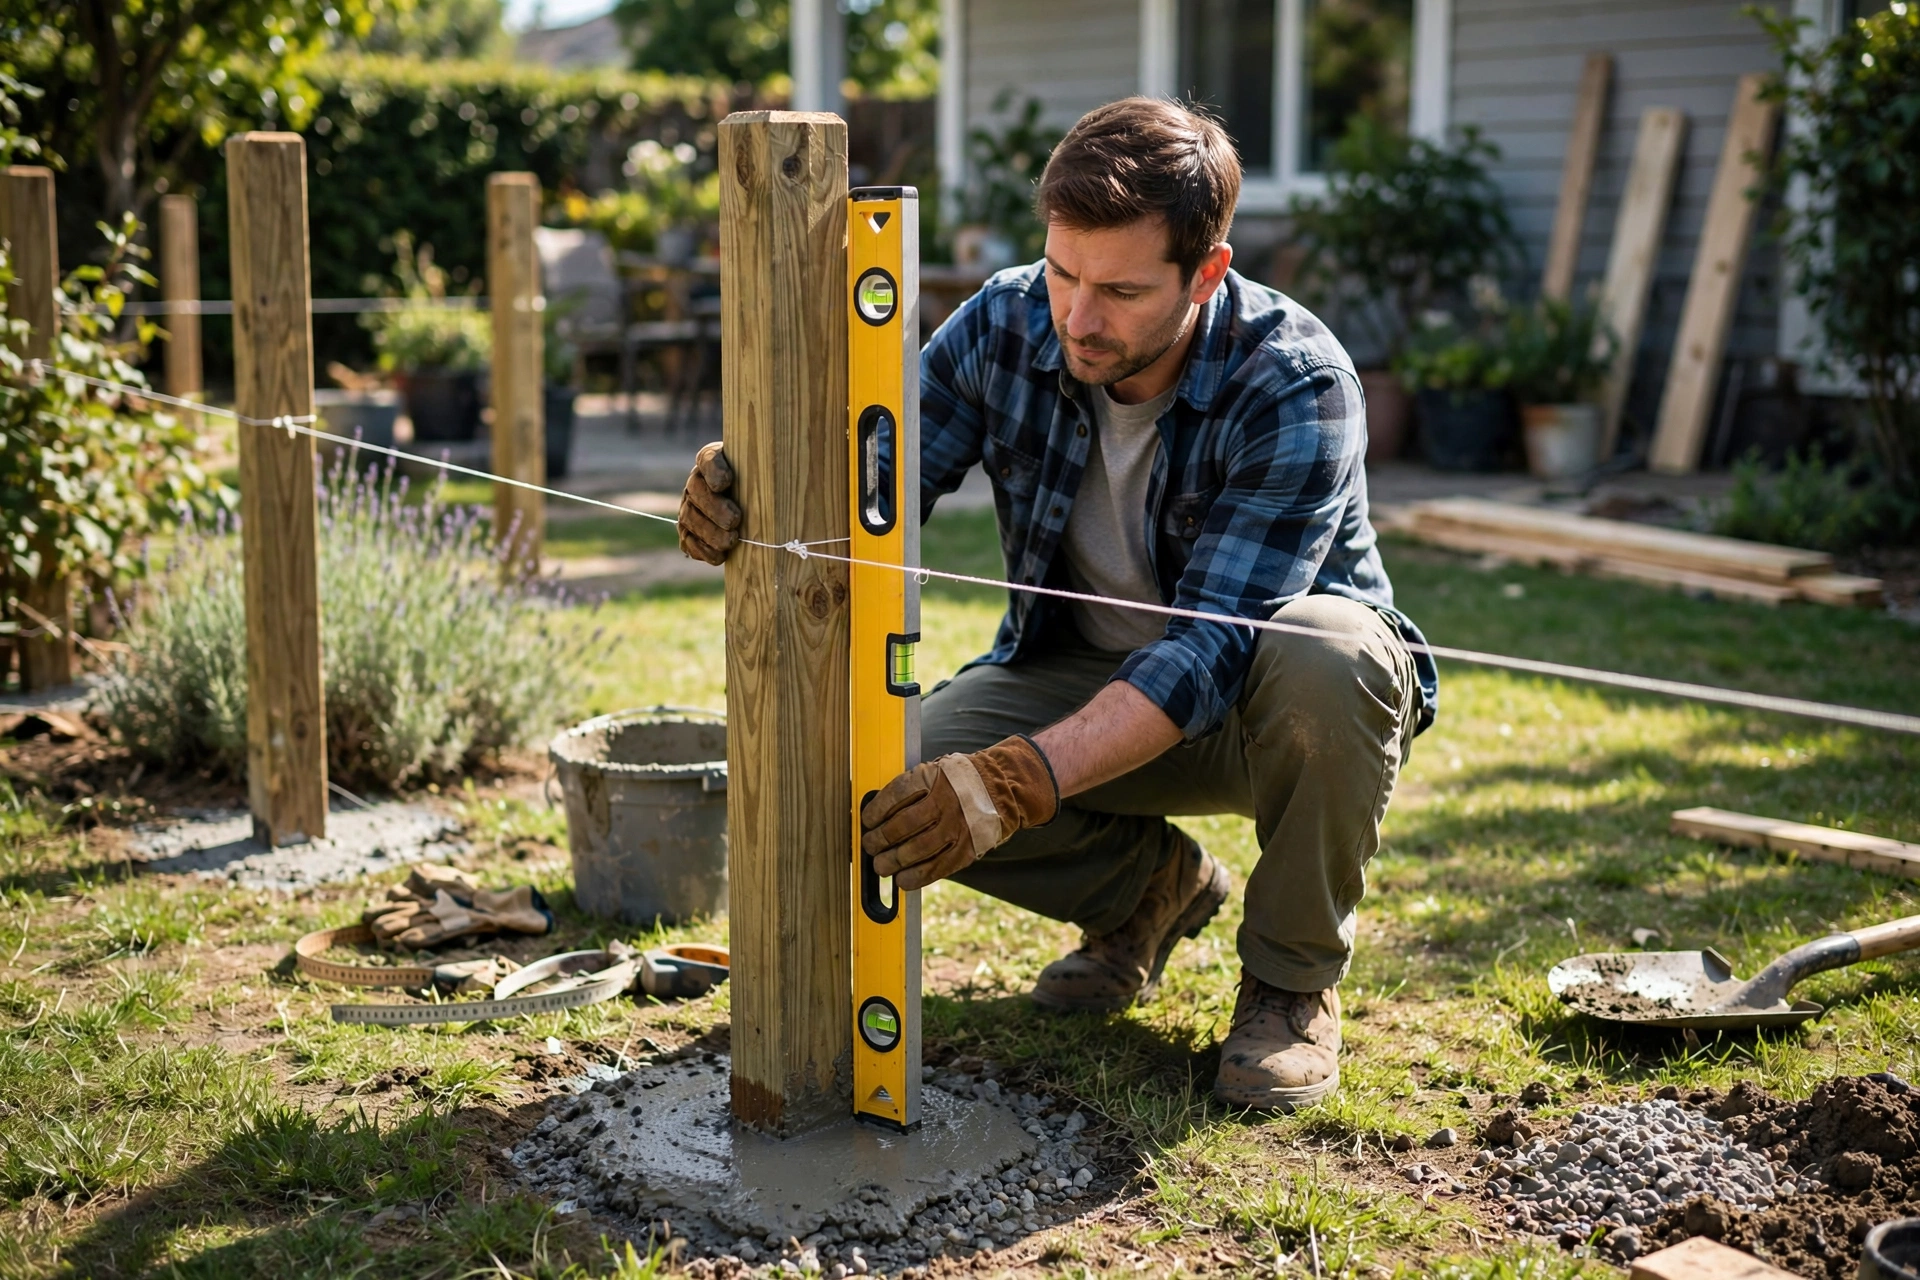
Here’s the complete guide to building a fence that stays straight for decades: planning, post setting (the real skill), panel installation, and the small details that separate lasting fences from leaning ones.
Safety first: Call 811 (or your local utility locator) before digging — hitting utilities kills. Eye and hearing protection for cutting, gloves for concrete work (it’s caustic — wash skin contact promptly), and safe lifting (posts and concrete are heavy).
Planning (before you dig)
Print This Before You Dig — The Pre-Dig Checklist
Run this list before the first hole — every item is from the planning section of this guide.
- Know your actual property line. Get a survey — not the neighbour’s guess. Building on the wrong side of the line creates legal nightmares.
- Check permits and HOA rules. Many jurisdictions require permits, and HOAs dictate height, style, and placement. Check first, dig second.
- Call 811 (or your local utility locator). Utility location is free and legally required in most places — hitting a gas line or buried electrical is catastrophic.
- Pick your style and height. 6 ft (1.8 m) is the standard privacy fence; many areas cap backyards at 6 ft (1.8 m) and fronts at 4 ft (1.2 m).
- Mark the line with stakes and string. Straight lines matter — a wavy fence is visible forever.
- Mark post positions. Typically 8 ft (2.4 m) apart, or per panel width.
- Plan your gates first. Gate openings need at least 36 in (91 cm) for mowers and 48 in+ (1.2 m) for equipment — decide before the posts go in.
1. Know your boundaries and rules
- Property survey — know your actual line (not the neighbor’s guess). Building on the wrong side creates legal nightmares.
- Permits and HOA — many jurisdictions require permits; HOAs dictate height, style, and placement. Check first.
- Call 811 — utility location is free and legally required in most places. Hitting a gas line or buried electrical is catastrophic.
2. Choose the style and height
| Style | Privacy | Cost | Notes |
|---|---|---|---|
| Privacy (board-on-board) | Full | $$$ | The classic — solid, attractive both sides |
| Picket | Low | $$ | Decorative, traditional — not for privacy |
| Shadowbox | Partial | $$$ | Attractive both sides, allows airflow |
| Chain link | None | $ | Functional, not beautiful — pet/security |
| Split rail | None | $ | Rural aesthetic, livestock |
Height: 6 ft is the standard privacy fence (check local limits — many cap at 6 ft for backyards, 4 ft for front).
3. Layout
- Mark the line with stakes and string — straight lines matter (a wavy fence is visible forever).
- Mark post positions — typically 8 ft apart (or per panel width).
- Account for gates — plan gate positions and widths (36″ minimum for mowers, 48″+ for equipment).
Bookmark This Checklist — Tools & Materials
| Tool / Material | Why you need it |
|---|---|
| Post hole digger (clamshell) or power auger | Digs every post hole along the fence line — a power auger earns its keep when setting a long run of posts. |
| 4 ft (1.2 m) level | Plumbs each post in both directions and re-verifies plumb before the concrete sets. |
| Tape measure + string line | Lays out a straight fence line and marks post positions — typically 8 ft (2.4 m) apart. |
| Circular saw | Cuts rails and pickets to length — guide |
| Drill/driver | Drives fasteners for rails, pickets, and gate hardware — guide |
| 8 ft (2.4 m) pressure-treated posts rated for ground contact | 2.5–3 ft (75–90 cm) of each post goes underground for a 6 ft (1.8 m) fence — depth is the lifespan lever. |
| Concrete mix (bags) | Locks posts rigid; fast-setting sets in 20–40 minutes, standard mix costs less for many posts. |
| Gravel | 6 in (15 cm) of drainage gravel under every post; tamped gravel alone also works and drains better. |
| Rails and pickets (or pre-built panels) | The visible fence — keep the bottom rail 2–4 in (5–10 cm) above grade to stop ground-contact rot. |
| Gate hardware — heavy posts, braced frame, adjustable hinges, latch | Gates bear dynamic loads: heavier posts, diagonal-braced frame, and an opening at least 36 in (91 cm), 48 in+ (1.2 m) for equipment. |
| Wheelbarrow + mixing tools + tamper | Mixes concrete, compacts gravel and soil in 6 in (15 cm) lifts for a solid, drainable hole. |
| Safety gear — eye and hearing protection, gloves, sturdy boots | Concrete is caustic to skin; posts and concrete bags are heavy lifting work. |
Post setting (THE critical skill)
The posts determine everything — a fence with perfect pickets on failing posts is a failing fence. 80% of fence longevity is in the post installation.
Depth
- Rule: 1/3 of the post underground, minimum 2 ft (deeper in frost zones — below the frost line, or frost heave pushes posts up).
- 6-ft fence: 8-ft posts, 2.5–3 ft in the ground.
- Deeper is always better — the marginal cost of deeper holes pays back in decades.
Drainage (the rot prevention)
This is what most DIYers get wrong: concrete poured directly around a post traps moisture against the wood — accelerating rot at the ground line (where posts always fail).
The correct method: 1. 6″ of gravel at the hole bottom (drainage — water flows away from the post base). 2. Set the post on the gravel. 3. Fill with concrete — but slope the concrete away from the post at the surface (water sheds instead of pooling). 4. Alternatively: tamped gravel/soil only (no concrete) — excellent drainage, easier post replacement later. The traditional method that many pros prefer.
Post treatment: use pressure-treated posts rated for ground contact (UC4A or higher). Consider post sleeves or bitumen coating at the ground line (the rot zone).
Setting technique
- Dig the hole (wider at the bottom — bell shape resists frost heave).
- Gravel base, set post.
- Plumb in both directions — brace the post (temporary 2×4 braces staked to the ground).
- Pour/mix concrete (or tamp gravel in 6″ lifts).
- Recheck plumb — concrete shifts posts; verify before it sets.
- Crown the concrete (slope away from post for drainage).
Fast-setting concrete: pour dry mix, add water — sets in 20–40 minutes. Convenient but more expensive. Standard mix is cheaper for many posts.
Panel/rail installation
The rail system (for stick-built)
- Attach horizontal rails (2x4s) between posts — typically 2 rails for 4-ft fence, 3 for 6-ft.
- Keep rails level — they determine the picket line.
- Leave the bottom rail 2–4″ above grade (prevents ground-contact rot and allows airflow).
Hanging pickets
- Start at one end, work systematically.
- Spacing: butt tight (privacy) or gapped (picket style — use a spacer block for consistency).
- Top line: run a string line at the desired height — pickets follow the string (not the ground, which undulates).
- Stepped vs racked on slopes: stepped (each section level, stepping down) for steep slopes; racked (following the grade) for gentle slopes.
Pre-built panels (the faster option)
- Faster installation, consistent appearance.
- Less flexible on slopes and uneven terrain.
- Attach to posts with brackets or screws — ensure level.
Keep This Chart Handy — Post Setting at a Glance
Posts decide how long the fence lasts, so get this part right before any picket goes on. Each row restates a post-setting fact already given in this guide.
| Post-setting step | What to do | Why it matters |
|---|---|---|
| Depth | Bury at least 2 ft (61 cm) of post, ideally one-third of its length; for a fence 1.8 m (6 ft) tall, bury 75 cm to 90 cm (2.5 ft to 3 ft) | Shallow posts are the classic reason a run starts leaning within a few years |
| Frost protection | In cold climates, dig below the frost line with a hole that widens toward the bottom | A bell-shaped hole resists frost heave pushing the post upward |
| Drainage base | Put a 15 cm (6 in) gravel layer at the hole bottom and set the post on it | Water drains away from the post base instead of sitting against the wood |
| Concrete crown | If using concrete, slope its surface away from the post, so rainwater runs off instead of pooling | Concrete poured flat, or straight against bare wood, holds damp against the timber at ground level, where rot starts |
| Plumb and brace | Plumb in both directions, brace with temporary boards staked to the ground, and recheck before the mix sets | Pouring shifts posts, so a single early check is not enough |
| Post protection | Use posts that are pressure-treated, with a ground-contact rating of UC4A or higher, and consider a sleeve or bitumen coating at ground level | Ground level is the rot zone, and it is where posts tend to fail first |
Gates (plan carefully)
- Frame the gate opening with heavier posts (gate posts bear dynamic loads — use 6×6 or doubled 4x4s, deeper setting).
- Build the gate frame with diagonal bracing (prevents sagging — the #1 gate failure).
- Hardware: quality hinges (adjustable is worth it), latch at comfortable height.
- Sag prevention: the diagonal brace goes from the bottom hinge side to the top latch side (compression direction).
Mistakes to Avoid — Keep This Handy
Every leaning fence on your street made at least one of these mistakes. Run down this list before you dig, and your fence lands in the 15–20 year club instead of the five-year lean.
- Skipping the 811 call. Digging before utilities are marked is free to avoid and catastrophic to get wrong — gas lines and buried electrical are not a learning experience.
- Setting posts too shallow. Minimum 2 ft (61 cm) underground, ideally one-third of the post length, and below the frost line in cold climates. For a 6 ft (1.8 m) fence that means 2.5–3 ft (75–90 cm) in the ground — deeper is always better.
- Pouring concrete straight around the wood. Concrete against bare wood traps moisture at the ground line, exactly where posts rot. Use 6 in (15 cm) of gravel under the post and slope the concrete crown away from the post so water sheds instead of pooling.
- Plumbing once and walking away. Plumb in both directions, brace the post, and recheck plumb before the concrete sets — concrete shifts posts as it goes in.
- Guessing the property line. Build on the neighbour’s guess and you buy a legal nightmare. Know your actual surveyed line before the first hole.
- Letting the bottom rail touch the ground. Keep the bottom rail 2–4 in (5–10 cm) above grade, or ground-contact rot starts on day one.
- Building a gate like a fence panel. Gates need heavier posts (6×6 or doubled 4x4s, set deeper), a diagonal-braced frame, and adjustable hinges — a plain frame sags, and sagging is the #1 gate failure.
- Following the ground with the pickets. Run a string line at the desired height and let the pickets follow the string, not the undulating ground — a wavy top line is visible forever.
How deep should fence posts be?
Minimum 2 ft, ideally 1/3 of the post length, and below the frost line in cold climates. For a 6-ft fence: 2.5–3 ft deep. Deeper = longer life, always.
Concrete or gravel for posts?
Both work. Concrete: more rigid, but traps moisture (use gravel base + sloped crown). Gravel-only: better drainage, easier replacement, slightly less rigid. In wet climates: gravel is often better. In windy areas: concrete’s rigidity helps. Match the method to your conditions.
Why is my fence leaning?
Usually: shallow posts, rotted post bases (moisture trapped), or frost heave (posts above frost line). The fix depends on the cause — sometimes re-setting individual posts, sometimes the posts are rotted and need replacement. Prevention (depth + drainage) beats correction.
How do I keep the fence line straight?
String line between end posts — set the end posts first (perfectly positioned and plumb), then run a taut string. Every intermediate post aligns to the string. Check from a distance periodically — the eye catches waves the up-close view misses.
Should the fence follow the slope or stay level?
Gentle slope: racked (follows grade — no gaps underneath). Steep slope: stepped (each section level — clean look, but triangular gaps underneath that may need filling for pets). Choose per section based on the grade.
How long will a wood fence last?
Pressure-treated, properly installed (depth + drainage): 15–20 years. Cedar: 15–20 years. The posts fail first (ground-line rot) — post protection (sleeves, proper drainage, ground-contact rated lumber) is the lifespan lever.
The verdict: the fence priorities
- Call 811 — before any digging, no exceptions.
- Post depth — 1/3 underground, below frost line.
- Drainage — gravel base, sloped concrete crown, ground-contact rated posts.
- Plumb posts — braced and verified before concrete sets.
- String line — straight fence lines, level picket tops.
- Gate engineering — heavier posts, diagonal bracing, quality hardware.
The fence is a post-setting project that happens to have pickets. Get the posts right — depth, drainage, plumb — and the visible part is straightforward. The neighbors see the pickets; the decades see the posts.
Tool Worth Lab provides research-based project guidance. Call 811 before digging (legally required in most areas), verify property lines before building, wear protection for concrete work (it’s caustic), and check local permit and height requirements.
Keep Reading — Your Next Project Starts Here
The fence is up and the level, saw, and string line are already warmed up. Put them to work on one of these:
- How to Frame a Wall (Stud Layout & Building Guide) — the same layout-and-plumb skills, applied to walls.
- How to Hang a Door (Tool Guide & Step-by-Step) — hanging hinges and keeping things square, fence-gate style.
- How to Build a Dog House (Insulated & Properly Sized) — an outdoor woodworking project your dog will love as much as you do.