
On my first wall I nearly skipped the drain pipe to save a weekend of digging. That would have been the expensive mistake: the blocks were never the risk, the water behind them was. A wall without drainage doesn’t lean politely, it bows and fails — and once it leans, the fix is a rebuild, not a repair. Drainage first, blocks second, every time.
The good news is the engineering is completely solved. A compacted base, a drainage path that actually leads somewhere, and a wall that leans back into the hill — get those three things right and your wall will outlast your mortgage. Here’s the complete guide: block vs timber, the drainage system that matters more than the blocks, and the build itself.
Safety first: Call 811 before digging. Retaining wall blocks are heavy (repetitive lifting — proper technique). Walls over 4 ft typically require engineering and permits (the physics scale dangerously with height). Know when the project exceeds DIY.
Block vs timber
| Segmental block | Timber | |
|---|---|---|
| Lifespan | 50+ years | 15–25 years |
| Height | Up to 4 ft DIY (higher with engineering) | Up to 3–4 ft |
| Cost | $$–$$$ | $–$$ |
| Skill | Moderate (leveling critical) | Easier |
| Appearance | Structured, modern | Rustic, natural |
The recommendation: segmental retaining wall block (the interlocking systems) for most projects — engineered for the purpose, long-lived, and the systems include the design guidance. Timber for low, rustic, budget walls.
The height rule (know your limits)
- Under 4 ft: standard DIY (with proper base and drainage).
- Over 4 ft: engineering required in most jurisdictions (the soil pressure increases with the square of height — a 6-ft wall holds 4x the pressure of a 3-ft wall, not 2x).
- Tiered walls: multiple low walls (terraced) instead of one tall wall — each tier is independently stable, and terracing looks better.
When in doubt: tier it. Two 3-ft walls are dramatically safer and easier than one 6-ft wall.
The drainage system (THE critical engineering)
90% of retaining wall failures are drainage failures. Waterlogged soil behind the wall creates hydrostatic pressure that no wall design anticipates. The drainage system isn’t optional — it’s the wall.
The components
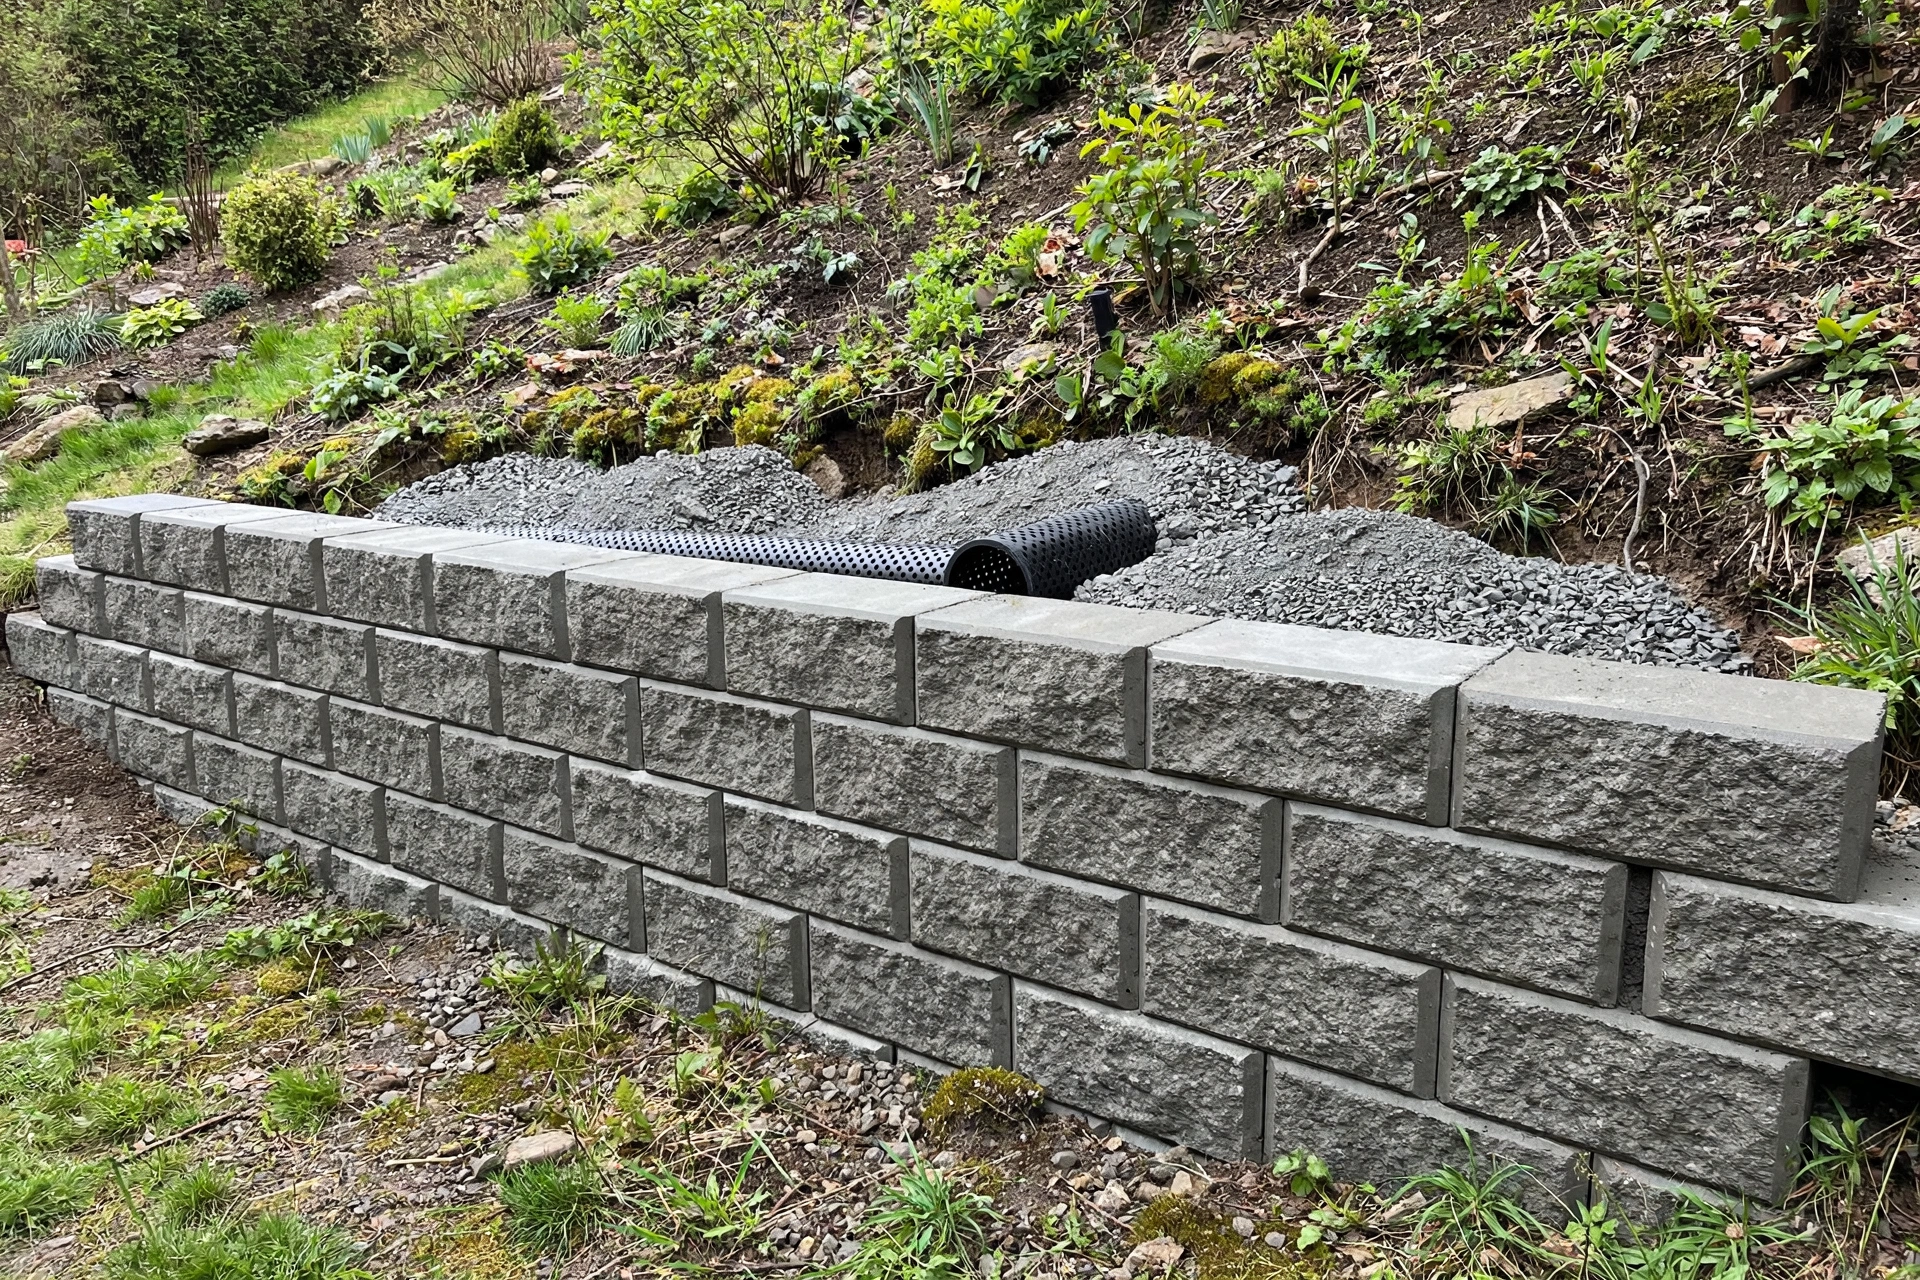
- Perforated drain pipe (4″ perforated PVC or corrugated) — at the base, behind the wall (collects groundwater).
- Drainage aggregate (3/4″ clean gravel) — 12″ minimum behind the wall (water flows through it to the pipe, not against the wall).
- Geotextile fabric — between the aggregate and the backfill soil (prevents soil migrating into and clogging the aggregate).
- Daylight or storm drain — the pipe must drain somewhere (daylight downhill, or connect to storm drainage). A drain pipe to nowhere is decoration.
The principle
Water that reaches behind the wall must have a clear path down (through aggregate) and out (through the pipe). Every component serves this path. Skip any component and water finds the wall instead.
Tools needed
| Tool | For |
|---|---|
| Shovels, wheelbarrow | Excavation (the big dig) |
| Plate compactor (rented) | Base compaction — non-negotiable |
| Level (4ft) + string line | Level courses, batter verification |
| Rubber mallet | Setting blocks |
| Circular saw + masonry blade or block splitter | Cutting blocks |
| Tape measure | Layout |
| Tamper | Hand compaction in tight areas |
Construction: segmental block wall
1. Layout and excavation
- Mark the wall line (stakes + string — including the curve if designed).
- Call 811.
- Excavate: 6″ base + one buried block course (the buried course is stability — walls that start at grade slide).
- Width: wall width + 12″ behind (for drainage aggregate).
2. Base
- 6″ of compacted crusher run (in 2″ lifts — compacted each lift).
- Level — the first course must be perfectly level (every subsequent course inherits errors).
- 1″ of bedding sand or fine aggregate (screeded level).
3. First course (the foundation)
- Bury the first course (top at or slightly below grade — the buried block resists sliding).
- Level each block — front-to-back and side-to-side.
- This course takes the longest — it’s the foundation for everything.
4. Build up
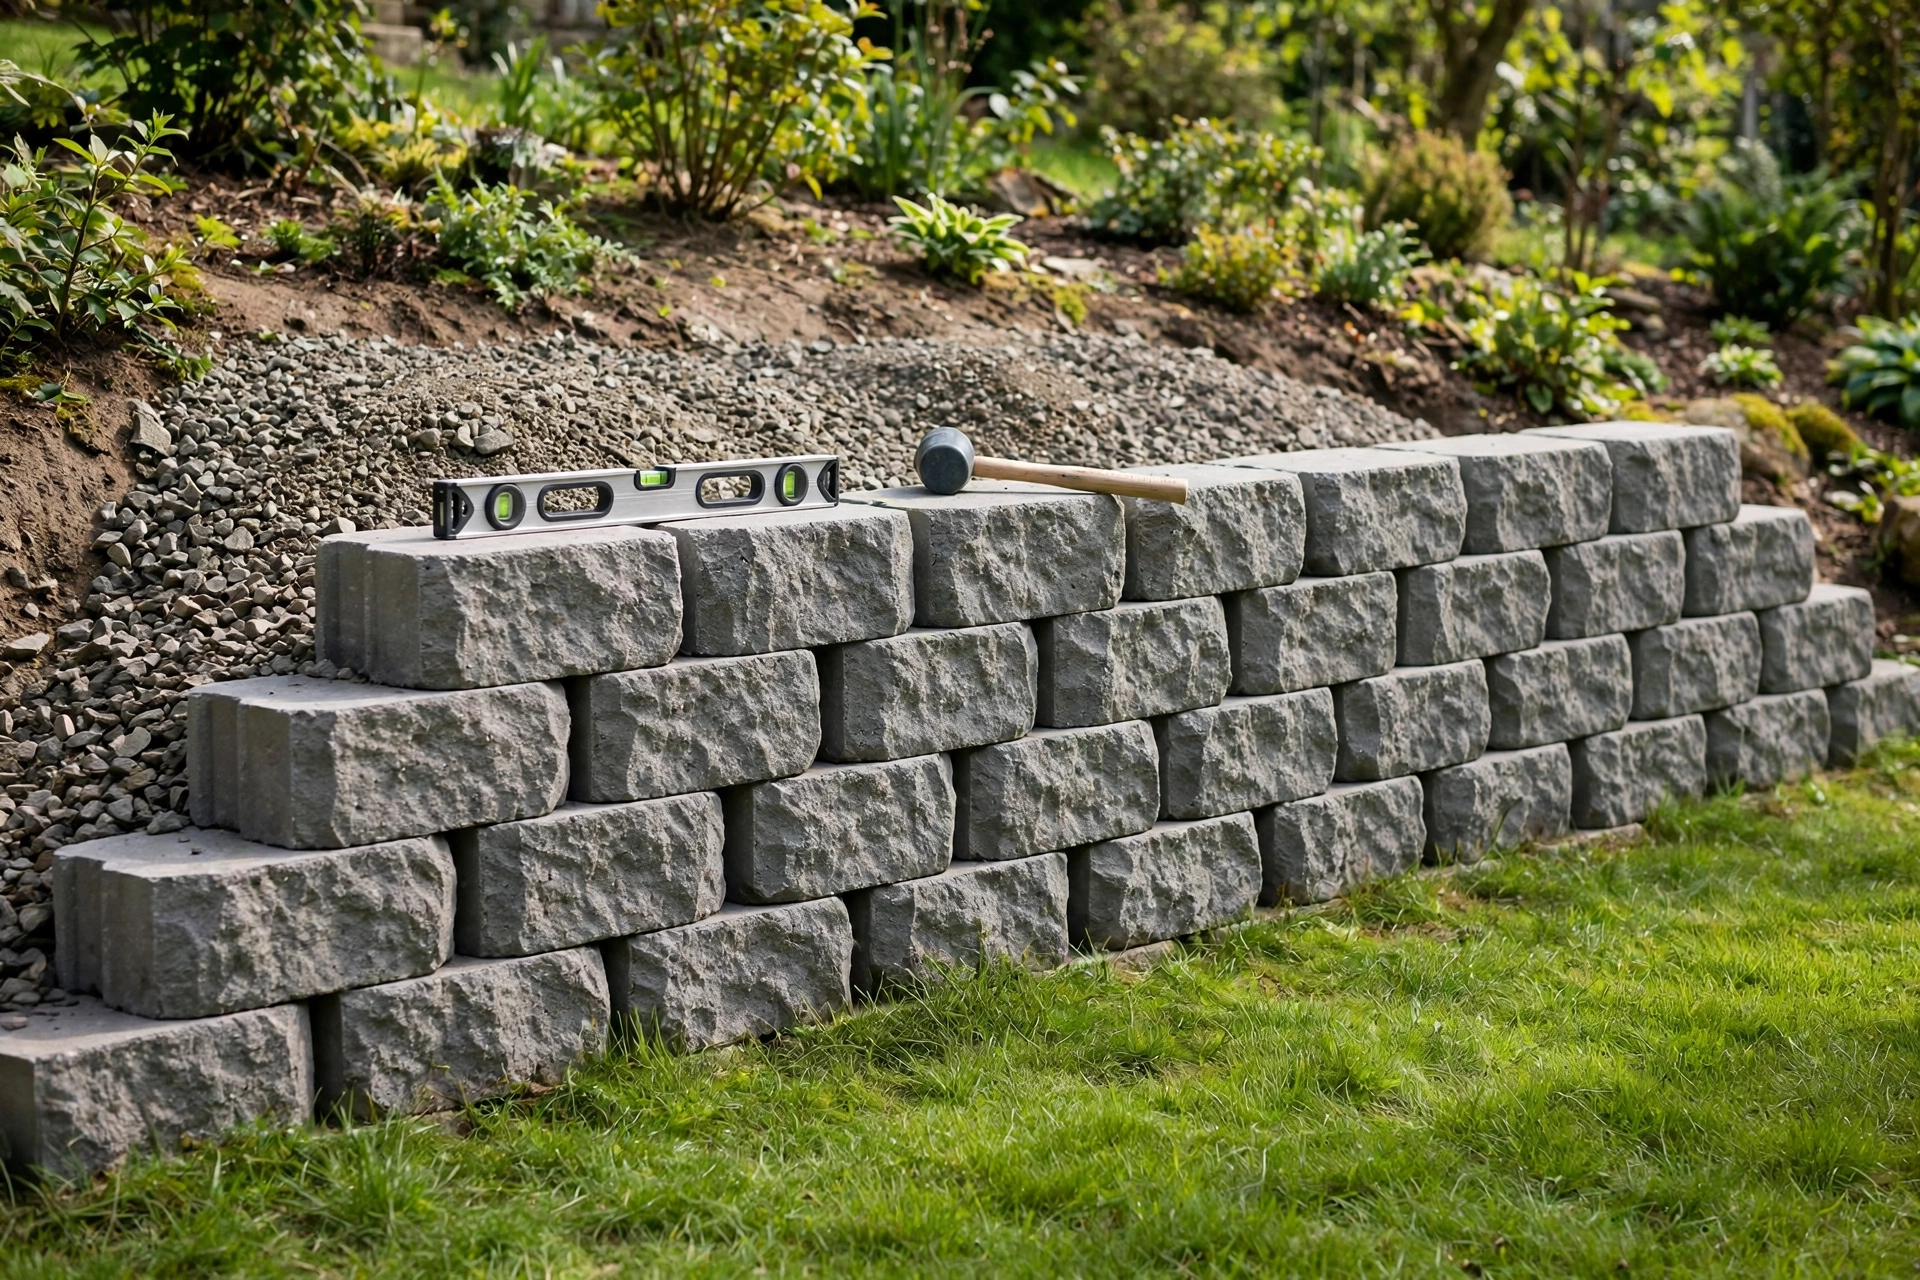
- Stagger joints (running bond — never align vertical joints).
- Setback/batter: each course set back ~3/4″–1″ (the wall leans into the hill — gravity works with you, not against you). Most segmental systems have built-in setback (the lip or pin system).
- Check level every course — front-to-back (batter) and along the wall.
- Sweep each course before placing the next (debris prevents proper seating).
5. Drainage (as you build)
- Drainage aggregate behind the wall — 12″ wide, placed as the wall rises (don’t backfill with soil then try to add aggregate later).
- Perforated pipe at the base — on the aggregate, sloping to daylight.
- Geotextile between aggregate and soil backfill.
- Backfill in lifts — compacted (not with heavy equipment near the wall — it pushes the wall).
6. Cap
- Cap blocks (the finished top — glued with construction adhesive).
- Slight overhang past the wall face (the drip edge — water sheds outward).
7. Finish grading
- Grade the soil above to drain away from the wall top (don’t pond water behind the wall).
- Vegetation on the slope above (roots stabilize soil).
Construction: timber wall (simplified)
- Same excavation and base principles (gravel base, drainage).
- Deadmen (tie-back timbers extending into the backfill) — every 6–8 ft, at every other course (they anchor the wall against soil pressure — the timber wall’s critical component).
- Timber courses — spiked together (12″ timber spikes or rebar).
- Same drainage system (pipe + aggregate + fabric — timber walls need drainage equally).
- Batter: lean the wall back slightly (1″ per foot of height).
Timber lifespan: 15–25 years (ground-contact rated timbers). The deadmen and drainage determine whether it’s 15 or 25.
After the build: the first-year inspection routine
A retaining wall does not fail overnight. It leans a little after the first heavy rain, settles a little after the first freeze, and only then, seasons later, becomes a problem that can no longer be ignored. The cheapest repair is the inspection that catches the first small movement, and the first year is when the wall tells you whether the base, drainage, and batter are doing their jobs. Build the inspection habit into the first year, and the wall will mostly look after itself afterwards.
Start with the drainage outlet, because that is where most failures announce themselves. After the first heavy rain, walk to the daylight point or storm connection and confirm water is actually leaving the system. A dry outlet after a wet week means the pipe is blocked, crushed, or never connected properly — and water is instead building pressure behind the wall. A trickle that turns muddy suggests soil is migrating through the fabric or around the aggregate, which will clog the system over time. Either symptom is worth fixing while the wall is still straight, because once the wall leans, the drainage fix becomes a rebuild.
Next, check the wall face itself with the same eye you used while building it. Stand at one end and sight along the face: a straight wall should read straight, and a curved wall should hold a smooth, consistent radius. Look for individual blocks that have stepped forward, caps that have shifted, or joints that have opened since the build. A single block moving a fraction of an inch after backfilling is normal settling; a run of blocks moving together, or a crack opening between courses, is the wall telling you the base is settling unevenly or the batter is being overcome. Photograph the face from the same spot each season, so small changes become visible instead of debatable.
Pay attention to the ground above and below the wall, not just the wall itself. Soil that ponds behind the wall top after rain means the finish grading has settled and water is now sitting where it should be draining away. Soil that washes out at the toe of the wall, or a gap opening between the wall base and the ground, means water is undermining the foundation from below. Vegetation matters here too: roots above the wall stabilise the slope, but a tree planted too close will eventually push roots into the drainage aggregate and the wall itself. Keep large-rooted planting well back, and let grass and shallow-rooted ground cover do the stabilising work.
Seasonal checks catch the problems that a single inspection misses. After the first freeze and thaw, look for heaving at the base and for blocks that have lifted — frost moves uncompacted or waterlogged base material first. After the driest part of summer, check for shrinkage gaps in clay soils behind the wall, which can open and then fill with water in the next rain, creating a new pressure pocket. After any work near the wall — a driveway repair, a new planting bed, a parked vehicle on the slope above — recheck the face and the drainage outlet, because surcharge is the quiet change that turns a sound wall into an overloaded one.
Know the line between maintenance and a rebuild. Re-levelling a cap, re-gluing a shifted cap block, re-grading a settled patch above the wall, and clearing a blocked outlet are maintenance. A wall that leans visibly along its length, bulges in the middle, or shows a stepped crack running through several courses is structural, and the honest response is to stop adding weight above it, keep water away from the backfill, and get an engineer’s opinion before attempting a repair. A wall repaired cosmetically while its drainage still fails will fail again, on the same schedule, only further along.
Keep Reading
If this guide helped, these related guides are worth your time:
- How to Pour a Concrete Slab (Small Pads & Footings Guide)
- What Size Drill Bit? (Concrete Anchor Chart Inside)!
- How to Build a Privacy Screen (Balcony & Patio Guide)
Why is my retaining wall leaning?
Usually: no drainage (hydrostatic pressure), inadequate base (settling), no batter (vertical walls get pushed), or surcharge overload (something heavy above — parked cars, structures — that the wall wasn’t designed for). Diagnose before repairing — the fix depends on the cause.
How far should the drainage pipe daylight?
To a point downhill where water can disperse without causing problems (not toward the house, not toward the neighbor). Minimum: beyond the wall’s zone of influence. If no downhill option: connect to storm drainage or a dry well.
Can I build a retaining wall in winter?
Base compaction in frozen ground is unreliable — wait for thaw. Frozen backfill settles unpredictably in spring. This is a warm-weather project (the base engineering demands it).
What about the soil above the wall (surcharge)?
Anything heavy above the wall (driveway, structure, steep slope) adds pressure — the wall must be designed for it. Standard DIY walls assume level backfill with landscaping only. Surcharge = engineering consultation.
How do I handle a curved wall?
Segmental blocks handle gentle curves naturally (the setback creates the curve — tighter curves need tapered blocks or cutting). Mark the curve with a hose or paint (the visual guide), and maintain consistent radius. Curves are actually stronger than straight walls (the arch effect).
When do I need an engineer?
Over 4 ft tall, any surcharge (structures/driveways above), poor soils (clay, fill), or if the failure consequences are severe (above a house, near a property line). The engineer’s fee ($500–$1,500) is trivial compared to a failed wall’s cost.
Keep This Chart Handy: Retaining Wall Numbers at a Glance
| Number | Spec | Why it matters |
|---|---|---|
| DIY height limit | Under 4 ft (1.2 m) | Above 4 ft, engineering and permits are typically required — soil pressure scales with the square of height |
| Tier instead of going tall | Two 3-ft (0.9 m) walls instead of one 6-ft (1.8 m) wall | Each tier is independently stable and dramatically safer |
| Base depth | 6 inches (15 cm) of compacted crusher run, in 2-inch (5 cm) lifts, compacted each lift | Every course above inherits the first course’s errors — the base is the foundation |
| Bedding layer | 1 inch (2.5 cm) of bedding sand or fine aggregate, screeded level | The perfectly level seat for the first course |
| Buried first course | Top of first course at or slightly below grade | The buried block resists sliding — walls that start at grade slide |
| Block setback (batter) | Each course set back 3/4–1 inch (19–25 mm) | The wall leans into the hill so gravity works with you, not against you |
| Drainage aggregate width | 12 inches (30 cm) minimum behind the wall | Water flows through it to the pipe instead of pressing against the wall |
| Drain pipe | 4-inch (10 cm) perforated PVC or corrugated pipe at the base, behind the wall, sloping to daylight | Collects groundwater; a pipe to nowhere is decoration |
| Geotextile fabric | Between the aggregate and the backfill soil | Stops soil migrating into and clogging the aggregate |
| Timber wall batter | Lean back 1 inch per foot of height (25 mm per 30 cm) | The timber wall’s lean-back equivalent of block setback |
| Timber deadmen | Every 6–8 ft (1.8–2.4 m), at every other course | Tie-back timbers anchor the wall against soil pressure — the timber wall’s critical component |
| Failure cause | 90% of retaining wall failures are drainage failures | The drainage system is not optional — it is the wall |
Bookmark This Checklist: Wall Trouble? Diagnose It Before It Becomes a Rebuild
Work through the symptom, check the drainage first, and know the line between maintenance and a structural problem.
| Symptom | What it usually means | Check first |
|---|---|---|
| Wall leaning or bulging along its length | Drainage failure creating hydrostatic pressure, no batter, or surcharge overload — 90% of retaining wall failures are drainage failures | Confirm the drainage system: 12 inches (30 cm) of drainage aggregate behind the wall, a 4-inch (10 cm) perforated pipe at the base sloping to daylight, and geotextile fabric between aggregate and soil |
| One block stepped forward, or one cap shifted | A single block moving a fraction of an inch after backfilling is normal settling | Photograph the face from the same spot each season — a run of blocks moving together, or a crack opening between courses, is the warning sign, not the single block |
| Drainage outlet dry after a wet week | Pipe blocked, crushed, or never connected properly — water is building pressure behind the wall instead | Walk to the daylight point or storm connection after heavy rain and fix the outlet while the wall is still straight |
| Trickle from the outlet turns muddy | Soil migrating through the fabric or around the aggregate, which will clog the system over time | Check the geotextile separation between aggregate and backfill soil before the clogging gets worse |
| Soil ponding behind the wall top after rain | Finish grading has settled, so water now sits where it should drain away | Re-grade the soil above to drain away from the wall top |
| Soil washing out at the toe, or a gap opening at the base | Water undermining the foundation from below | Keep water away from the backfill and recheck the face and outlet after any work near the wall |
| Visible lean along the length, a bulge in the middle, or a stepped crack through several courses | Structural failure, not maintenance | Stop adding weight above the wall, keep water away from the backfill, and get an engineer’s opinion before attempting a repair |
The verdict: the retaining wall priorities
- Drainage system — pipe + aggregate + fabric + daylight (the 90% of failures are here).
- Compacted base — 6″ in lifts, level first course (the foundation).
- Batter — lean into the hill (gravity as ally).
- Staggered joints — running bond (structural interlock).
- Buried first course — sliding resistance.
- Height limits — under 4 ft DIY; tier instead of going tall; engineer when in doubt.
The retaining wall is a drainage project with a wall in front of it. The blocks are visible; the drainage is vital. Build the water’s escape path first in your mind, then build the wall around it. The soil pushes; the drainage relieves; the batter resists. That’s the engineering — and it’s what keeps the wall standing for 50 years instead of 5.
Tool Worth Lab provides research-based project guidance. Call 811 before digging, respect the 4-ft DIY height limit (engineering required above), never skip the drainage system (90% of failures), and consult an engineer for surcharge conditions or poor soils.