
Quick Answer: A window box is an afternoon build — a box, drainage, brackets and the thriller-filler-spiller planting formula. The two things that make or break it: drainage for the plants, and brackets strong enough for the real weight of wet soil.
A window box is the cheapest facelift a house can get — one afternoon of sawing and suddenly your plain windows look like they belong in a cottage magazine. Estate agents call it curb appeal; your neighbours will just call it showing off.
But a window box is also a physics problem in a pretty dress: wet soil is shockingly heavy, thirsty plants dry out fast in a shallow box, and the wrong fixings turn your flower display into a wall-damaging missile. Build it like an engineer, plant it like a florist, and your street gets a new favourite house.
This guide builds yours the other way round: sized generously, anchored into real structure, drained properly, and planted so it looks like a florist did it. One afternoon, and your house is the one neighbours slow down for.
The fun part has a formula, by the way: thriller, filler, spiller. One tall star, a bunch of full fillers, and trailers spilling over the front edge. Plant them dense, repeat plants instead of collecting one of everything, and your box reads as designed from the street instead of looking like leftovers. Let’s build it.
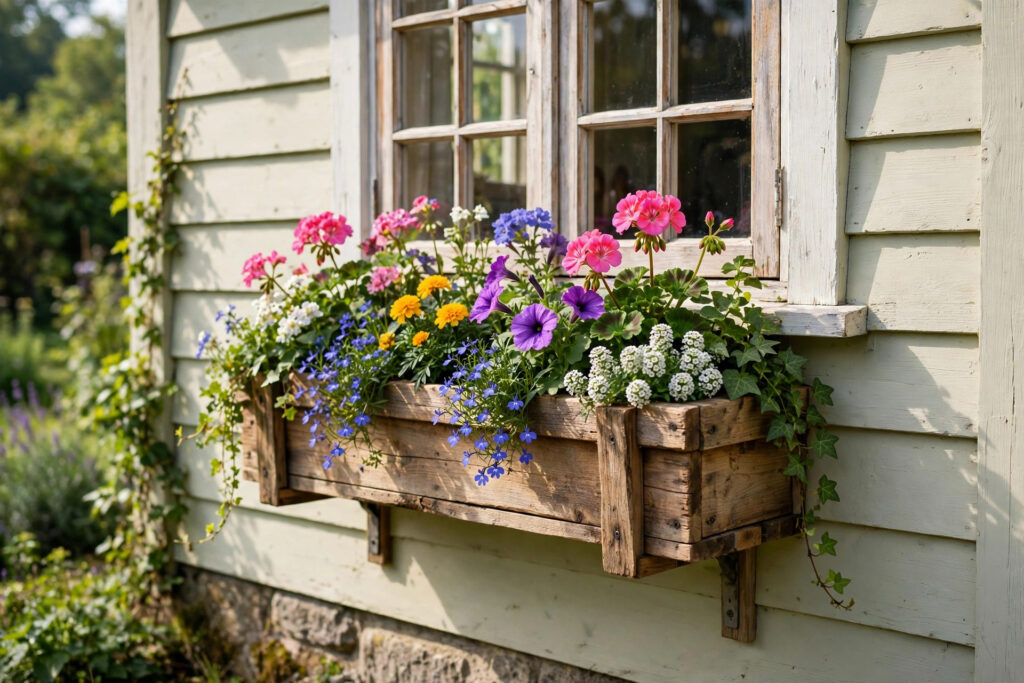
The principle: a window box manages water (drainage in, moisture retention, the watering) and weight (soil + water is HEAVY — the brackets must handle it). Every decision serves the plants’ health and the wall’s safety.
Sizing
| Dimension | Rule | Why |
|---|---|---|
| Length | Window width (or 2–4″ shorter) | The proportion (the box frames the window) |
| Depth | 8–10″ | Root space (the plants need room; narrower dries too fast) |
| Height | 8–10″ | Soil volume (the moisture buffer) |
The proportion: the box should look substantial (the skimpy box looks like an afterthought). When in doubt: deeper and taller (the plants thrive with the extra soil).
The weight reality (the engineering)
Soil + water is heavy — a 36″ box holds ~2 cubic feet of soil (100+ lbs wet). This is the project’s critical engineering.
- Brackets rated for the load (the spec — don’t guess).
- Into studs or masonry (the anchoring — same principle; the cantilevered load).
- Two brackets minimum (three for 48″+ — the span).
The failure mode: undersized brackets into siding (not structure) — the box rips off, taking siding with it. Anchor to structure, always.
Drainage (the plant health)
- Drainage holes (1/2″ — every 6″ along the bottom — the non-negotiable).
- Landscape fabric (over the holes — keeps soil in, lets water out).
- Gravel layer (1″ — the drainage assist; debated, but harmless).
- The saucer question: no saucer (the wall doesn’t want the drip — but the plants don’t want wet feet; drainage holes + no saucer is the answer; the wall gets a drip edge).
Drainage holes are non-negotiable — the #1 window box killer is root rot from waterlogged soil. Drill generously.
Materials
- Cedar or redwood (naturally rot-resistant — the classic; 3–5+ years).
- Composite/PVC (the no-maintenance — lasts indefinitely, less beautiful).
- Exterior screws (the corrosion resistance).
- Liner: coconut coir or plastic (the moisture retention + the wood protection).
The liner extends the box life dramatically (keeps wet soil off the wood — the rot barrier). Coir is the natural choice; plastic with drainage holes works.
Brackets
| Type | Look | Notes |
|---|---|---|
| Decorative iron | Classic | The curb appeal (the brackets are visible — make them beautiful) |
| Simple L-brackets | Minimal | The functional (paint to match) |
| French cleat | Hidden | The clean (the box lifts off for replanting — the clever) |
The French cleat is the insider’s choice (the box lifts off for seasonal replanting, winter storage, and wall maintenance — the practicality).
The planting formula (the design)
Thriller, filler, spiller
- Thriller: tall center (the drama — grasses, tall flowers).
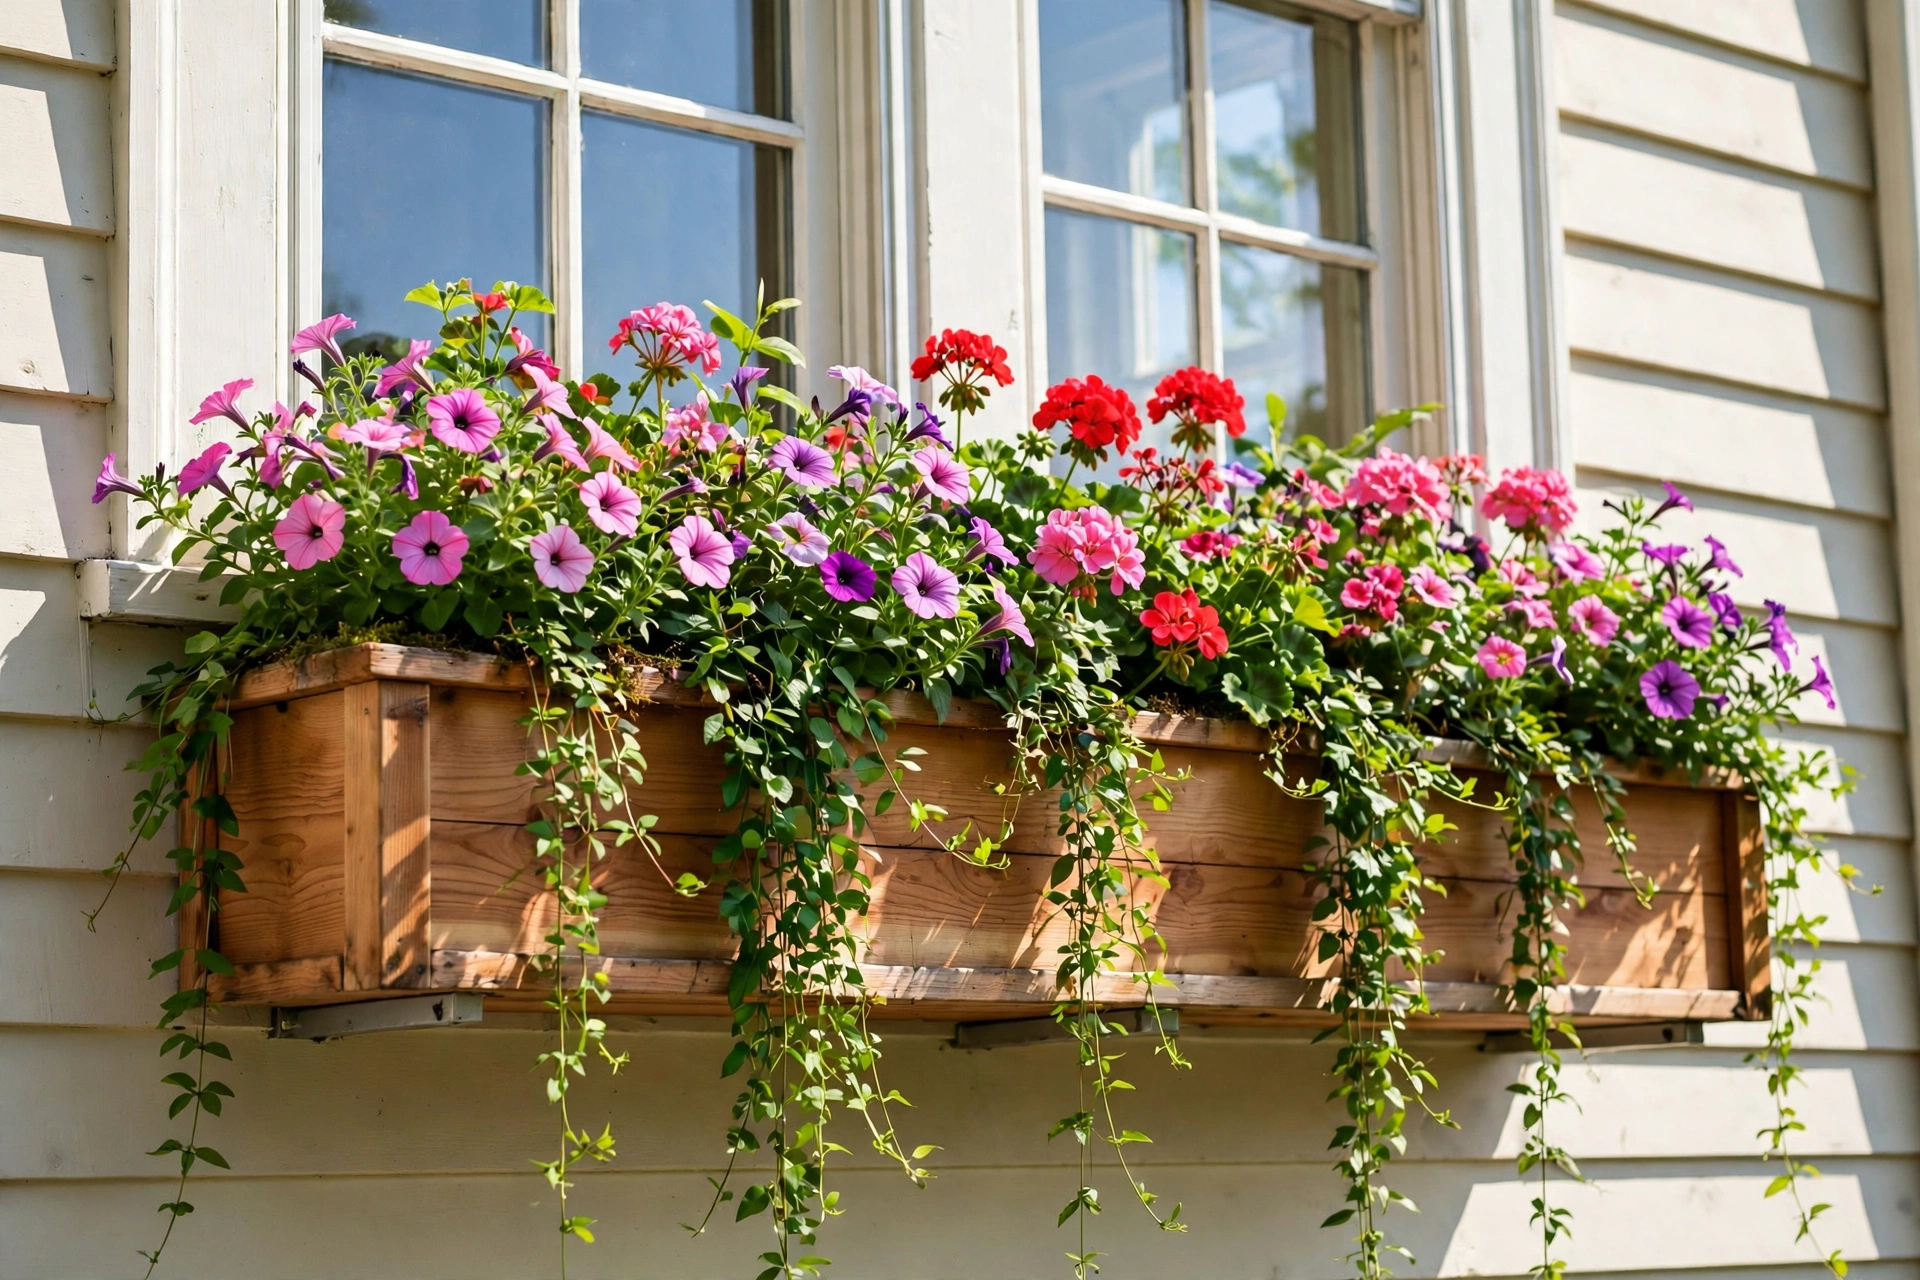
- Filler: mounding middle (the body — petunias, geraniums, the color).
- Spiller: trailing edges (the cascade — ivy, sweet potato vine, lobelia).
The density: plant closer than the tags say (the instant fullness — window boxes are viewed from the street; the lush beats the sparse).
Seasonal rotations
| Season | Plants |
|---|---|
| Spring | Pansies, bulbs, primrose |
| Summer | Petunias, geraniums, herbs |
| Fall | Mums, ornamental kale, grasses |
| Winter | Evergreen boughs, berries (the no-maintenance arrangement) |
The winter arrangement (cut evergreens + berries — no watering, no maintenance, looks festive for months) is the low-effort win.
Watering (the maintenance)
- Daily in summer (the small soil volume dries fast — the reality of window boxes).
- Self-watering reservoirs (the upgrade — the sub-irrigation extends intervals to 3–5 days).
- Drip irrigation (the automation — 1/4″ line on a timer; the set-and-forget for multiple boxes).
Watering is the ongoing commitment — the #2 window box killer (after drainage) is neglect. The self-watering or drip upgrade pays for itself in plant survival.
Tools needed
| Tool | For |
|---|---|
| Circular or miter saw | Cutting boards |
| Drill/driver | Assembly, drainage holes, mounting |
| Level | Level installation |
| Tape measure | Layout |
| Stud finder (if applicable) | Anchoring |
Construction
1. Cut
Boards per the sizing (the measuring — the box must be square for the brackets to sit right).
2. Assemble
- Box joints (butt joints + screws — the simple; or box joints — the crafted).
- Drainage holes (1/2″, every 6″ — the generous).
- Landscape fabric (the soil retention).
3. Finish
Exterior stain/paint (the wood finish — before planting; the box lasts years longer finished).
4. Mount
- Brackets to structure (studs/masonry — the anchoring).
- Level (the water pools evenly — the drainage works).
- Set the box (on brackets or cleat — the secure).
5. Plant
- Liner (coir — the protection).
- Soil (quality potting mix — not garden soil; the drainage).
- Thriller, filler, spiller (the formula — planted dense).
- Water deeply (the establishment).
Three planting recipes that actually work together
A good planting recipe removes the guesswork at the nursery, where most window boxes quietly go wrong — three pretty plants bought separately, which then fight over light and water all summer. Pick a recipe below based on the light your window actually gets, and keep the thriller-filler-spiller structure from earlier: one upright plant for height, mounding plants for body, and something that trails over the front edge.
| Your window | Thriller (height) | Filler (body) | Spiller (trail) |
|---|---|---|---|
| Sunny, all day | An ornamental grass or a tall geranium | Petunias and more geraniums — the classic sun-loving colour pair | Sweet potato vine or trailing lobelia |
| Part shade | A fern or other upright foliage plant | Impatiens and begonias, which flower happily without full sun | English ivy or other trailing foliage |
| Kitchen window, sunny | A bushy basil plant, pinched regularly so it stays full | Thyme and other low herbs packed in tightly | A trailing herb, or lobelia if you want one splash of flower among the leaves |
Two habits make any of these recipes look twice as good. First, repeat plants rather than collecting one of everything — the same filler in threes reads as a designed planting from the street, while six different singles read as leftovers. Second, plant the spiller plants right at the front edge and tilt them slightly outward as you firm the soil in. They take the hint, and you get the cascade weeks earlier instead of waiting for them to find the edge themselves.
Soil and feeding: the part most builds skip
What you fill the box with decides how forgiving it is. Ordinary garden soil is the common mistake: in a box it compacts, drains badly, and turns into a brick by midsummer. Use a proper potting mix instead — it is blended to stay open and drain freely while still holding some moisture around the roots, which is exactly the balancing act a window box needs every single day.
Then expect to feed. Frequent watering, which window boxes demand, washes nutrients straight out through the drainage holes — the very holes you drilled to keep the plants alive. By midsummer an unfed box often looks tired for this reason alone: the plants are not thirsty or diseased, they are hungry. A diluted liquid feed at regular intervals through the growing season, mixed and applied according to the label on whatever you buy, is the usual fix. Go gently — a weak feed given consistently beats a strong dose given once in a panic.
Mistakes that make a good box look tired by midsummer
- Skipping the deadheading. Spent petunia and geranium flowers left in place tell the plant its job is done and seed is next. Five minutes with your fingers every few days, pinching off faded blooms, keeps the flowers coming.
- Watering a little, often, at the surface. A daily splash that only wets the top inch trains roots upward and leaves the bottom of the box dry. Water properly until it runs from the drainage holes, then let the surface dry slightly before the next round.
- Planting for June and ignoring August. Some spring stars fade in real heat. When one plant gives up mid-season, replace just that plant — a box is small enough that a single swap refreshes the whole display.
- Letting the spillers swallow the fillers. Vigorous trailers are wonderful until they shade everything behind them. Trim them back without mercy when they start winning; they regrow quickly.
- Forgetting the box itself. Once a season, look at the wood, the liner and the brackets while you are up there watering. Catching a softening board or a loosening bracket in August is a repair; finding it after the box falls is a replacement.
Print This Before You Water — Window Box Diagnosis Chart
Tape this inside the shed door. Every symptom below, and its fix, comes from this guide — no new advice, just the answers in one place.
| Symptom | Likely cause | Fix |
|---|---|---|
| Soil dry again hours after watering | Box too shallow, or splash-watering only the surface | Water slowly until it runs from the 1/2″ (13 mm) drainage holes; build 8–10″ (20–25 cm) deep |
| Plants yellow and soggy | Waterlogged soil — blocked or missing drainage | Clear or drill 1/2″ (13 mm) holes every 6″ (15 cm) along the bottom |
| Flowers stopped coming | Spent blooms left in place | Deadhead every few days — five minutes with your fingers |
| Box looks thin and random | One of everything planted | Repeat plants instead, and plant dense |
| Trailers swallowing everything behind them | Spillers left unchecked | Trim them back without mercy — they regrow quickly |
| Box sagging or pulling away from the wall | Undersized brackets into siding, not structure | Rated brackets anchored into studs or masonry — two minimum, three for 48″ (122 cm) and over |
Common questions
Can I hang a window box from a railing instead of the wall? Yes — railing planters and brackets made for railings are a good option, especially in rentals where drilling into the wall is not allowed. The same weight rule applies, doubled: a railing is not structure in the way a stud wall is, so keep the box modest in size, use brackets made for that railing, and check the fixing is still tight after the first few waterings, when the soil is at its heaviest.
How do I stop the drips annoying the wall and windows below? Water in the morning, slowly, at soil level rather than from above, and stop as soon as water first appears from the drainage holes. Most drip problems are really over-watering problems. A box mounted with a small gap or drip edge behind it, as described earlier, also keeps the occasional overflow off the siding instead of streaking down it.
Keep This Handy — Window Box Seasonal Care Checklist
Pin this to the fridge — a window box only stays beautiful if the care keeps up with the seasons:
- Every few days — Deadhead. Five minutes with your fingers, pinching off faded petunia and geranium blooms, keeps the flowers coming. Left in place, spent flowers tell the plant its job is done and seed is next.
- Every watering — Water properly. Water slowly at soil level until it runs from the drainage holes (1/2″ / 13 mm holes every 6″ / 15 cm along the bottom), then let the surface dry slightly before the next round. A daily surface splash trains roots upward and leaves the bottom dry.
- Summer — Water daily. Small soil volumes dry fast; a self-watering reservoir stretches watering to 3–5 days. Feed with a diluted liquid feed at regular intervals through the growing season — frequent watering washes nutrients straight out, and an unfed box looks tired by midsummer because the plants are hungry, not thirsty.
- Mid-season — Swap, don’t mourn. When one plant gives up in real heat, replace just that plant — a box is small enough that a single swap refreshes the whole display. Trim spillers back without mercy when they start shading the fillers.
- Once a season — Inspect the box itself. While watering, look at the wood, the liner, and the brackets. Catching a softening board or a loosening bracket in August is a repair; finding it after the box falls is a replacement. Remember the weight: a 36″ (91 cm) box holds ~2 ft³ of soil = 100+ lbs wet.
- Seasonally — Replant annuals (3–4 rotations a year for the always-beautiful look); perennials + evergreens get a yearly refresh. For winter: remove annuals, switch to the evergreen arrangement, make sure drainage is clear (freeze-thaw with blocked drainage cracks boxes).
Keep This Chart Handy — Which Mount Works on Your Wall
The rule is simple: anchor to structure, never to siding alone. A planted 36-inch (91 cm) box weighs more than 100 lb (45 kg) once it’s watered, so the mount matters more than the box itself.
| Your wall | Anchor into | Bracket approach | Watch out |
|---|---|---|---|
| Wood siding over studs | The studs | Lag-bolted brackets — two minimum, three for 48 in (122 cm) and longer | Siding alone won’t hold it — always hit structure |
| Vinyl siding | Sheathing and studs behind the siding | Mount through to the structure, with siding blocks to give a flat surface | Or skip the wall entirely — freestanding brackets on posts from the ground |
| Brick or masonry | The masonry itself | Masonry anchors into the structure — two brackets minimum, three for 48 in (122 cm) and longer | Brackets must still be rated for the full wet-soil load — don’t guess the rating |
For the cleanest look, consider a French cleat: it hides the hardware and the box lifts off for seasonal replanting, winter storage, and wall maintenance.
How do I keep it from rotting?
Cedar/redwood (naturally resistant) + liner (the soil barrier) + finish (the moisture protection) + drainage (no standing water). The combination lasts 5–10 years; without the liner, half that.
What if I have vinyl siding?
Mount through to the sheathing/studs (the structure behind — siding alone won’t hold). Use siding blocks (the mounting blocks that provide a flat surface). Or freestanding brackets (the alternative — posts from the ground; no wall penetration).
How often do I replant?
Seasonally for annuals (the rotations above — 3–4 times/year for the always-beautiful). Perennials + evergreens: yearly refresh (the lower-maintenance). The winter evergreen arrangement: once (lasts the season).
Can I grow herbs/vegetables?
Absolutely (the kitchen window box — basil, thyme, lettuce, the edible; 8–10″ depth suffices for most herbs). The raised bed principles scaled down. South-facing is best (the sun).
What’s the biggest mistake?
Undersized brackets into non-structure (the collapse). Second: no drainage holes (the rot). Third: too-small box (the plants struggle, the proportions look wrong). All three are in this guide — avoid them and the box thrives.
How do I winterize it?
Remove annuals, switch to the evergreen arrangement (the winter look), ensure drainage is clear (freeze-thaw with blocked drainage cracks boxes), and consider bringing prized boxes into the garage (the extreme climates). The winterization principle applied.
The verdict: the window box essentials
- Right size — window width, 8–10″ deep (the proportion + the root space).
- Structure-anchored — studs/masonry, rated brackets (the weight engineering).
- Drainage holes — generous (the #1 plant health factor).
- Liner — coir (the wood protection).
- Thriller, filler, spiller — planted dense (the design formula).
- Watering plan — daily, self-watering, or drip (the commitment).
The window box is the highest curb-appeal-per-dollar project — an afternoon’s build, the thriller-filler-spiller, and the facade transforms. Neighbors notice. The house looks loved. And the herbs are right outside the kitchen window.
Bookmark This Chart — Window Box Numbers at a Glance
Size it, anchor it, drain it — the numbers that decide whether it thrives:
| Decision | The number |
|---|---|
| Length | Window width (or 2–4″ shorter) |
| Depth & height | 8–10″ each — narrower dries out too fast |
| The weight | A 36″ box holds ~2 ft³ of soil = 100+ lbs wet — engineer for it |
| Brackets | Rated for the load, anchored into studs or masonry — two minimum, three for 48″+ |
| Drainage | 1/2″ holes every 6″ along the bottom — non-negotiable |
| Lifespan | Cedar + liner + finish + drainage = 5–10 years; skip the liner and halve it |
| Watering | Daily in summer; a self-watering reservoir stretches it to 3–5 days |
Tool Worth Lab provides research-based project guidance. Anchor brackets to structural studs or masonry (never siding alone — the loaded box will pull out), drill generous drainage holes (root rot from waterlogged soil is the #1 killer), use a liner to protect the wood (extends life dramatically), plan the watering commitment (small soil volumes dry fast — consider self-watering or drip), and size generously (8–10″ deep minimum for plant health).
Keep Reading
Loved this guide? These related articles will keep your project moving: