
Quick Answer: No — standard twist bits catch the hard glaze and either skate off or crack the tile. Carbide or diamond tile bits are non-negotiable.
There is a special kind of heartbreak reserved for the moment a hairline crack creeps across a tile you just drilled — a tile that matches nothing in any store anymore, in a bathroom you were only trying to improve. One wrong bit, one careless squeeze of the trigger, one forgotten splash of water, and the tile you drilled is the tile you get to look at every single morning for the next ten years.
The maddening part is how small the difference is between a perfect hole and a cracked tile. Same drill, same tile, same hands — the only thing that changes is five quiet decisions made before the bit touches the glaze: the bit, the tape, the water, the speed, and the distance from the edge. Get them right and drilling tile is almost boring. Get one wrong and you are learning how discontinued tiles work. Here is how to land on the boring side.
Related reading: Drill Bit Size for Concrete Anchors (Complete Chart)
Mistakes to Avoid — Read This Before You Drill
Every cracked tile comes from one of these mistakes. Run through this list before the bit touches the tile.
- Using hammer mode. Hammer action shatters tile — turn hammer mode off completely before you start.
- Using a standard twist bit. Regular bits catch the hard glaze and skate or crack the tile. Use a diamond or carbide tile bit.
- Starting at 90° on the glaze. The bit will wander and chip the surface. Begin at a 45° angle to cut a groove, then straighten to vertical.
- Running high speed. Keep it under about 400 RPM for diamond bits — high speed builds the heat that cracks tile.
- Skipping the water. Spray water on the bit and hole every 15–20 seconds. Heat buildup is a top cause of cracking, especially in porcelain.
- Drilling within 1″ (2.5 cm) of an edge or corner. Edges are the weakest spots — stay at least 1″ (2.5 cm) away.
- Punching through at full pressure. Ease pressure to almost nothing as the bit breaks through the back of the tile, or the exit side chips.
What you need
| Item | Why |
|---|---|
| Diamond or carbide tile bit | Regular bits shatter tile |
| Masking tape | Prevents bit wandering + reduces chipping |
| Spray bottle with water | Cooling — heat cracks tile |
| Marker | Mark through the tape |
| Safety glasses | Always |
Bit choice matters most:
- Ceramic tile: carbide-tipped masonry/tile bit works fine
- Porcelain tile: much harder — use a diamond hole saw or diamond bit
- Glass tile: diamond bit only, slowest speed
Bookmark This Chart — Tile Type × Bit × Speed Cheat Sheet
Screenshot this before you touch the drill — it’s every speed-and-bit decision in the guide, one glance wide:
| Tile type | Best bit | Speed guidance |
|---|---|---|
| Ceramic | Carbide-tipped masonry/tile bit | Slow — never use hammer mode |
| Porcelain | Diamond hole saw or diamond bit (porcelain is much harder) | Under ~400 RPM, keep it wet with water |
| Glass | Diamond bit only | Slowest of all — constant water cooling |
Step-by-step
1. Mark your spot
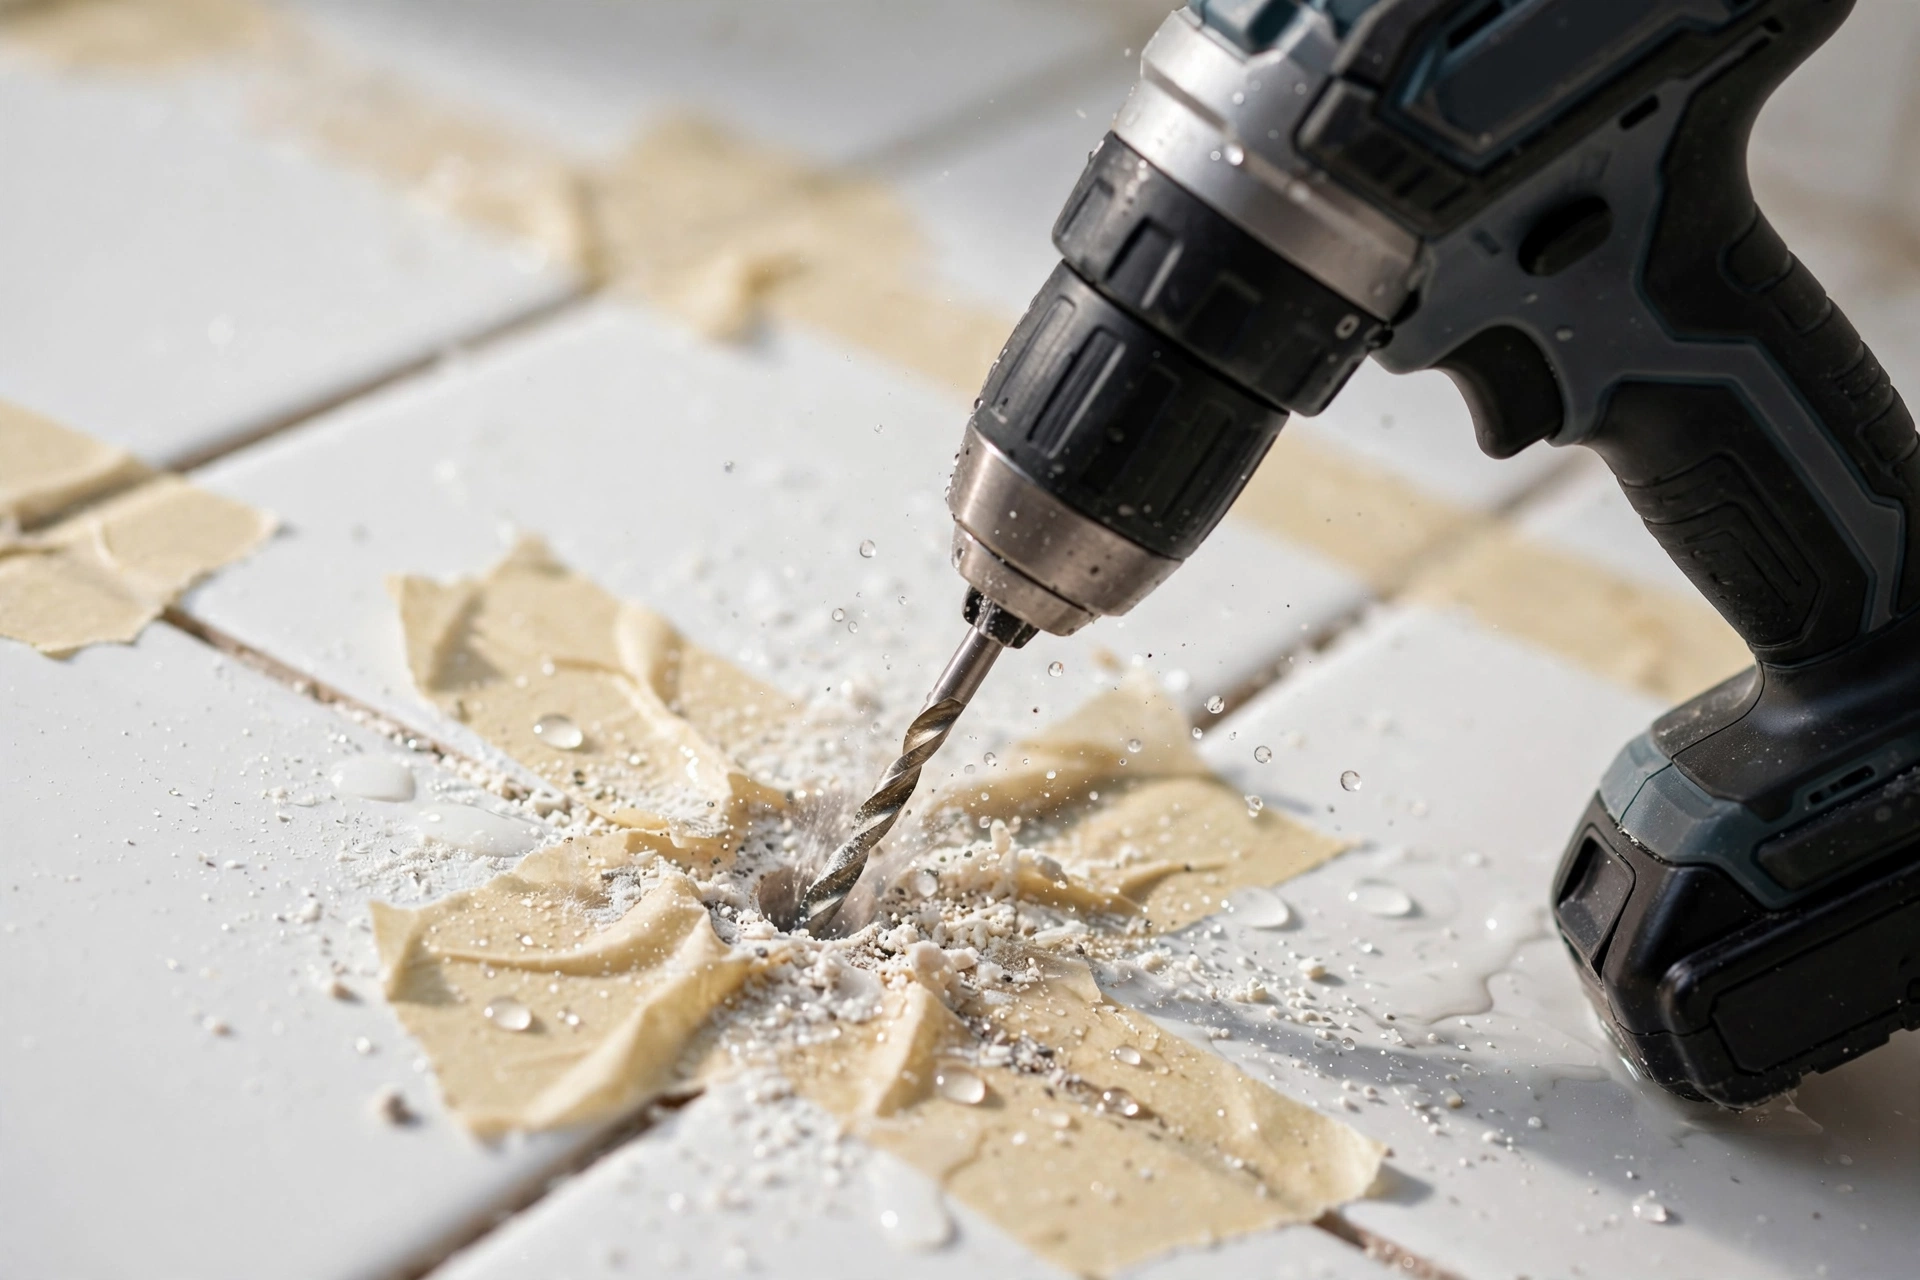
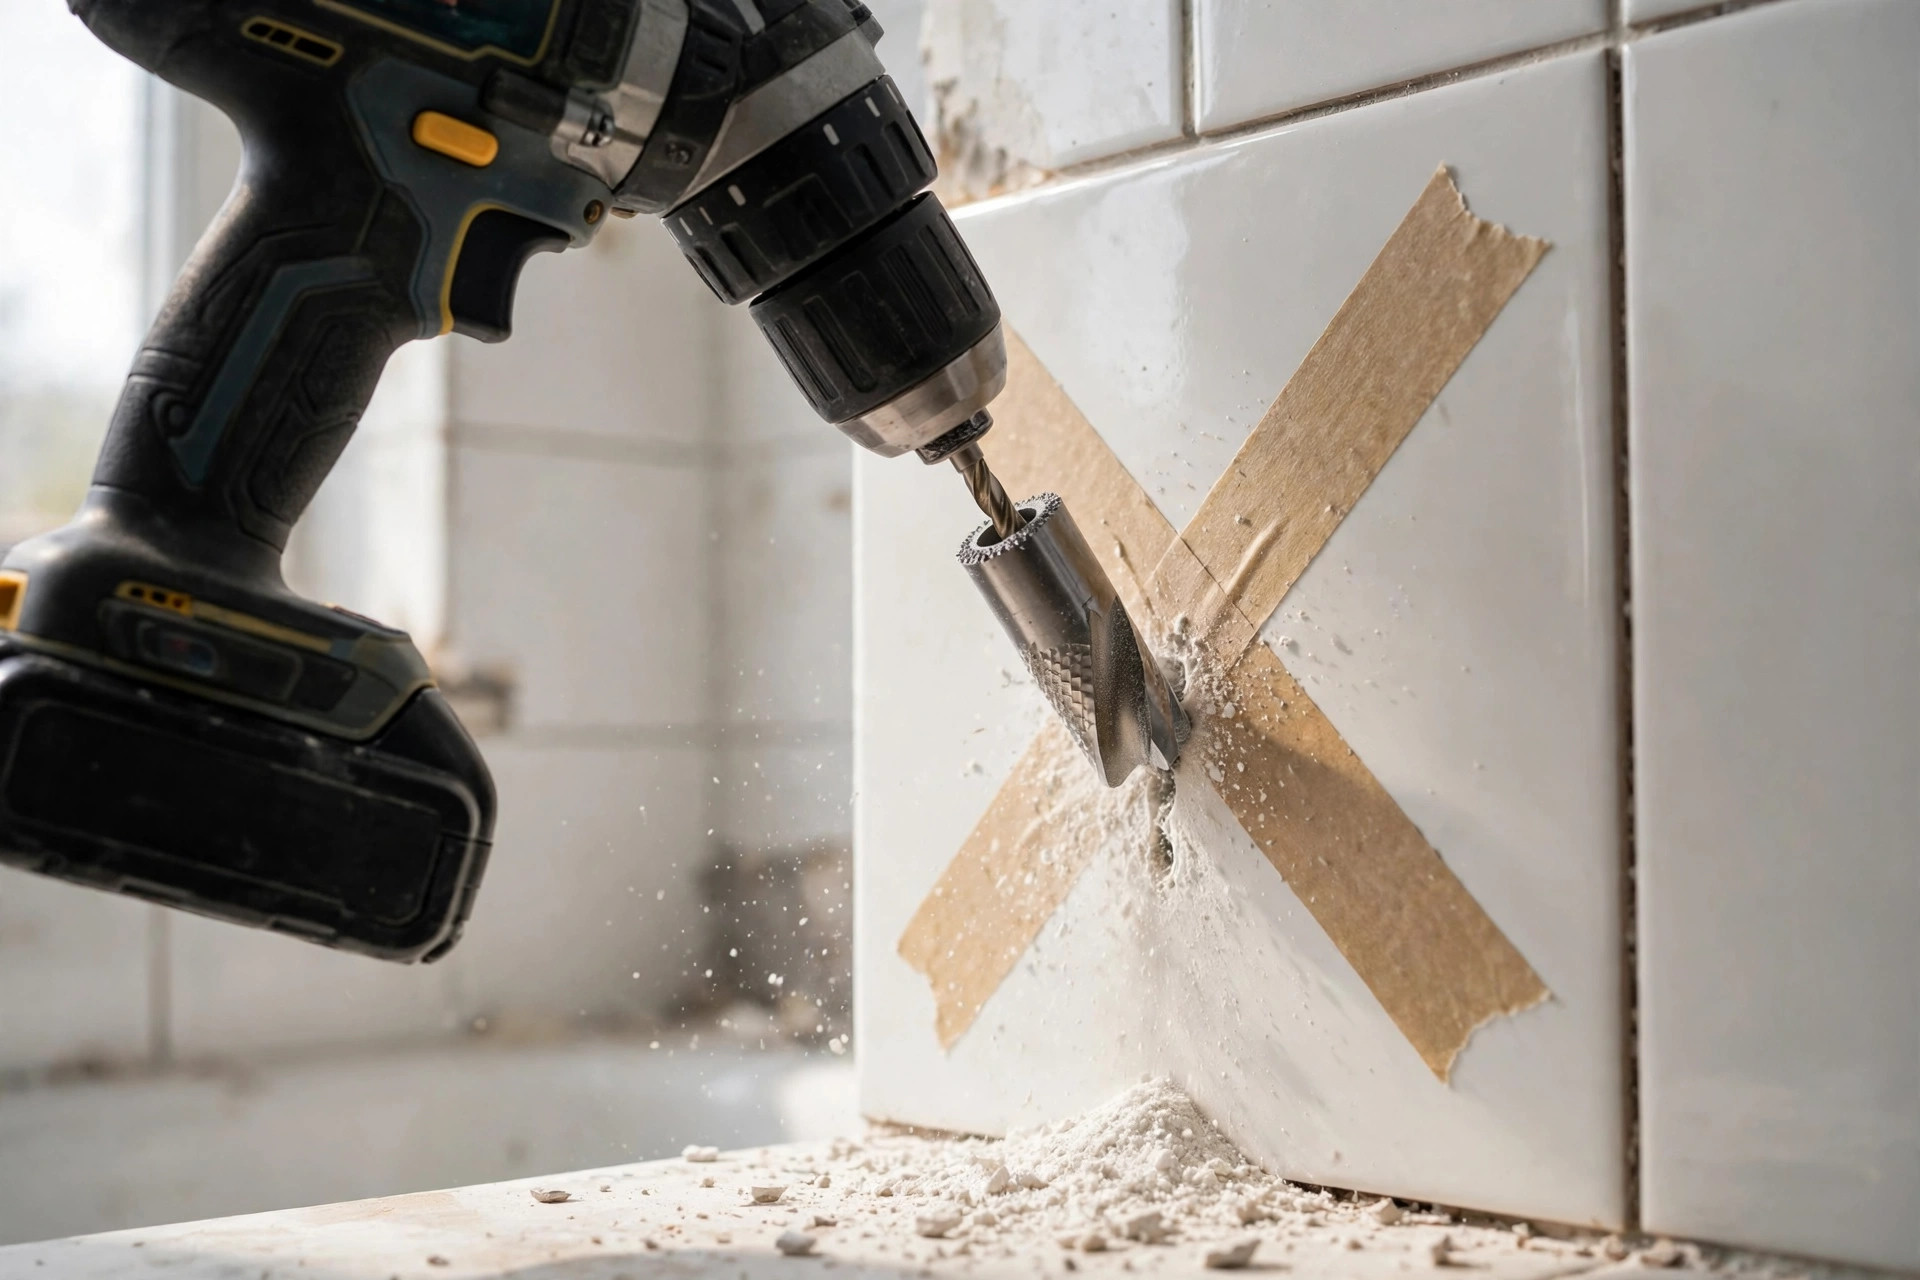
Put masking tape over the drilling area (X pattern for larger holes). Mark your spot on the tape. The tape gives the bit grip and prevents the glaze from chipping as the bit starts.
2. Start at an angle
Begin drilling at a 45° angle to create a small groove — this stops the bit from skating across the glaze. Once you have a bite, slowly straighten to 90°.
3. Go slow, no hammer action
Critical: turn OFF hammer mode. Hammer action shatters tile. Use low RPM (under 400 for diamond bits), light pressure, and let the bit grind through.
4. Keep it cool
Spray water on the bit and hole every 15–20 seconds. Heat buildup is a top cause of cracking — especially in porcelain. A small sponge soaked in water held against the bit works too.
5. Ease through the back
As you break through the back of the tile, reduce pressure to almost nothing. Punching through aggressively chips the exit side. Slow and gentle wins.
6. Clear and clean
Remove the tape, wipe away dust, and check the hole. Small chips around the edge are normal and will hide under a fixture, escutcheon, or anchor.
The 7 rules that prevent cracks
| Rule | Why it matters |
|---|---|
| Right bit (diamond/carbide) | Wrong bits catch and shatter |
| Masking tape on surface | Prevents wandering + glaze chips |
| No hammer mode — ever | Hammering = cracked tile |
| Slow speed | High speed = heat = cracks |
| Light pressure | Forcing = flexing = cracking |
| Keep it wet | Cooling prevents thermal shock |
| Don’t drill near edges/corners | Edges are weakest — stay 1″+ away |
Keep This Chart Handy — Water Control Compared: Cool the Bit Without Flooding the Room
Heat is a top cause of cracked tile, and water is how you beat it — but not every water trick fits every hole. Pick your method before the drill starts, and re-wet every 15–20 seconds while you cut. Screenshot this before you pick up the drill.
| Method | Best for | How to do it | Watch out |
|---|---|---|---|
| Spray bottle with water | Every hole — the default | Spray the bit and the hole every 15–20 seconds | Heat builds fast if you skip a round — spray on a schedule, not when you remember |
| Damp sponge held against the bit | Wall tiles — cooling with almost no mess | Hold a water-soaked sponge against the bit while you drill | Squeeze and re-soak often — a dry sponge cools nothing |
| Ring of plumber’s putty | Floor tiles — water that must stay put | Press a small ring of putty around the hole to dam the water in | Floors only — on a wall the dam will not hold |
| Tape or towel below the hole | Catching drips on finished walls and floors | Tape a strip of tape or an old towel below the hole to catch runoff | This catches drips, it does not cool — use it with a cooling method, not instead of one |
Bookmark This Checklist — The Tile-Drilling Go/No-Go Check
Run this in the last sixty seconds before the bit touches the tile. If any answer is “no,” fix it first — a hole drilled on a “no” is how tiles crack.
- Right bit in the chuck? Ceramic: a carbide-tipped masonry/tile bit works fine. Porcelain: much harder — diamond hole saw or diamond bit. Glass tile: diamond bit only. A standard twist bit is an automatic no-go.
- Hammer mode OFF? Hammer action shatters tile. Check the drill’s mode selector, not just your memory — this is the single most common “I don’t know what happened” cause.
- Tape on and marked? Masking tape over the drilling area (an X pattern for larger holes), with your spot marked on the tape. The tape gives the bit grip and stops the glaze chipping as the bit starts.
- Slow speed planned? Low RPM — under about 400 RPM for diamond bits — and light pressure. Let the bit grind through; forcing it flexes and cracks the tile.
- Water within arm’s reach? Spray bottle, or a damp sponge held against the bit. Plan to spray every 15–20 seconds — heat buildup is a top cause of cracking, especially in porcelain.
- Far enough from the edge? At least 1″ (2.5 cm) from any edge or corner. Edges are the weakest spots; if the hole has to be closer, that is a deliberate risk, not an accident.
- Checked what’s behind the wall? Sweep with a stud/pipe detector. You are drilling into a wall that may hide pipes and wires, and you cannot support the back of a wall tile the way you can a loose one.
- Backing plan ready? The tile bit gets you through the tile only. The instant you are through, stop and swap to a bit suited to whatever is behind it — drilling the whole depth with the tile bit dulls an expensive bit on material it was never meant for.
- Exit plan set? Ease pressure to almost nothing as the bit breaks through the back of the tile. Punching through aggressively chips the exit side — slow and gentle wins the last millimetre too.
Nine yeses? Drill. Anything less? Fix the “no” first — it takes a minute, and it beats replacing a tile.
Drilling near edges
Tiles crack most easily near edges and corners. Stay at least 1 inch from any edge. If you must drill close to an edge, go extra slow, use a diamond bit, and keep it very wet. Some pros won’t guarantee edge holes — respect the risk.
Match the hole to the job: what are you actually mounting?
Not every hole in tile carries the same responsibility. A toilet roll holder forgives almost anything; a grab bar forgives nothing. Before you drill, be honest about which of these you are doing, because it changes how careful — and how choosy about placement — you need to be:
| What you’re mounting | How demanding is it? | The smart approach |
|---|---|---|
| Towel rail or toilet roll holder | Light and forgiving | Your first practice holes — take your time and learn the feel of the bit here |
| Mirror or cabinet | Moderate — alignment matters | Measure twice, mark both holes on tape, and drill both before fitting anything |
| Shower grab bar | Safety-critical | The fixings must bite into solid backing or a stud, never just the tile and board — if you cannot find solid fixing, get a professional in |
| Shower fittings and pipework | Larger holes, no hiding place | Diamond hole saw, started at an angle, with a helper spraying water |
| Shelves over a bath or basin | Moderate, but dropped items hurt | Choose fixings made for the material behind the tile, not just plugs that came in the box |
Through the tile is only halfway: what is behind it matters
Here is the part most first-timers miss: the tile is just the skin. The moment your bit breaks through the back, it meets something else — cement board, plasterboard, brick, or block — and that material decides whether your fixing holds or spins uselessly in its hole.
Work it like this. Drill the tile itself exactly as described above: tile bit, tape, slow, wet, no hammer. The instant you are through the glaze and body of the tile, stop and swap to a bit suited to whatever is behind it. A masonry bit for brick or block, a standard bit for timber studs or plasterboard. Drilling the whole depth with the tile bit dulls an expensive bit on material it was never meant for — and drilling the tile with the masonry bit on hammer mode is how tiles die. Two stages, two bits, no drama.
The same logic fixes your wall plug choice. The plug needs to grip in the backing material, not flop around in the tile hole, so pick a plug made for the board or masonry behind the tile, long enough to open up behind or inside that backing. If the hole ends in a hollow cavity with nothing solid to bite, that is a job for a proper cavity fixing — or a sign to move the mounting point to where a stud or solid backing actually is.
Keep This Chart Handy — What’s Behind the Tile Decides the Bit
The tile is only the skin. The moment the bit breaks through, it meets whatever is behind it — and that material decides the bit, the plug, and whether the fixing holds. Screenshot this before you drill.
| What’s behind the tile | Bit for the backing | Fixing that holds |
|---|---|---|
| Brick or block | Masonry bit — after the tile bit | A plug made for masonry, long enough to open up inside the backing |
| Timber studs or plasterboard | Standard bit — after the tile bit | A plug made for the board or timber behind the tile |
| Cement board | Swap to a bit suited to the board — never drill the whole depth with the tile bit | A plug made for the board behind the tile |
| Hollow cavity, nothing solid | Stop — no bit fixes this | A proper cavity fixing, or move the mounting point to a stud or solid backing |
| The tile itself | Diamond or carbide tile bit, slow, wet, no hammer | — |
One rule covers every row: the plug must grip in the backing material, not flop around in the tile hole — and every hole still stays at least 1 in (2.5 cm) from any edge or corner.
Crack Autopsy: What Went Wrong? — Keep This Chart Handy
Not every mark on a tile is a disaster — and not every disaster looks dramatic at first. Before you panic (or shrug it off), read the damage like a detective: what you see tells you exactly which rule broke. Screenshot this for the moment you actually need it.
| What you see | What caused it | What to do |
|---|---|---|
| Tiny chip at the hole’s edge, hidden under the fixture | Normal start-up chipping — small chips around the edge are normal | Cosmetic. It will hide under the fixture, escutcheon, or anchor. Carry on. |
| Crack running away from the hole | Structural failure — the tile is done, whatever the cause | Do not mount anything on it. Replace the tile before mounting, and move the hole — even shifting into the neighbouring tile usually saves the project. |
| Bit skated across the glaze, leaving scratches | Started at 90° on the glaze instead of at a 45° angle | Begin at a 45° angle to cut a groove, then straighten to vertical. Masking tape over the area also gives the bit grip and reduces chipping. |
| Tile cracked despite going slow | Heat buildup — high speed, no water, or hammer mode left on | Keep it under about 400 RPM for diamond bits, spray water every 15–20 seconds, and check hammer mode is OFF before every hole. Heat is a top cause of cracking, especially in porcelain. |
| Exit side chipped as the bit broke through | Punching through at full pressure | Ease pressure to almost nothing as the bit breaks through the back of the tile. Slow and gentle wins the last millimetre too. |
| Crack near an edge or corner | Drilled within 1 in (2.5 cm) of an edge or corner — the weakest spots | Stay at least 1 in (2.5 cm) away. If the hole has to be closer, that is a deliberate risk, not an accident — go extra slow, use a diamond bit, and keep it very wet. Some pros won’t guarantee edge holes. |
| Wrong bit marks — the bit caught the glaze and lurched | Standard twist bit on tile, or the wrong bit for the tile type | Ceramic: carbide-tipped masonry/tile bit works fine. Porcelain: much harder — diamond hole saw or diamond bit. Glass tile: diamond bit only, slowest speed. A standard twist bit is an automatic no-go. |
The pattern behind every row: tiles almost never crack from one big mistake. They crack from one small skipped step — the tape, the water, the angle, the speed — and the damage always tells you which one it was.
If a crack starts: the stop-work rescue routine
Despite perfect technique, a hairline crack can still appear — some tiles hide flaws you will never see from the front. What you do in the next thirty seconds decides whether you lose one tile or the whole section:
- Stop immediately and back the bit straight out. Do not “finish the hole quickly.” Every extra second of vibration walks the crack further.
- Take the tape off and look honestly. A tiny chip at the hole’s edge that will sit hidden under the fixture is cosmetic. A crack running away from the hole is structural — that tile is done.
- Move the hole, don’t mourn it. If the tile is sound but the spot is cursed, shifting the fitting a short distance — even into the neighbouring tile — usually saves the project.
- If the tile must be replaced, replace it before mounting anything. Keep spare tiles from the original installation for exactly this day; matching a discontinued tile years later is miserable.
- Never mount a heavy fitting on a cracked tile and hope. Hope is not a fixing. The crack will grow under load, usually at the worst possible moment.
Common questions
Can I just drill through the grout line instead — isn’t that easier? It is easier, and sometimes acceptable for the lightest fittings. But grout is weak, crumbly material: plugs in grout loosen over time, and the drill can still chip the edges of both tiles either side of the line. Treat grout holes as a light-duty shortcut, not a proper fixing — for anything with weight or safety attached, go through the tile properly.
How do I keep the wet drilling mess off the wall and floor? Less water, applied smarter. A damp sponge held against the bit delivers cooling with a fraction of the runoff, and a strip of tape or an old towel taped below the hole catches what does escape. On floors, drill inside a small ring of plumber’s putty that dams the water around the hole. It is a two-minute setup that saves a twenty-minute cleanup.
Keep Reading
Drilling is only half the battle — these keep the rest of the project crack-free:
- Drill Stripping Screws? Causes & Fixes — too much speed strips fasteners; too little cracks tile. Balance matters everywhere.
- Drill Smells Like Burning? Read This — heat is the #1 killer in tile drilling too — here’s what’s normal and what’s not.
- Drill Bit Size for Concrete Anchors (Complete Chart) — through the tile is only halfway; what’s behind it needs the right bit too.
Frequently asked questions
Can I use a regular drill bit on tile?
No — standard twist bits catch the hard glaze and either skate off or crack the tile. Carbide or diamond tile bits are non-negotiable.
Why did my tile crack even though I went slow?
Usual suspects: hammer mode was on, bit was dull, no water cooling, hole too close to the edge, or excessive pressure. Also — some tiles have hidden flaws; occasionally it’s just bad luck.
Do I need a special drill?
No — any drill works. A variable-speed drill is ideal for the low RPMs tile needs. Single-speed high-RPM drills make it harder (but still possible with care).
How do I drill a large hole (for pipes)?
Use a diamond hole saw (the cup-shaped bit), not a twist bit. Same rules: tape, slow, wet, no hammer. Start at an angle to establish the cut, then straighten.
Can I drill through tile that’s already on the wall?
Yes — same technique. Be extra careful with pressure since you can’t support the back. Make sure you’re not drilling into a pipe or wire behind (use a stud/pipe detector).
What if the tile is porcelain?
Porcelain is much harder and denser than ceramic. Budget extra time, use diamond bits only, keep it very wet, and be patient — it can take several minutes per hole.
The verdict
| Your tile | Use this |
|---|---|
| Ceramic wall tile | Carbide tile bit |
| Porcelain floor tile | Diamond bit or hole saw |
| Glass tile | Diamond bit, slowest speed |
| Large holes (pipes) | Diamond hole saw |
| Near edges | Reconsider placement; go ultra-slow if unavoidable |
Drilling tile is 10% tools, 90% patience. Right bit, tape, slow speed, water, no hammer — follow those five and you’ll wonder why you were ever nervous.
Related: Dull bits are a hidden cause of cracked tile, because they demand more pressure — here is how to sharpen drill bits in 60 seconds and keep them cutting clean.
Tool Worth Lab provides general DIY information only. Always check for hidden pipes and wires before drilling into walls. When in doubt, consult a qualified professional.
For official specifications, see Bosch’s official site.
For official specifications and support documentation, see DeWalt’s official site.
Pingback: What Size Drill Bit for a 5/16" Concrete Anchor? (Full Size Chart) - Tool Worth Lab