
Your car will not start. The outlet is dead. The fairy lights gave up halfway through the string — and the electrician’s quote for coming out to look at it is more than the gadget that would have told you the answer in ten seconds. That gadget is a multimeter, it costs less than a takeaway dinner, and the only reason it still sits in its packaging is that nobody ever explained the dial in plain English. Until now.
Forget the manual — this guide treats the multimeter like what it is: three simple questions with numerical answers. Is there power? Is this connected? Is this component good? Learn those three, and the safety habits that keep every test uneventful, and you will never guess at an electrical problem again.
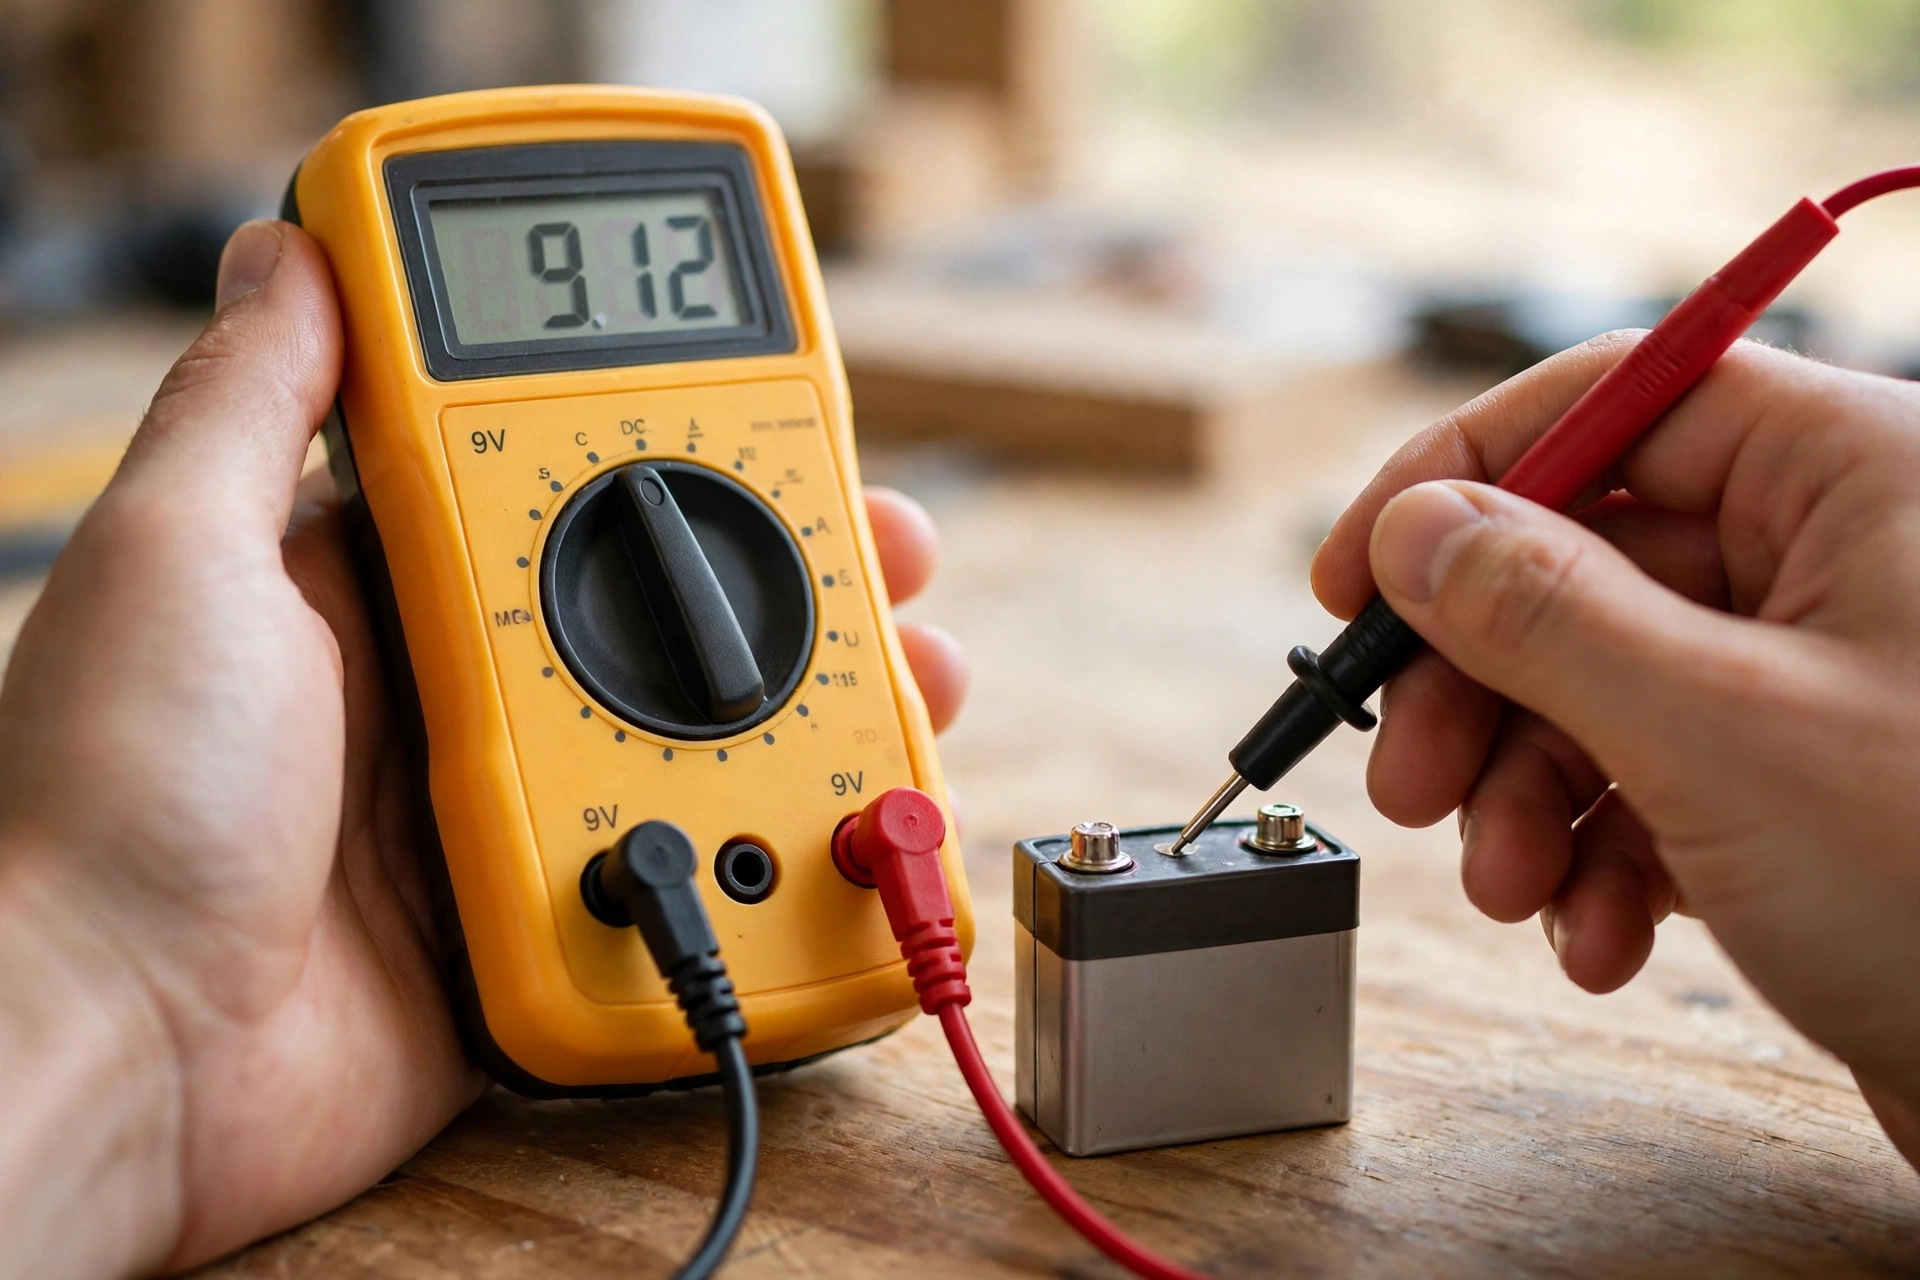
Safety first: Electricity can kill — this isn’t boilerplate. Never measure current on a live circuit until you understand the meter’s fuse limits (beginners: don’t measure current at all — voltage, continuity, and resistance cover 95% of needs). Always start on the highest range and work down. Keep fingers behind the probe guards. If you’re unsure about a measurement, stop and learn before proceeding.
The 30-second orientation
A basic digital multimeter has:
- Display: shows the reading. (Autoranging meters choose the range automatically — buy one of these; they’re $20–$30 and eliminate the most confusing part.)
- Dial: selects what to measure — voltage (V), current (A), resistance (Ω), continuity (sound wave symbol).
- Two probes: black goes in COM (common — always), red goes in the jack matching what you’re measuring (VΩ for voltage/resistance/continuity).
- Leads: the wires. Keep them intact — damaged leads are a shock hazard.
Which multimeter to buy: an autoranging digital multimeter ($20–$35) from a reputable brand. Autoranging eliminates manual range selection (the #1 beginner confusion). You don’t need True RMS, Bluetooth, or 10,000 counts — you need reliable basic measurements.
Skill 1: Measuring voltage (is there power?)
The most-used skill — “is this outlet live?”, “is this battery dead?”, “is power reaching this point?”
How: 1. Black probe in COM, red probe in VΩ. 2. Dial to voltage — V~ (AC, wavy line) for household outlets, V⎓ (DC, solid/dashed line) for batteries and electronics. 3. Touch the probes to the two points (outlet slots, battery terminals). Polarity doesn’t matter for the reading (reversed just shows a minus sign). 4. Read the display.
What the numbers mean: – Household outlet: ~120V AC (North America) — if it reads 0, the outlet’s dead (check the breaker). – Car battery: ~12.6V DC = healthy; below 12.0V = discharged; below 10V under load = failing. – AA battery: 1.5V DC new; below 1.2V = replace.
The golden rule: measure voltage with the circuit powered — you’re checking what the electricity is doing. (Continuity and resistance are the opposite — circuit unpowered.)
Skill 2: Testing continuity (is this connected?)
Continuity = “does electricity have a complete path between these two points?” The meter beeps when the path is complete.
How: 1. Probes as above (COM + VΩ). 2. Dial to the continuity symbol (sound waves / diode symbol). 3. Power OFF — always. Testing continuity on a live circuit damages the meter and risks shock. 4. Touch probes to the two points. Beep = connected. No beep = broken path.
What it’s for: – Blown fuses: beep = good, silent = blown. The 10-second fuse test. – Broken wires: test each end — silence means the wire’s broken somewhere. – Switches: beep when ON, silent when OFF — verifies the switch works. – Extension cords: test each conductor end-to-end.
Why it’s magical: it turns invisible electrical problems into a yes/no beep. Half of all “is it broken?” electrical diagnosis is just continuity testing.
Skill 3: Measuring resistance (how much opposition?)
Resistance (ohms, Ω) tells you about components — heating elements, motor windings, sensors.
How: 1. Probes as above, dial to Ω. 2. Power OFF — always (the meter supplies its own tiny test current; external power corrupts the reading and risks the meter). 3. Touch probes across the component. Read the ohms.
What the numbers mean: – Near 0 Ω: a short / direct connection (normal for a wire, bad across a component that should have resistance). – OL (overload): infinite resistance = open circuit = broken (a heating element reading OL is dead). – Specific values: compare to the spec — a 1500W/120V heater element should read ~10Ω (R = V²/P). Way off = failing.
Practical uses: testing heating elements (water heater, dryer, toaster), checking motor windings, verifying resistors in electronics.
Bookmark This Chart — Multimeter Dial Settings at a Glance — Keep This Handy
Every dial symbol on your meter answers a different question. Memorize this row of five and you’ll never guess a setting again — screenshot it for the toolbox.
| Dial symbol | What it measures | Your typical home use | Circuit power |
|---|---|---|---|
| V~ (wavy line — AC voltage) | Alternating current voltage, ~120 V (North America) / ~230 V (most other countries) | Is this outlet live? Is power reaching this fixture? | ON |
| V⎓ (solid/dashed line — DC voltage) | Direct current voltage — car battery 12.6 V = healthy, below 12.0 V = discharged; AA battery 1.5 V = new, below 1.2 V = replace | Is this car battery healthy? Are these AA batteries dead? | ON |
| Continuity (sound-wave/diode symbol) | Complete electrical path — beep = connected, silence = broken | Blown fuses (beep = good), broken wires, switches, extension cords | OFF — always |
| Ω (resistance) | Opposition in ohms — near 0 Ω = short, OL = open/broken (a heating element reading OL is dead) | Water heater, dryer, toaster heating elements; motor windings; resistors in electronics | OFF — always |
| A / mA (current — skip as a beginner) | Current in series with the circuit — mistakes blow the meter’s fuse or worse | Not for DIY basics — voltage, continuity, and resistance answer nearly every home question | Special rules — leave this one alone |

Keep This Chart Handy — What Your Reading Actually Means
Knowing which dial to turn is half the job — the other half is knowing what the number on the screen is trying to tell you. Every reading below comes from the three skills taught in this guide.
| What you measured | The reading | What it means | Your next step |
|---|---|---|---|
| Household outlet (V~) | ~120 V AC (North America) | Power is present | Carry on — the outlet is live |
| Household outlet (V~) | 0 V | The outlet is dead | Check the breaker |
| Car battery (V⎓) | ~12.6 V DC | Healthy | Nothing to do |
| Car battery (V⎓) | Below 12.0 V | Discharged | Charge it; a load test at an auto parts store settles good vs bad |
| Car battery (V⎓) | Below 10 V under load | Failing | Plan a replacement |
| AA battery (V⎓) | 1.5 V DC | New | Keep using it |
| AA battery (V⎓) | Below 1.2 V | Spent | Replace it |
| Continuity (power OFF) | Beep | Complete path — connected | Fuse is good, wire is intact, switch works when ON |
| Continuity (power OFF) | Silence | Broken path | Fuse is blown, wire is broken somewhere, or switch is OFF |
| Resistance (power OFF) | Near 0 Ω | A short / direct connection | Normal for a wire; bad across a component that should have resistance |
| Resistance (power OFF) | OL (overload) | Infinite resistance — open circuit | The component is broken (a heating element reading OL is dead) |
| Heating element (power OFF) | ~10 Ω for a 1500 W / 120 V heater (R = V²/P) | Matches spec | Element is fine; way off means it is failing |
Remember the golden rule behind every row: measure voltage with the circuit powered; measure continuity and resistance with the circuit unpowered — always.
Print This Before You Test — The 60-Second Probe Setup Checklist
Run through this list before the probes touch anything. Every item comes from the safety and setup guidance in this guide — screenshot it and keep it with the meter.
- Black probe in COM, always; red probe in the VΩ jack for voltage, continuity, and resistance tests.
- Fingers behind the probe guards, every single test, no exceptions.
- Inspect the leads first: cracked insulation, exposed wire, or loose probes means replace the leads before testing.
- Voltage tests use a powered circuit; continuity and resistance tests use an unpowered circuit, always.
- Manual-ranging meter? Start on the highest range and work down. Autoranging meters choose the range for you.
- If you are unsure about a measurement, stop and learn before proceeding — guessing is not testing.
- Leave current measurement alone as a beginner: voltage, continuity, and resistance cover 95% of home needs.
- Mains and panel work needs a CAT III 600V meter at minimum; a no-name meter may not carry real safety ratings.
Keep This Chart Handy — Which Test for Which Problem?
Start from the problem, not the dial. Every row below uses one of the three skills taught in this guide — screenshot it and keep it with the meter.
| Your problem | The test | Dial setting | What a good reading looks like |
|---|---|---|---|
| Dead outlet or dead fixture | Voltage | V~ (AC, wavy line) | ~120 V AC (North America) means power is present; 0 V means the outlet is dead — check the breaker |
| Car will not start, or suspect AA batteries | Voltage | V⎓ (DC, solid/dashed line) | Car battery 12.6 V DC = healthy, below 12.0 V = discharged; AA battery 1.5 V = new, below 1.2 V = replace |
| Blown fuse, broken wire, or a switch that may be dead | Continuity (power OFF, always) | Sound-wave / diode symbol | Beep = connected and good; silence = blown fuse or broken path |
| Heating element not heating (water heater, dryer, toaster) | Resistance (power OFF, always) | Ω | A 1500 W / 120 V heater element should read ~10 Ω; near 0 Ω = short, OL (overload) = open circuit and the element is dead |
| Mystery wire — is it AC or DC? | Voltage | Try V~ first, then V⎓ | Most household wiring is AC; the wrong setting gives wrong readings, usually 0 or garbage |
| Meter suddenly stopped working on one function | Check the fuse | — | Usually blown by attempting current measurement incorrectly — another reason beginners should leave current alone |
The rule behind every row: measure voltage with the circuit powered; measure continuity and resistance with the circuit unpowered — always.
The safety rules (non-negotiable)
- Voltage = power on. Everything else = power off. Measuring resistance or continuity on a live circuit can destroy the meter and hurt you. When in doubt, verify zero voltage first.
- Start high, work down (manual-ranging meters) — or just buy autoranging and skip this.
- Don’t measure current as a beginner. Current measurement puts the meter in series with the circuit (a fundamentally different connection) and mistakes blow the meter’s fuse — or worse. Voltage, continuity, and resistance answer nearly every DIY question.
- Inspect your leads. Cracked insulation, exposed wire, loose probes — replace them. Your life literally depends on the insulation.
- One hand when possible on live circuits — keeps current from crossing your chest in a fault. The old electrician’s rule.
- CAT ratings matter for mains work — a CAT III 600V meter is the minimum for household electrical panels. The $10 no-name meter may not have real safety ratings.
Keep Reading
- Drill Smells Like Burning? Causes and Fixes — a burning smell means something electrical is struggling; your new multimeter skills can help you diagnose what’s going on.
- How to Store Power Tool Batteries So They Last — now that you can measure voltage, check your stored batteries the right way instead of guessing.
- Angle Grinder Sparks Too Much? What’s Normal and What’s Not — electrical troubleshooting meets real tools: know which symptoms are fine and which need a meter.
What’s the difference between AC and DC voltage settings?
AC (V~, wavy line) = household power, outlets, mains wiring — the voltage alternates direction. DC (V⎓, solid/dashed line) = batteries, electronics, automotive — steady one-direction voltage. Wrong setting gives wrong readings (usually 0 or garbage). When in doubt about a mystery wire: try AC first (most household wiring), then DC.
Why does my meter show a small voltage on a dead circuit?
Phantom/ghost voltage — the meter’s high input impedance picks up induced voltage from nearby live wires. It’s not dangerous, just confusing. (Low-impedance mode on better meters eliminates it.) If it reads full line voltage (~120V), it’s actually live — treat it as such.
Can a multimeter test a car battery?
Voltage test: yes — 12.6V+ resting is healthy. But voltage alone doesn’t reveal capacity — a battery can show 12V and still fail under load. For definitive testing, auto parts stores do free load tests. The multimeter tells you “discharged vs charged,” not “good vs bad.”
How do I test if an outlet is wired correctly?
Voltage tests: hot-to-neutral ≈ 120V, hot-to-ground ≈ 120V, neutral-to-ground ≈ 0V. But a $10 outlet tester (plug-in with lights) is faster and clearer for wiring verification — the multimeter is for when you need actual numbers.
My meter has a fuse — when does it blow?
Usually from attempting current measurement incorrectly (probes in the current jack across a voltage source = short circuit through the meter). This is exactly why beginners shouldn’t measure current. If your meter suddenly stops working on one function, check the fuse first.
Analog or digital multimeter?
Digital, always, for beginners — precise readings, no scale interpretation, autoranging available. Analog meters have niche uses (observing trends, some automotive) but require reading a needle against scales — an unnecessary learning curve.
The verdict: the three-skill electrician
| Skill | Power | Answers |
|---|---|---|
| Voltage | ON | Is there power? How much? |
| Continuity | OFF | Is this connected? Is the fuse blown? |
| Resistance | OFF | Is this component good? |
Three skills, one $25 autoranging meter, ten seconds per test. That’s the difference between guessing at electrical problems and knowing. The multimeter stops being intimidating the moment you realize it’s just three questions with numerical answers — and now you know all three.
Tool Worth Lab provides research-based DIY guidance. Electricity can kill — never measure resistance or continuity on live circuits, inspect your leads before use, and call an electrician for anything beyond basic testing that you’re unsure about.