
Here’s the bit nobody warns you about before your first acrylic project: the sheet can survive being dropped, knocked over, and leaned on all week — then crack in half the second you cut it wrong. Not because plexiglass is fragile, but because it punishes exactly four mistakes, and beginners make at least one of them on every single cut.
The good news? Once you know those four mistakes, cutting plexiglass stops being scary and starts being weirdly satisfying. This guide matches the right method to the exact thickness in your hands — and by the end of it, you’ll be cutting edges so clean they look like they came out of a shop, not your garage.
This guide matches every method to the thickness you’re actually cutting, from a simple score-and-snap on thin sheets to a router edge so clean it looks polished. Follow the method for your sheet, and the material that terrified you becomes the most satisfying one in the shop.
Safety first: Plexiglass shards are sharp — wear eye protection and gloves. Power-cutting acrylic produces fine plastic dust and fumes — work in ventilated areas and wear a dust mask. Never cut PVC-based plastics with heat methods (toxic chlorine gas); plexiglass is acrylic, not PVC, but verify your material if unsure.
The golden rules (all methods)
- Keep the protective film ON while cutting — it prevents scratches and reduces chipping. Peel it after all cutting is done.
- Support the entire sheet — plexiglass cracks from flexing more than from cutting. The sheet must be fully supported on both sides of the cut, right up to the blade.
- Let the tool do the work — pressure causes cracking. Every method below works with light, steady feed.
- Sharp blades only — dull blades grab and crack instead of cutting.
Bookmark This Checklist — The 60-Second Pre-Cut Check
Run through this before every cut. Every item comes from this guide’s golden rules and mistakes section — screenshot it and tape it to the wall.
- Protective film ON? Keep it on while cutting — it prevents scratches that become crack starting points. Peel it only after all cutting is done.
- Sheet fully supported? Support everywhere, on both sides of the cut, right up to the blade. A flexing sheet cracks from vibration before the blade even gets going.
- Blade sharp and fine-toothed? Jigsaw: fine-tooth blade, 10+ TPI, for plastic/laminate. Circular/table saw: fine-tooth plywood/laminate blade, 60+ teeth. Dull or coarse wood blades grab and crack.
- Speed right? Low to medium on the jigsaw, moderate feed on the saw — too fast cracks, too slow melts (melted plastic re-welds behind the blade).
- Sheet at room temperature? Very cold acrylic is more brittle — if it’s been in a freezing garage, let it warm up first.
- Offcut supported? An unsupported offcut snaps off under its own weight at the end of the cut and cracks the edge — roller stand or a helper.
- Safety on? Eye protection and gloves (shards are sharp), dust mask, ventilated area — power-cutting acrylic makes irritant dust and fumes.
Method 1: Score and snap (thin sheets — up to 3/16″)
For thin plexiglass, you don’t need power tools at all.
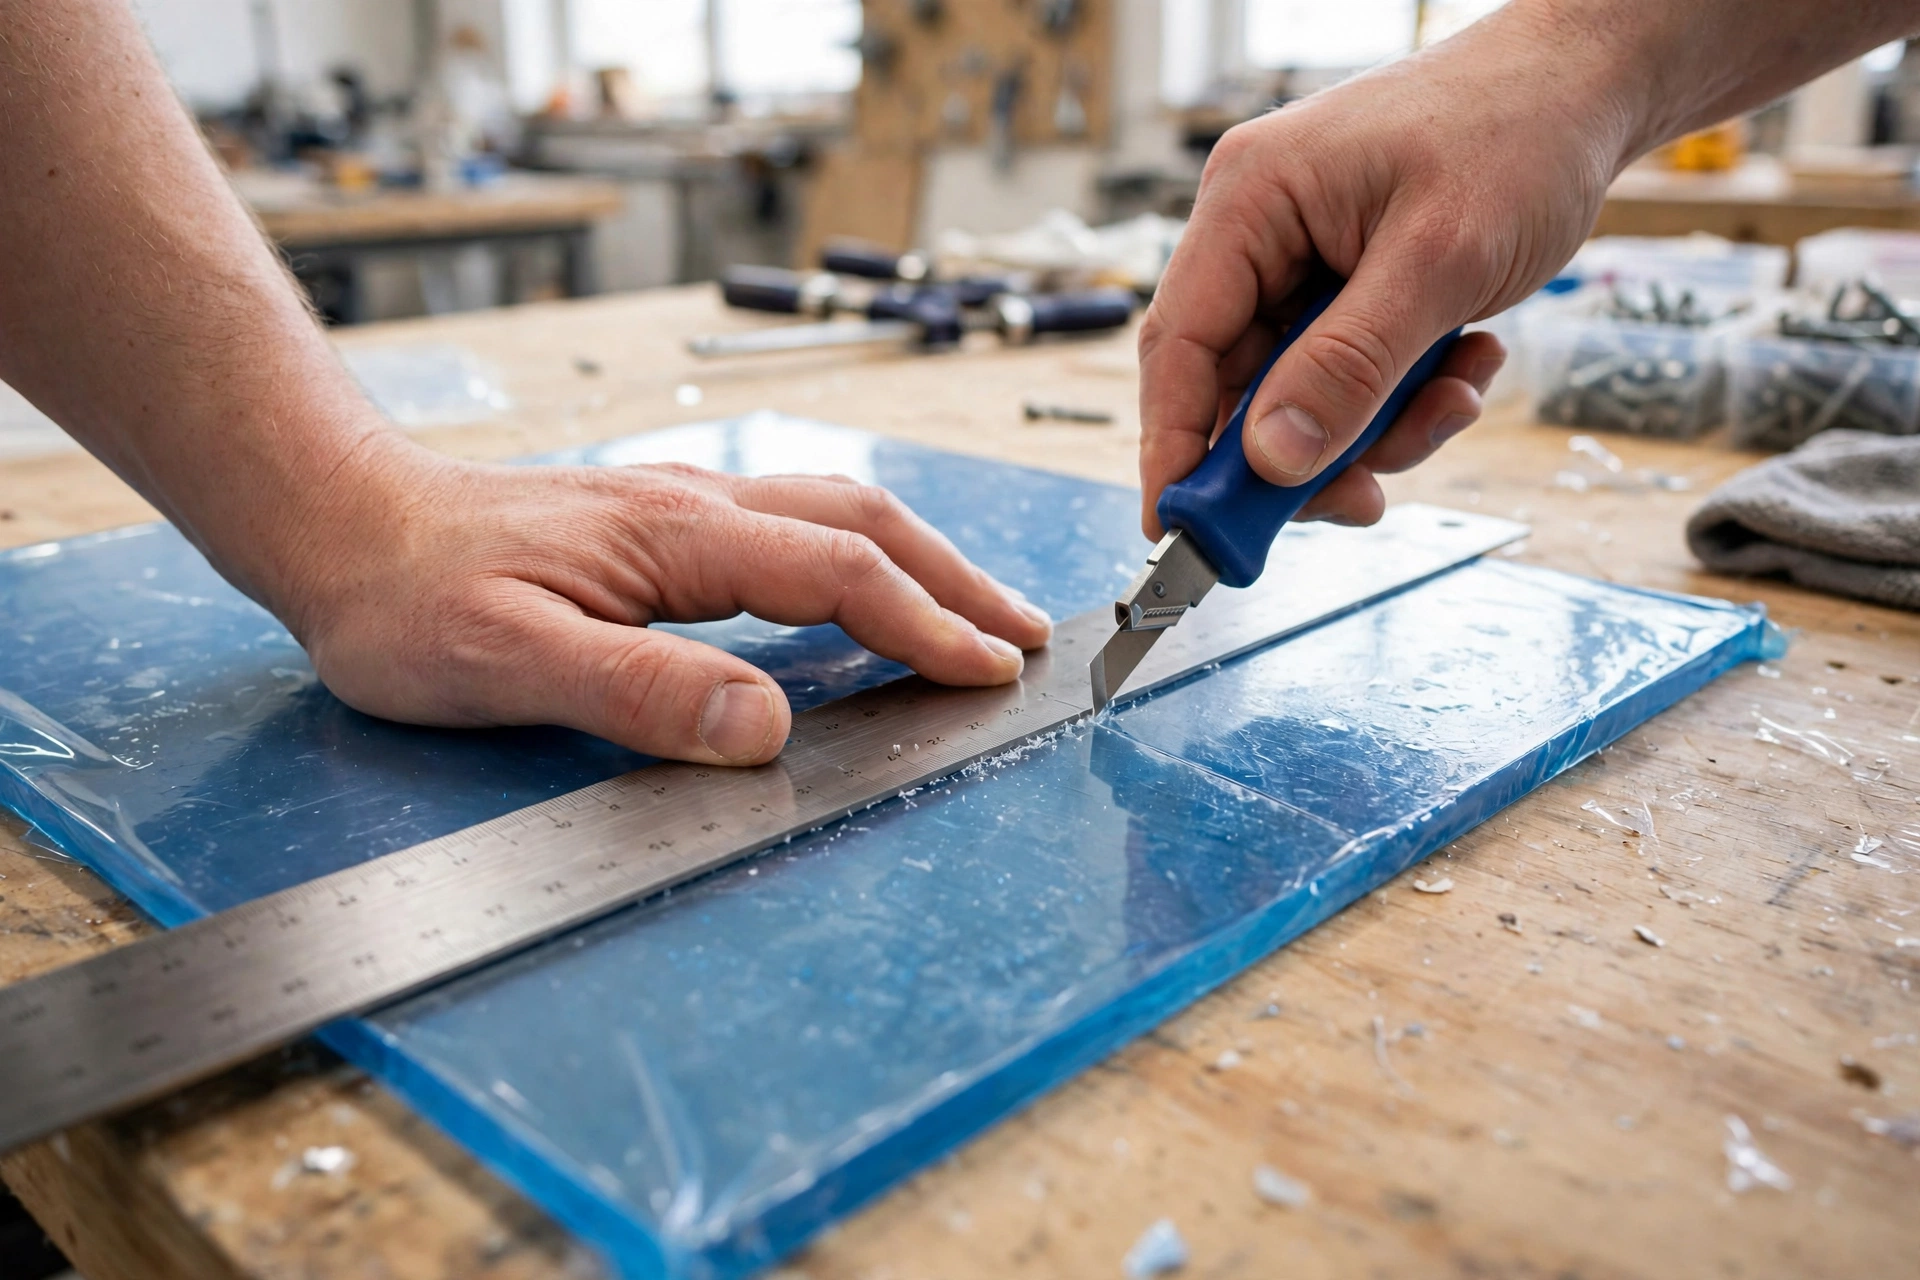
How: 1. Mark your cut line (on the protective film). 2. Clamp a straightedge along the line. 3. Score deeply with a plastic scoring tool or utility knife — 5–10 firm passes, cutting about halfway through the thickness. One light pass won’t do it; you need a real groove. 4. Align the score line with a table edge, hold the waste side down firmly, and snap the overhanging piece upward with sharp, confident pressure.
Why it works: the deep score creates a stress concentration — the sheet wants to break there. A confident snap gives a clean edge; a hesitant one gives a wandering crack.
Best for: straight cuts in sheets up to 3/16″ (4–5mm). The cheapest, quietest, safest method — and the edge quality is excellent for thin stock.
Method 2: Jigsaw (curves + medium thickness)
The go-to for curved cuts and sheets up to ~1/2″.
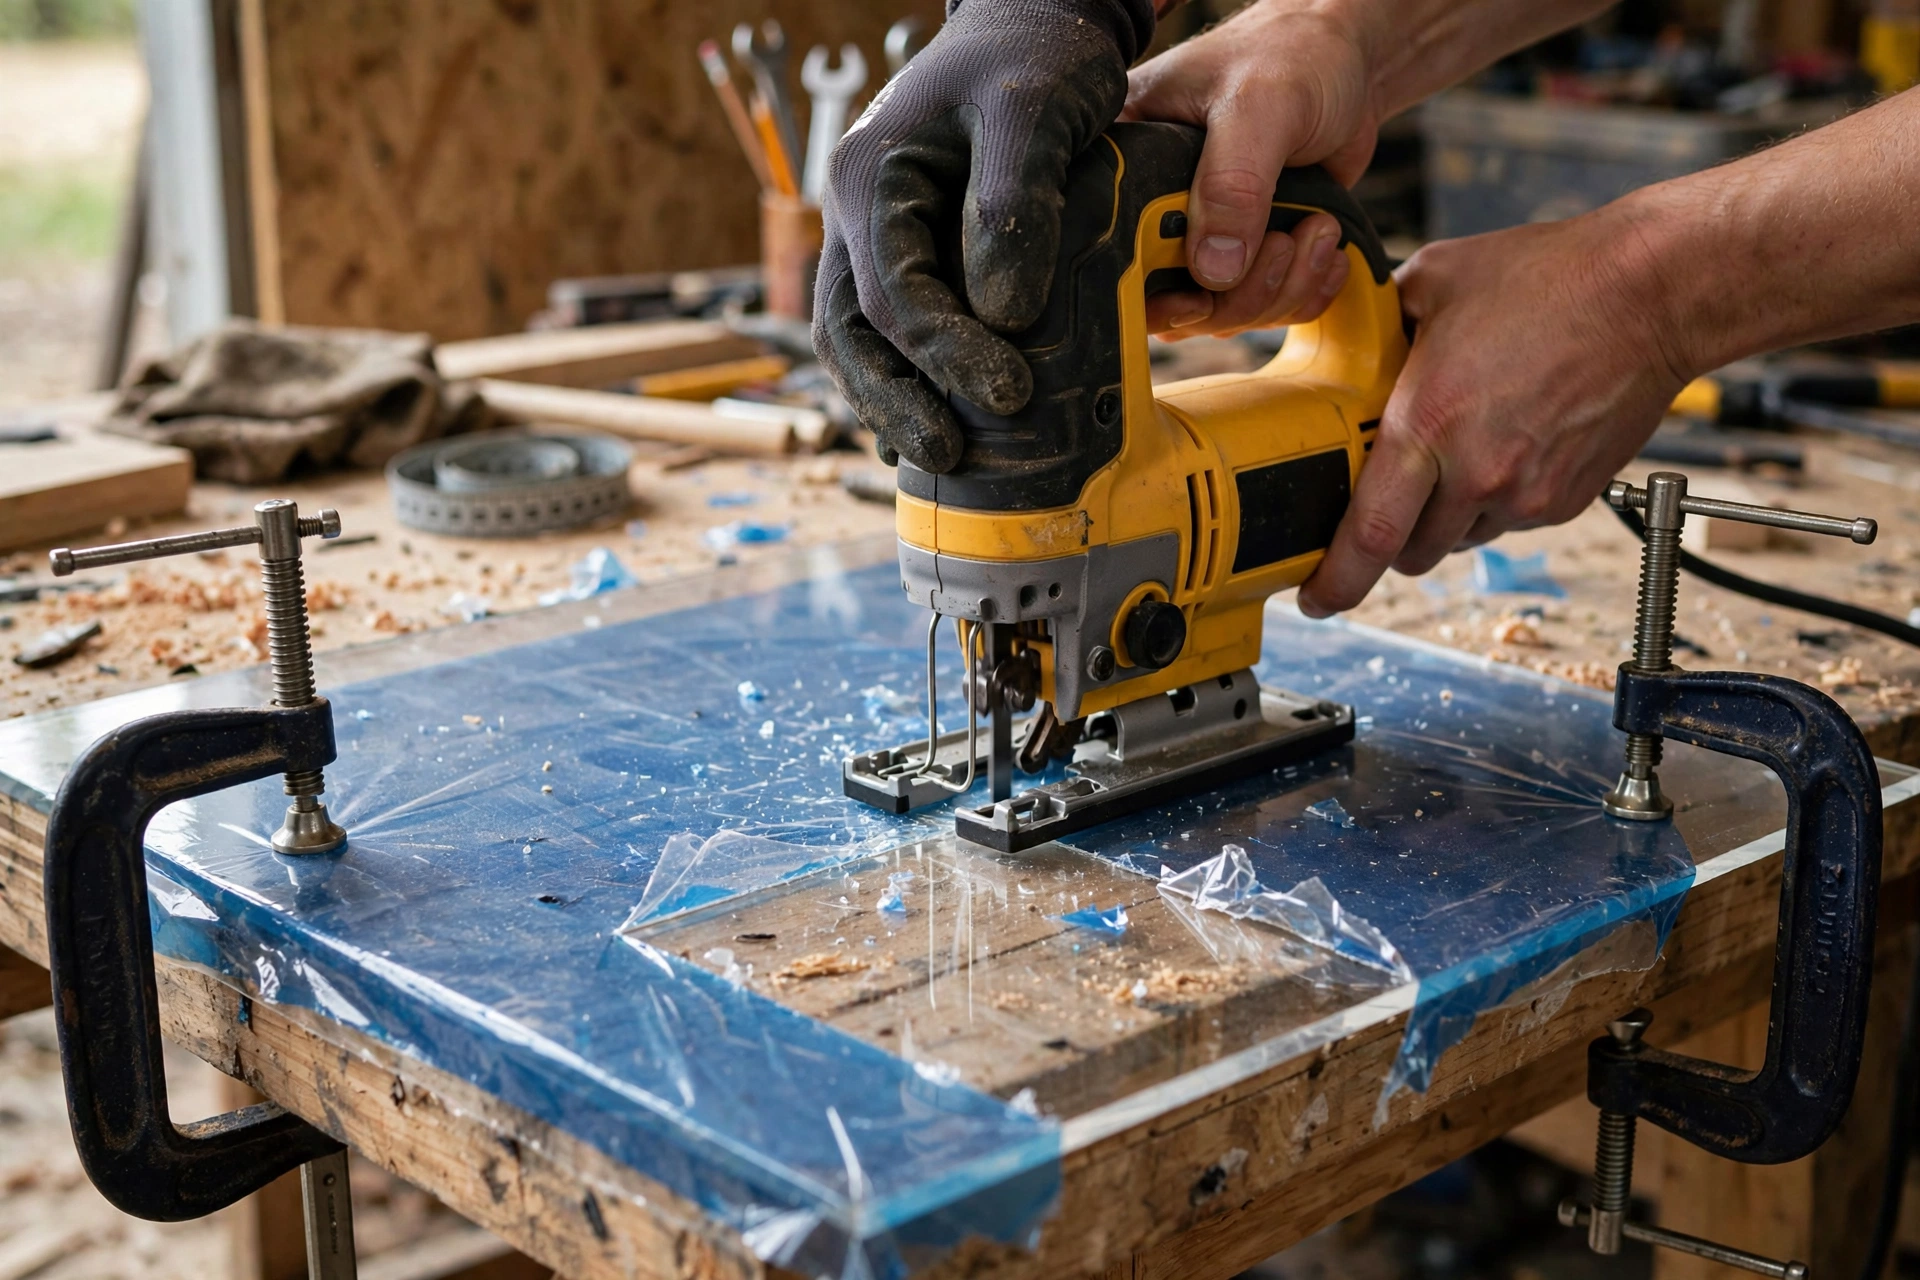
How: – Use a fine-tooth blade (10+ TPI) designed for plastic/laminate — or a metal-cutting blade. Coarse wood blades grab and crack. – Low to medium speed — high speed melts the plastic, which then re-welds behind the blade (gumming it up and cracking the sheet). – Light pressure, steady feed — let the teeth cut; don’t push. – Sandwich technique: clamp the plexiglass between two sheets of thin plywood or hardboard. The sandwich prevents chipping on both faces and supports the sheet fully. This single trick eliminates 90% of jigsaw cracking. – Drill starter holes for interior cutouts — never plunge a jigsaw blade into plexiglass.
Best for: curves, cutouts, and sheets 3/16″–1/2″ where scoring won’t work.
Method 3: Circular saw / table saw (straight cuts, thick sheets)
For thick plexiglass (1/4″+) and long straight cuts, power saws are fastest — with the right setup.
How: – Blade: fine-tooth plywood/laminate blade (60+ teeth) — or a dedicated plastic-cutting blade. The more teeth, the less each tooth grabs. – Table saw preferred over circular saw — the flat table supports the sheet fully, and the fence guides straight. – Moderate feed rate — too fast cracks, too slow melts. You’ll feel the sweet spot: steady cutting without laboring. – Zero-clearance insert on the table saw — prevents the sheet from dropping into the blade slot and cracking. – Support the offcut — an unsupported offcut piece snaps off under its own weight at the end of the cut, cracking the edge. Roller stand or a helper.
Best for: long straight cuts in 1/4″–1″ sheets. Production-style cutting.
Method 4: Router (cleanest edges)
A router with a flush-trim or straight bit produces the cleanest cut edges of any method — nearly polished.
How: – Clamp a straightedge as a guide (or use a template + flush-trim bit). – Climb-cutting is actually preferred here (unlike wood) — feeding with the bit rotation on acrylic reduces chipping. Take light passes. – Multiple shallow passes for thick sheets. – Router basics here if you’re new to the tool.
Best for: finish-quality edges, template work, and situations where the edge will be visible.
Method 5: Laser cutter (if you have access)
Makerspaces and fab labs have them — lasers cut acrylic beautifully with flame-polished edges. Not a home method for most, but worth knowing: if your cut needs to be perfect and you have access, this is the answer.
Thickness guide: which method when
| Thickness | Best method | Also works |
|---|---|---|
| Up to 1/8″ (3mm) | Score and snap | Jigsaw |
| 3/16″ (4–5mm) | Score and snap (deep score) | Jigsaw |
| 1/4″ (6mm) | Jigsaw (sandwich) | Table saw, router |
| 1/2″ (12mm) | Table saw / router | Jigsaw (slow) |
| 3/4″+ (18mm+) | Table saw / router (multiple passes) | — |
| Curves (any thin–medium) | Jigsaw (sandwich) | Router + template |
| Best edge quality | Router | Laser |
Keep This Chart Handy — Blade & Speed Cheat Sheet: Every Method at a Glance
Screenshot this before you pick up a blade: the right blade and the right speed for every method in this guide — get these two right and cracking mostly takes care of itself.
| Method | Best for | Blade | Speed & feed |
|---|---|---|---|
| Score and snap | Straight cuts, up to 3/16″ (4–5 mm) | Plastic scoring tool or utility knife | 5–10 firm passes, scoring about halfway through; snap with sharp, confident pressure |
| Jigsaw | Curves and cutouts, 3/16″–1/2″ (4–5 mm to 12 mm) | Fine-tooth blade, 10+ TPI, for plastic/laminate — or a metal-cutting blade | Low to medium speed; light pressure, steady feed — high speed melts the plastic |
| Circular / table saw | Long straight cuts, 1/4″–1″ (6–25 mm) | Fine-tooth plywood/laminate blade, 60+ teeth | Moderate feed — too fast cracks, too slow melts |
| Router | Finish-quality edges, template work | Flush-trim or straight bit | Light passes; climb-cutting is preferred on acrylic (unlike wood) |
| Laser cutter | Perfect edges, if you have access | No blade — laser beam | Makerspaces and fab labs; flame-polished edges |
The mistakes that crack plexiglass
- Inadequate support — the #1 cause. A flexing sheet cracks from vibration before the blade even gets going. Support everywhere, especially near the cut.
- Dull or wrong blade — coarse wood blades grab. Dull blades push instead of cut. Both crack.
- Too much pressure — forcing the cut stresses the sheet. Light, steady feed always.
- High speed melting — melted plastic re-welds, gums the blade, and the thermal stress cracks the sheet. Slow down.
- Removing the protective film early — the film prevents surface scratches that become crack initiation points. Leave it on until the very end.
- Cold plexiglass — very cold acrylic is more brittle. If the sheet’s been in a freezing garage, let it warm to room temperature before cutting.
Keep This Chart Handy — Plexiglass Rescue Chart: What Went Wrong
Something already went wrong? Find it below. Every fix uses only the methods in this guide — score-and-snap for sheets up to 3/16″ (4–5 mm), jigsaw for curves, table saw or router for 1/4″ (6 mm) and up.
| What happened | Why | Fix |
|---|---|---|
| Crack runs along the cut line | Sheet flexed — support was missing near the cut | Support fully on both sides of the cut, right up to the blade |
| Edge melts and re-welds behind the blade | Speed too high, feed too slow | Jigsaw on low to medium speed; saw at a moderate feed — too fast cracks, too slow melts |
| Chipped or scratched faces | Protective film peeled off early, or no sandwich | Keep the film on until all cutting is done; for jigsaws, clamp the sheet between two sheets of thin plywood or hardboard |
| Snap wanders off the line | Score too shallow | Score deeply — 5–10 firm passes, about halfway through the thickness — then snap with sharp, confident pressure |
| Rough or sharp cut edge | Edge left unfinished | Scrape with a utility knife held perpendicular, then sand 220 → 400 → 600+ grit wet; flame polish or buff with plastic polish for display edges |
| Cracks on a cold morning | Very cold acrylic is more brittle | Let a sheet from a freezing garage warm to room temperature first |
Finishing the edge
Cut edges are sharp and often slightly rough. Finish them:
- Scrape with a utility knife blade held perpendicular — removes the roughest marks.
- Sand progressively: 220 → 400 → 600+ grit wet sanding for smooth edges.
- Flame polish (advanced): a quick pass with a propane torch melts the edge smooth and clear. Practice on scrap first — too slow and it bubbles, too fast and nothing happens. Impressive results when done right.
- Buff with plastic polish for optical clarity on display edges.
Drilling holes in plexiglass without cracking it
Cutting plexiglass gets all the attention, but drilling it is where most sheets actually crack — usually on the very last hole, when you are almost done and stop being careful. The rules are different from wood, and they matter more than the drill you use.
First, never use a standard twist bit straight out of the pack. Its aggressive tip grabs the acrylic and pulls itself through, which is exactly how cracks start. Use a bit ground for plastic, or take a standard bit and dull its cutting edge slightly on a sharpening stone until it scrapes more than it bites. Second, always clamp the sheet to a sacrificial backing board and drill through both — the backing supports the exit side, where blowout happens. Third, tape both faces over the hole location with masking tape; it reduces chipping at entry and gives your mark something to grip.
Run the drill at moderate speed with light, steady pressure, and back the bit out every few seconds to clear chips. Heat is the enemy: a hot bit melts the acrylic, which then grabs the bit and cracks on cooling. For holes larger than 1/4 inch, step up in stages or use a step bit, and never force it. A hole drilled slowly with a sharp-for-plastic bit looks factory-clean. A hole drilled fast with a wood bit looks like a spiderweb and cannot be undone.
Why did my plexiglass crack even though I was careful?
Almost always inadequate support (the sheet flexed) or a dull/wrong blade. Re-examine those two before blaming the material. Also check: was the protective film on? Was the sheet cold?
Can I drill holes in plexiglass?
Yes — with a brad-point or plastic-specific bit, low speed, light pressure, and a backer board underneath. Standard twist bits can grab and crack on breakthrough — back the hole and ease off at the end. Step bits work beautifully in thin acrylic.
What’s the difference between plexiglass, acrylic, and Lexan?
Plexiglass is a brand name for acrylic (polymethyl methacrylate). Lexan is a brand name for polycarbonate — a different plastic that’s virtually unbreakable (250x stronger than glass) but scratches easier and costs more. This guide covers acrylic; polycarbonate is more forgiving to cut (less crack-prone) but gums blades faster.
Can I cut plexiglass with a utility knife alone?
For thin sheets (1/8″ and under): yes, that’s the score-and-snap method. For thicker: the knife can’t score deep enough for a clean snap. Don’t try to “cut through” thick acrylic with a knife — you’ll just scratch it.
How do I glue plexiglass?
Weld-On / acrylic cement (solvent welding) — it chemically melts the joint for an invisible, incredibly strong bond. Not glue — it’s a solvent. Apply with a needle applicator, hold briefly, done. Regular super glue works for quick fixes but the joint is visible and weaker.
Is cutting plexiglass toxic?
Acrylic dust and fumes from power cutting are irritants — ventilate and wear a mask. It’s not in the same danger category as PVC (which releases chlorine gas when heated), but “irritant” still means “don’t breathe it.” Outdoor or ventilated cutting, always.
The verdict
Plexiglass doesn’t crack randomly — it cracks from flexing, dull blades, wrong speeds, and impatience. Support the sheet fully, use sharp fine-tooth blades, feed lightly and steadily, and keep the film on until you’re done.
For thin sheets: score and snap. For curves: jigsaw with the sandwich trick. For thick straight cuts: table saw with a fine blade. For perfect edges: router. Match the method to the thickness, respect the golden rules, and the material that terrified you becomes one of the most satisfying to work with.
Keep Reading
- How to Use a Scroll Saw (The Beginner’s Guide)
- Jigsaw vs Circular Saw: Which Should You Buy First?
- How to Use a Router for Beginners (The No-Fear Guide)
Tool Worth Lab provides research-based DIY guidance. Always wear eye protection and a dust mask when cutting acrylic — the shards are sharp and the dust is an irritant. Verify your plastic type before using heat methods.