
Here is a fun fact about your basement: the water down there is patient. It will wait months — years, even — for the one night your pump gives up, and it always picks the same night: the biggest storm of the year, the power flickering, the backup battery you meant to test sitting there dead since last spring.
The good news? Beating it is almost insultingly simple. One dry afternoon, one bucket of water, and the seven steps in this guide — pick the right pump, cut the pit, run the pipe, wire it safely, and test it like your dry basement depends on it. Because it does. Let us make your sump pump the most boring, reliable thing in your house.
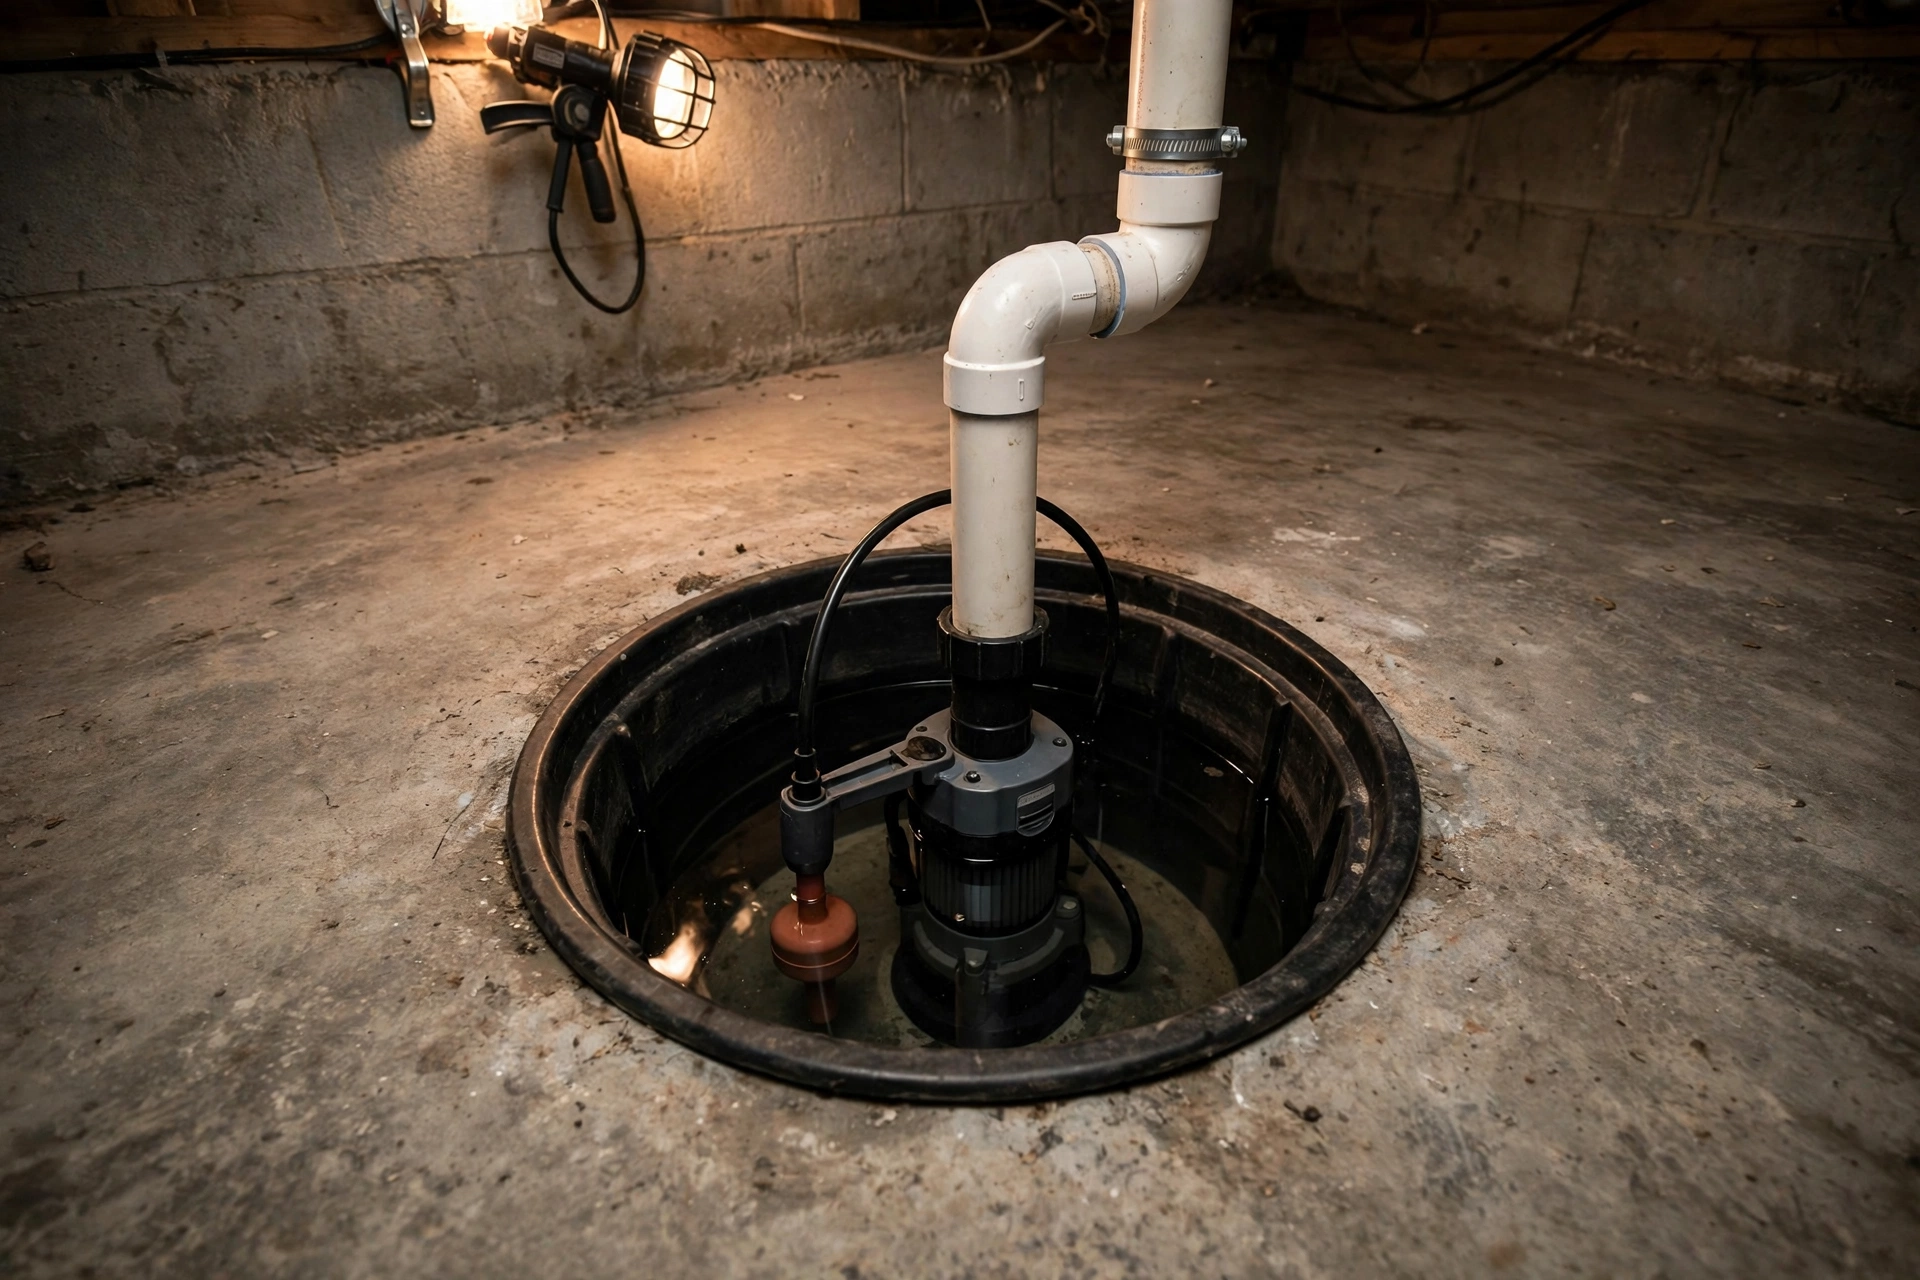
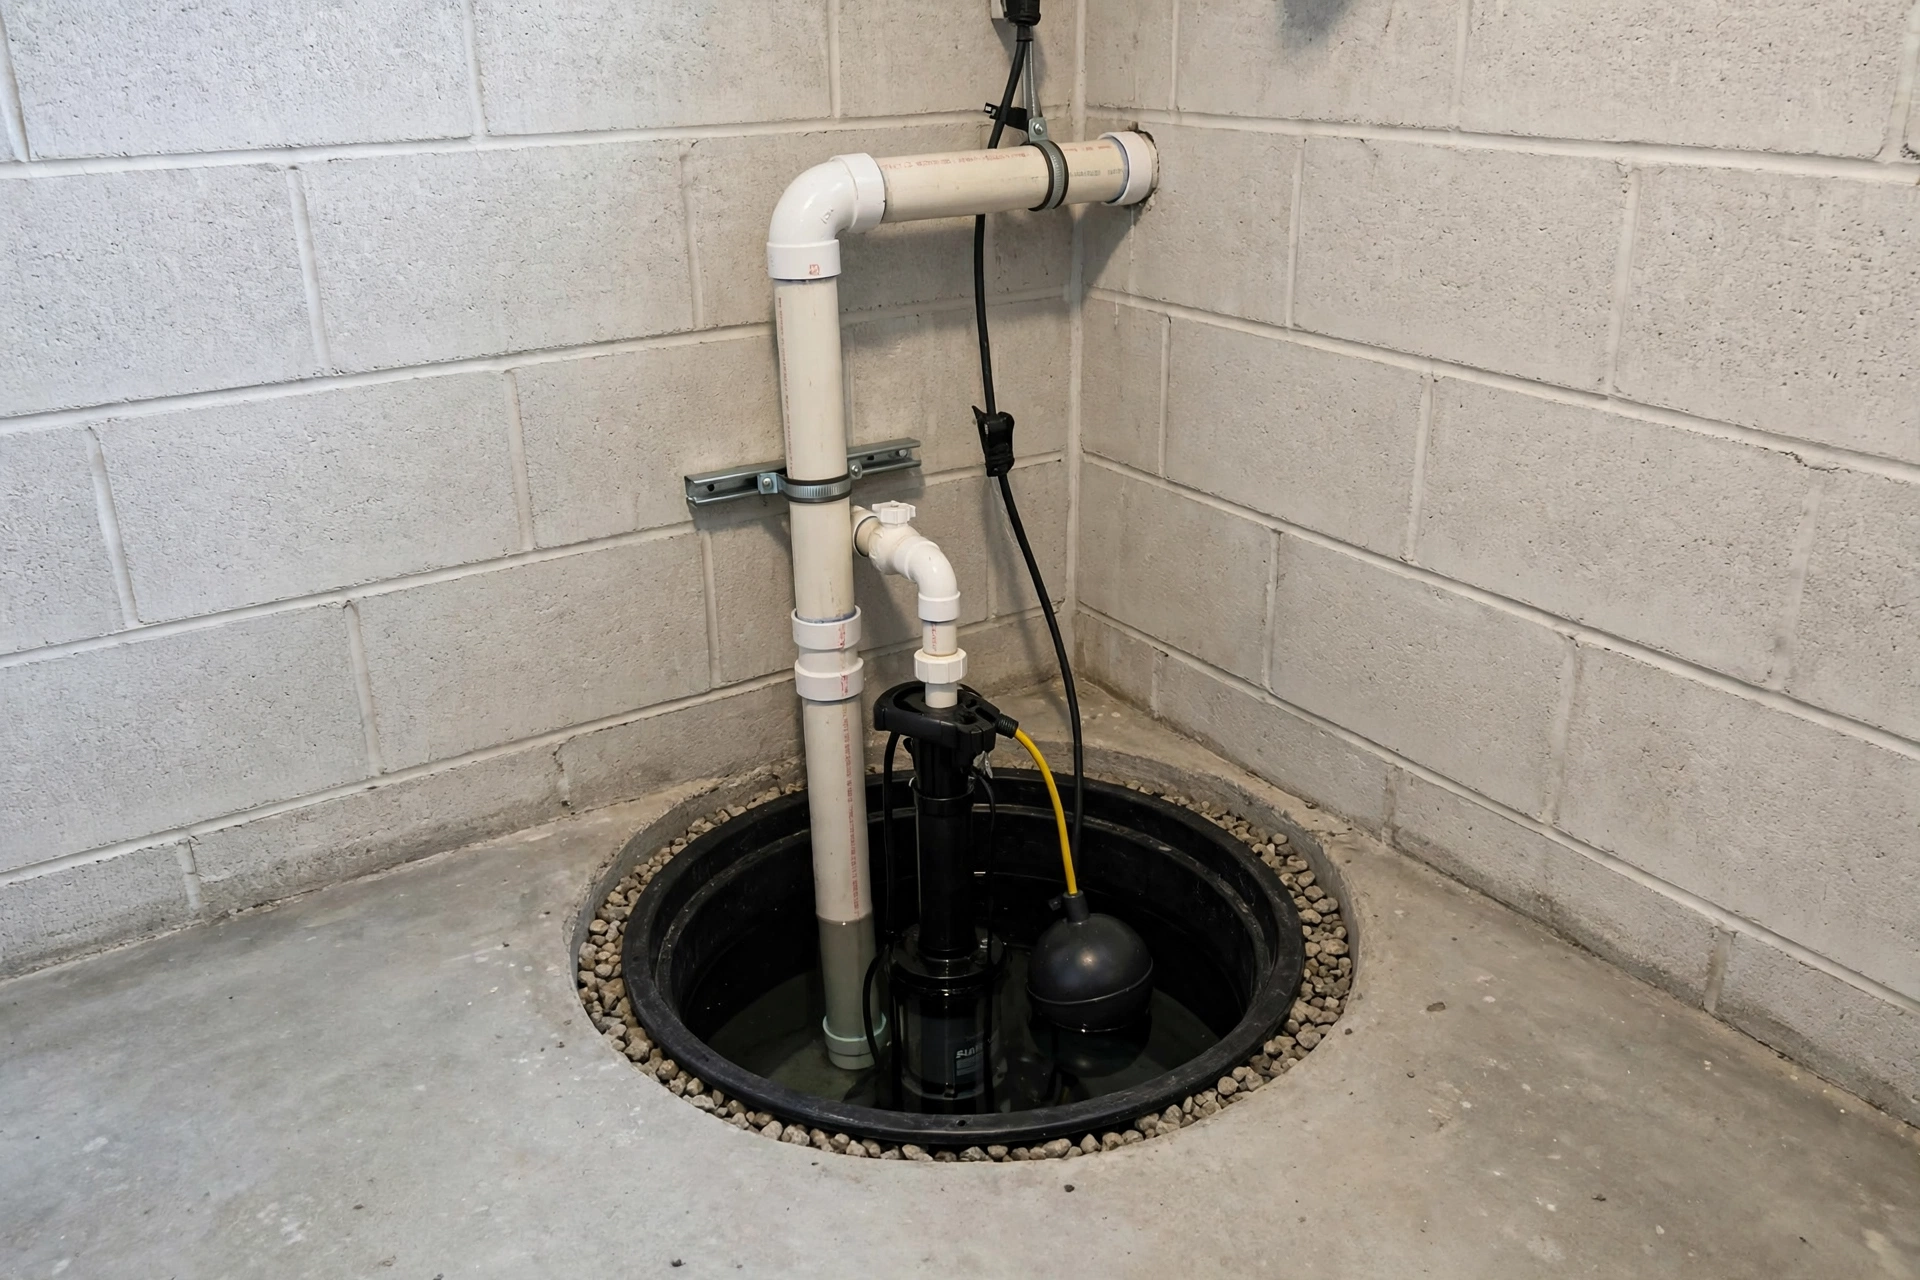
Safety first: Electrical near water — GFCI protection is mandatory, never work on the pump while powered. Pit excavation: call 811 (utilities under the slab). Concrete dust = silica hazard (P100 respirator for cutting the slab).
Do you need a sump pump?
Signs you do: – Water in the basement (any amount, any frequency). – Efflorescence on walls (white mineral deposits — water migrating through concrete). – Musty smell / mold (moisture problem). – High water table area (neighbors have pumps — you likely need one). – Finished basement (the stakes — water damage to finished space is catastrophic).
The rule: if water has ever entered, it will again. A sump pump is prevention, not reaction.
Pump selection
Types
| Type | Pros | Cons |
|---|---|---|
| Submersible | Quieter, handles debris, longer life | More expensive |
| Pedestal | Cheaper, easier to service (motor above water) | Louder, shorter life |
Submersible is the standard for primary pumps (quieter, more reliable, handles the real conditions).
Sizing
- 1/3 HP: standard residential (most basements).
- 1/2 HP: high water table, larger basements, faster pumping needed.
- Capacity: measured in GPH (gallons per hour) at your head height (the vertical lift to the discharge). Match the pump’s curve to your actual lift.
Don’t oversize dramatically — an oversized pump short-cycles (frequent on/off wears the switch). Right-size for the water volume.
Switch types
- Tethered float: the classic (adjustable, reliable, needs pit width for the tether swing).
- Vertical float: compact (for narrow pits).
- Electronic/diaphragm: no moving float (most reliable long-term, premium price).
The switch is the failure point — more pumps “fail” from stuck switches than dead motors. Quality switch = reliable pump.
The backup (non-negotiable)
Power outages coincide with the heaviest rains (storms cause both). A sump pump without backup fails exactly when needed most.
Backup options
| Type | How it works | Pros | Cons |
|---|---|---|---|
| Battery backup | 12V battery + secondary pump | Automatic, works in any outage | Battery needs maintenance/replacement |
| Water-powered | Municipal water pressure drives pumping | No battery, unlimited runtime | Uses drinking water, needs municipal supply |
| Generator | Powers the primary pump | Whole-house benefit | Manual (unless automatic standby) |
Minimum: battery backup system (the standard — automatic, affordable, effective). Ideal: battery backup + generator awareness (for extended outages).
Test the backup twice yearly (maintenance calendar) — a dead backup battery is the same as no backup.
Tools needed
| Tool | For |
|---|---|
| Concrete saw or jackhammer (rented) | Cutting the slab for the pit |
| Shovel | Excavating the pit |
| Drill/driver | Mounting, connections |
| PVC cutter / hacksaw | Discharge pipe |
| Level | Pit and pipe slope |
| Tape measure | Layout |
Installation (step by step)
1. Location
- The lowest point of the basement (water flows there naturally).
- Near an exterior wall (shortest discharge path).
- Near power (GFCI outlet — dedicated circuit recommended).
- Away from the furnace/water heater (don’t flood the mechanicals to save the basement).
2. Cut the pit
- Mark the basin outline (typically 18–24″ diameter).
- Call 811 — utilities may run under the slab.
- Cut the concrete (concrete saw — silica precautions: wet cut + P100).
- Excavate 24–30″ deep (below the slab, into the subgrade).
- Radon consideration: if your area has radon, the pit needs a sealed cover (the pit is a radon entry point — sealed lid + vented).
3. Set the basin
- Gravel base (6″ — drainage under and around the basin).
- Set the perforated basin (holes allow groundwater in).
- Surround with gravel (water flows through gravel to the basin).
- Level the basin rim with the floor.
4. Install the pump
- Set the pump in the basin (on a paver or stand — not directly on gravel/silt).
- Attach the check valve (on the discharge pipe, above the pump — prevents backflow when the pump stops).
- Check valve orientation matters (arrow pointing up/away — get it backwards and the pump can’t discharge).
5. Discharge pipe
- 1.5″ PVC typical (sized to the pump’s outlet).
- Route to the exterior — through the rim joist (not through the foundation wall below grade if avoidable).
- Slope: the exterior portion should drain away (no low spots where water sits and freezes).
- Discharge location: 10–20 ft from the foundation (not next to the house — that just recycles the water).
- Freeze protection: the exterior pipe must drain fully (no traps where water sits and freezes solid in winter).
6. Electrical
- Dedicated GFCI circuit (recommended — not shared with other loads).
- The outlet should be above potential flood level (not on the floor).
- Never use an extension cord as permanent power (it’s a code violation and a failure point).
7. Test
- Fill the pit with water (bucket or hose).
- Verify the pump activates (at the correct level).
- Verify discharge (water exits at the discharge point, not leaking from joints).
- Verify the check valve (pump stops → no significant backflow).
- Test the backup system (unplug the primary — the backup should engage).
Print This Before You Install — Discharge Pipe Checklist
- Use 1.5 in (about 38 mm) PVC as the typical discharge pipe size, sized to the pump’s outlet.
- Route the discharge pipe to the exterior through the rim joist, not through the foundation wall below grade if that route can be avoided.
- Slope the exterior portion so it drains away from the house, with no low spots where water sits and freezes.
- Discharge the water 10–20 ft (about 3–6 m) from the foundation — discharging next to the house just recycles the same water back against the wall.
- Keep the discharge away from neighbors’ yards, and check local code first, since some municipalities regulate whether discharge goes to a storm drain or to daylight.
- Make sure the exterior pipe drains fully between pump cycles: any trapped water freezes and blocks the pipe, and then the pump runs against a blocked pipe and burns out.
- Test the discharge at installation: fill the pit with water, verify water exits at the discharge point with no leaks from joints, and verify the check valve allows no significant backflow when the pump stops.
Discharge details (the commonly botched part)
- Away from the house (10–20 ft minimum — discharging next to the foundation recycles the water).
- Away from neighbors (don’t flood their yard — it’s your water to manage).
- Check local code (some municipalities regulate discharge location — storm drain vs daylight).
- Freeze-proofing: the pipe must drain completely between cycles (any trapped water freezes and blocks the pipe — then the pump runs against a blocked pipe and burns out).
Maintenance (the twice-yearly ritual)
- Test: pour water in the pit — verify activation, pumping, and shutoff.
- Clean: remove debris/silt from the basin (it clogs the pump intake).
- Check valve: verify it’s functioning (listen for backflow when the pump stops).
- Backup battery: check charge, test the backup pump, replace battery every 3–5 years.
- Discharge: verify the exterior outlet is clear (ice in winter, debris in summer).
- GFCI: test the outlet (monthly — it’s the power lifeline).
The Twice-Yearly Sump Pump Check — Keep This Checklist Handy
- Test the pump: pour water into the pit and verify the pump activates, pumps, and shuts off as it should.
- Clean the basin: remove debris and silt from the basin so the pump intake cannot clog.
- Check the valve: verify the check valve is functioning by listening for backflow when the pump stops.
- Test the backup: check the backup battery charge, test the backup pump, and replace the battery every 3–5 years.
- Clear the discharge: verify the exterior discharge outlet is clear — ice in winter, debris in summer.
- Test the GFCI outlet: test the GFCI outlet monthly, since it is the power lifeline for the pump.
Sizing the pump: the GPM math in two minutes
Most sump pump failures are not mechanical — they are sizing mistakes. A pump that is too small runs constantly and burns out during the storm that matters most. A pump that is far too big short-cycles, clicking on and off every few seconds, which wears out the switch just as fast. Getting the size right takes two minutes of honest math.
Start with inflow: during the heaviest rain you have seen, time how fast water enters the pit. Bail it down to the pump’s turn-on level, then time how long it takes to rise one inch. A standard 18-inch diameter pit holds roughly 1.1 gallons per inch of depth, so if it rises an inch in 60 seconds, your inflow is about 1.1 gallons per minute — but size for the worst storm, not the average one, so double it. Next, measure total dynamic head: the vertical lift from the pump to the discharge point plus roughly one foot of head for every ten feet of horizontal pipe and every elbow. A pump’s rated gallons per minute means nothing without its head rating — a pump rated 3,000 GPH at zero head may deliver half that at ten feet of lift.
Read the pump curve chart on the box, find your head height, and pick a pump whose output at that head is at least double your worst-case inflow. That margin is what keeps the basement dry when the storm of the decade arrives.
7 Sump Pump Mistakes That Flood Basements — Bookmark This Checklist
Most flooded basements are not bad luck — they are one of these seven mistakes, made on installation day and discovered on the wettest night of the year. Check your install against every row before the next storm.
| Mistake | Why it floods you | Do this instead |
|---|---|---|
| Check valve installed backwards | The arrow points the wrong way, so the pump cannot discharge at all | Arrow up and away from the pump — test it: when the pump stops, there should be no significant backflow. |
| Discharging right next to the house | The same water comes straight back against the wall | Discharge 10–20 ft (3–6 m) from the foundation, where it drains away and cannot recycle. |
| Skipping the backup | Storms knock out power exactly when rain is heaviest | Battery backup as a minimum — and test it twice a year, because a dead backup battery is the same as no backup. |
| Buying a pump that is far too big | It short-cycles — clicking on and off every few seconds — and wears out the switch | Right-size it: 1/3 HP covers most basements; 1/2 HP only for a high water table or a larger basement. Match output to your head height on the pump curve. |
| Setting the pump straight on gravel or silt | Silt clogs the intake and the pump chokes | Set it on a paver or stand inside the basin, and clean debris and silt out of the basin twice a year. |
| Powering it with an extension cord | It is a code violation and a failure point — and the outlet may sit at flood level | A dedicated GFCI circuit, outlet above potential flood level, tested monthly. |
| Cutting the slab without calling 811 | Utilities may run under the slab — and in radon areas the open pit becomes a gas entry point | Call 811 first, and fit a sealed lid with the discharge sealed through it if radon is a concern in your area. |
How often should the pump run?
Varies enormously — from rarely (dry seasons) to every few minutes (spring thaw + rain). Constant running indicates high water table (normal for some areas) or an undersized pump / stuck switch (investigate). Never running in a wet area suggests a problem (test it — don’t assume).
Why is my pump running constantly?
High water table (may be normal), check valve failed (water flowing back — the pump re-pumps the same water), float switch stuck, or the discharge is blocked/frozen (pump can’t empty the pit). Diagnose in that order.
Can I install it myself?
The pump and plumbing: yes (straightforward). Cutting the slab: DIY-able with rented tools (but it’s the hard part). Electrical (new circuit): electrician. Many DIYers do the pit and plumbing, hire the electrician for the circuit.
What’s the lifespan?
7–10 years typical for the pump (submersible). Switches often fail first. Budget for replacement on that timeline — and the backup battery every 3–5 years. A 10-year-old pump without backup is a flood waiting for a storm.
Do I need a sealed lid?
If radon is a concern in your area: yes (the pit is a direct path for soil gas). Sealed lid + the pump’s discharge sealed through it. Check your area’s radon zone — the EPA maps are the reference.
What size pit do I need?
18–24″ diameter, 24–30″ deep is standard (fits most pumps with room for the float switch to operate). Bigger pits = less frequent cycling (more water per cycle). Don’t go smaller than the pump + switch clearance requires.
The verdict: the sump pump priorities
- Right location — lowest point, near exterior wall, near power.
- Quality pump + switch — submersible, right-sized, reliable switch (the failure point).
- Check valve — correct orientation (prevents backflow cycling).
- Discharge done right — 10–20 ft from house, freeze-proof drainage, code-compliant location.
- Backup system — battery minimum (power fails when rain is heaviest).
- GFCI dedicated circuit — above flood level, no extension cords.
- Twice-yearly testing — the maintenance calendar ritual.
The sump pump is flood insurance you install once — the pit, the pump, the discharge, the backup. It’s not glamorous, but on the night the storm hits and the power flickers, it’s the hardest-working device in the house. Install it right, back it up, test it twice a year. The dry basement is the reward.
Tool Worth Lab provides research-based installation guidance. Use GFCI protection (mandatory near water), never work on the pump while powered, call 811 before cutting the slab, wear P100 respiratory protection for concrete cutting (silica hazard), install a backup system (power fails during the storms that need pumping most), and consider radon sealing in affected areas.