
Quick Answer: Unplug the saw or remove the battery first — never just switch it off. Then lock the blade, loosen the arbor nut, and fit the new blade with the teeth pointing in the direction of rotation — fitting it backwards is the #1 beginner mistake. Recheck everything before pulling the trigger again.
Somewhere between the wrench slipping and the nut refusing to budge, most people have the same thought: surely swapping a blade should not feel this dramatic. It should not — and once you know the four gotchas hiding in this five-minute job, it never will again. The blade is sharp, yes, but the real danger is not the teeth. It is the skipped step.
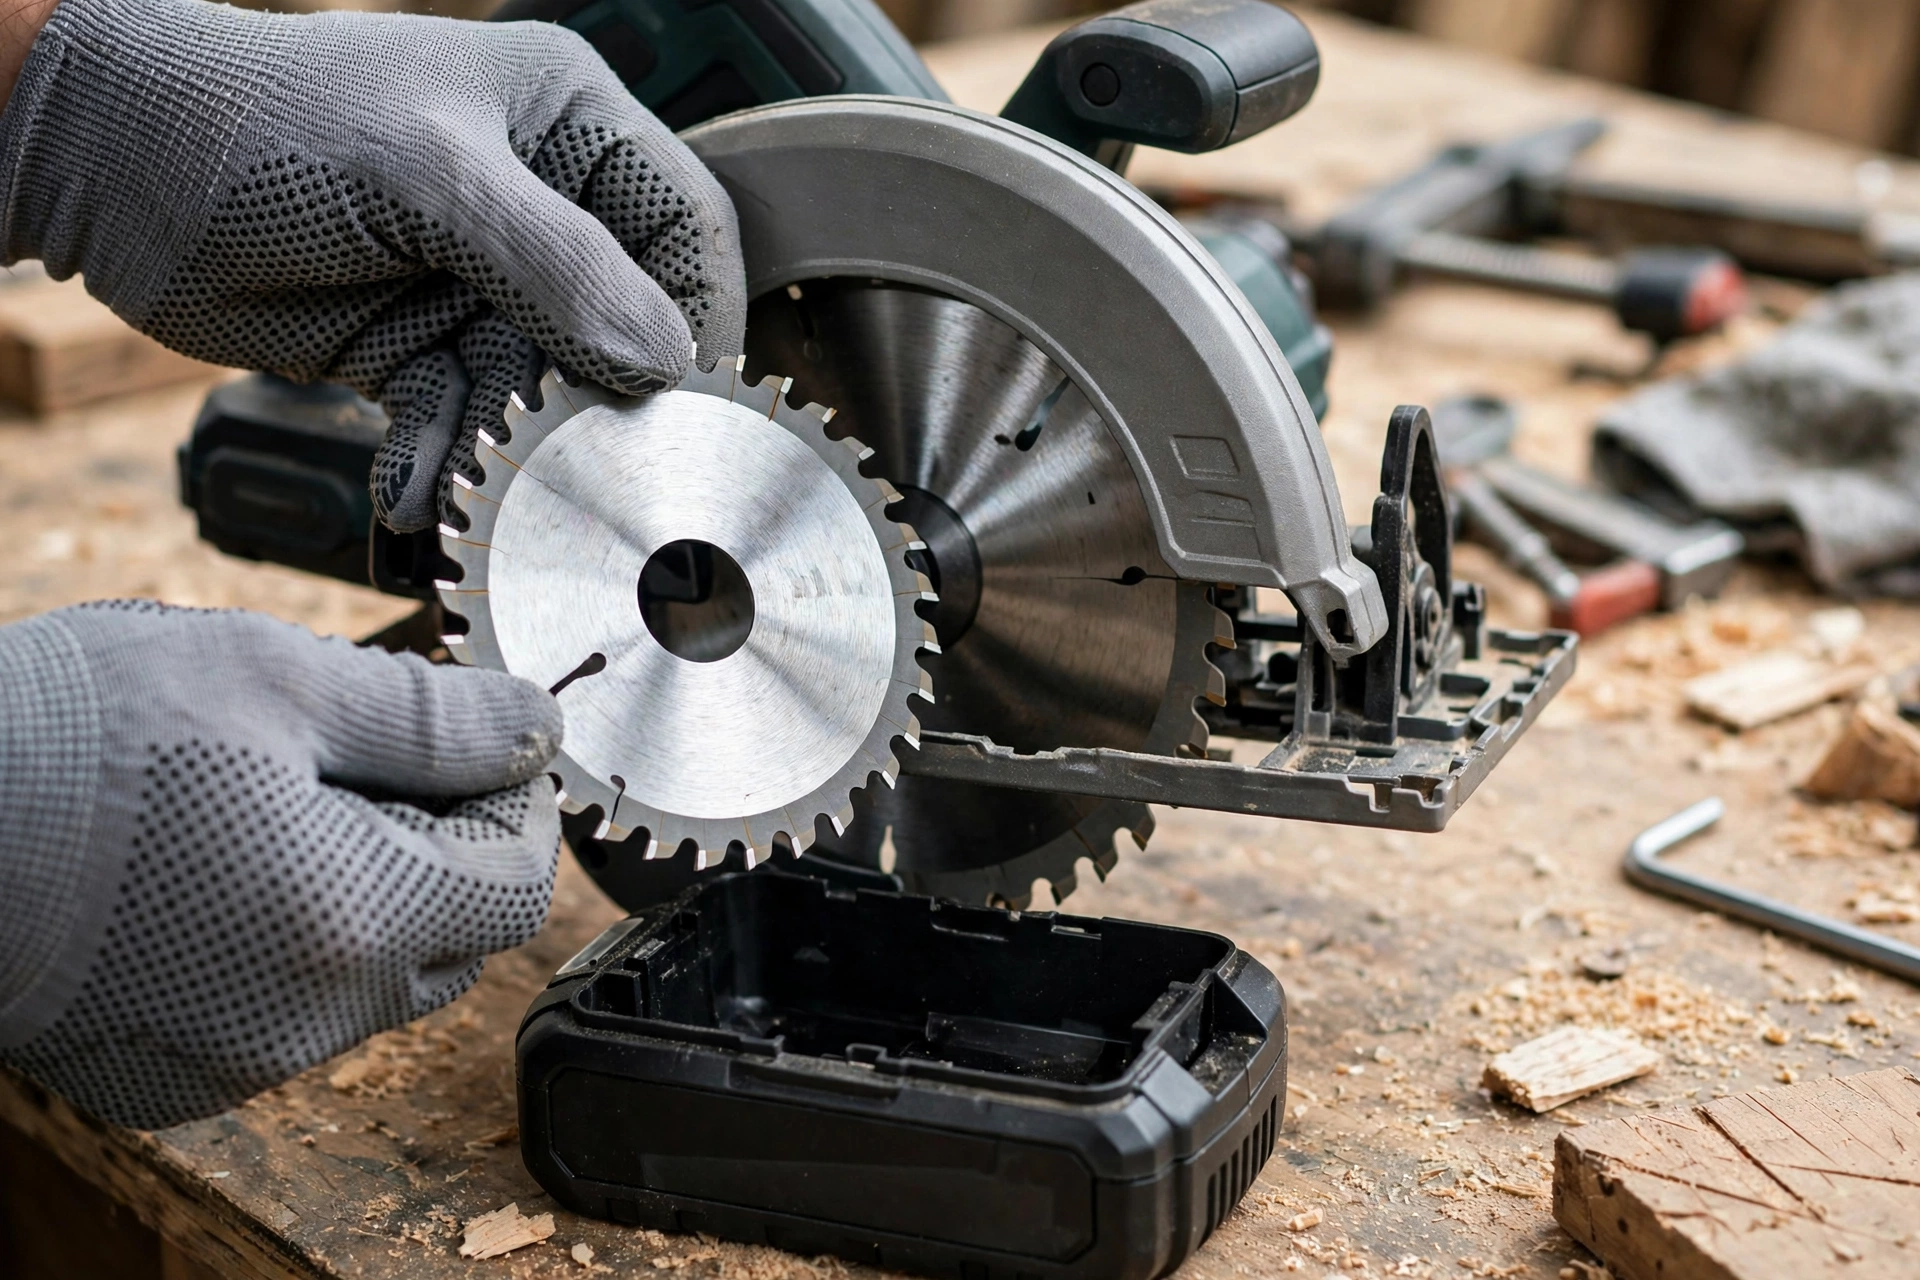
This guide walks the job in order, wrench in hand: power off for real (not just switched off), the thread direction that fools everyone once, the arrow that tells you which way the blade faces, and the thirty-second test that catches every mistake before the trigger does. Follow it once and the next blade change will feel like changing a light bulb — routine, quick, and slightly boring in the best possible way.
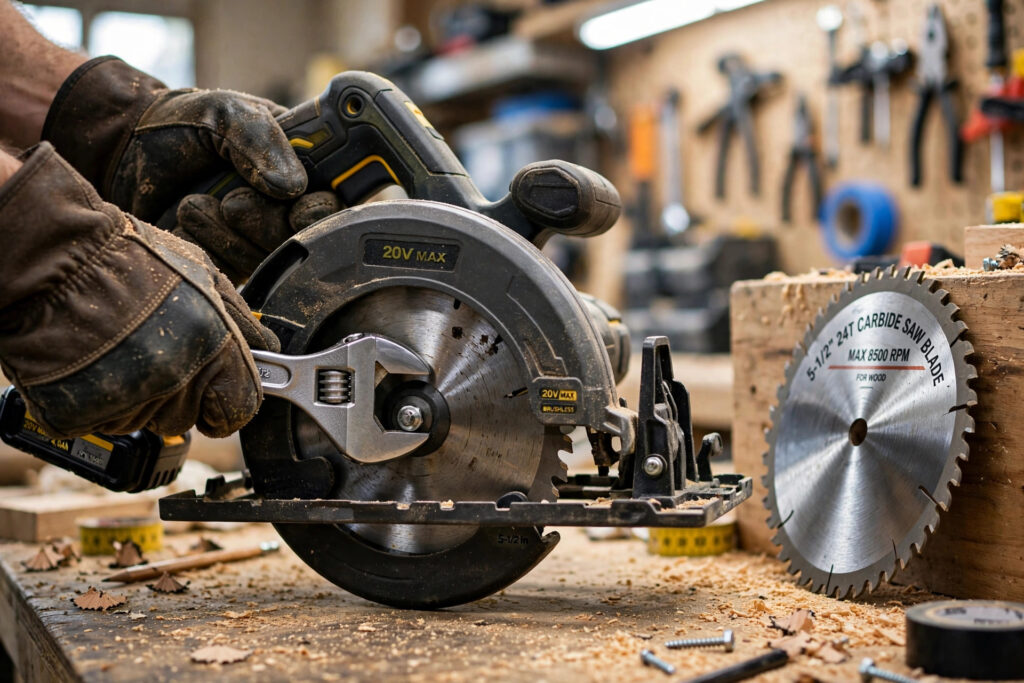
Safety first: Unplug the saw — or remove the battery — before you touch anything. Not “turned off.” Unplugged. Every year, people lose fingertips to saws that were “off” but still plugged in when something bumped the trigger. Wear cut-resistant gloves for handling the blade itself.
Quick answer: the 60-second version
- Unplug the saw (or remove the battery).
- Engage the blade lock (or wedge the blade).
- Loosen the arbor nut — remember, many saws use a reverse (left-hand) thread, so you turn it clockwise to loosen.
- Remove the outer washer, then the old blade. Note which way the teeth pointed.
- Mount the new blade with teeth pointing the same direction (teeth point up at the front of the saw — toward you as you push forward).
- Replace the washer and nut, tighten firmly (snug, not gorilla-tight).
- Spin it by hand to check clearance, then plug in and make a test cut.
If any step confused you, keep reading — the details are where safety lives.
What you’ll need
- The correct replacement blade (matching diameter — almost always 7-1/4″ for full-size saws)
- The wrench that came with your saw (usually stored on the saw itself — check the handle or base)
- Cut-resistant gloves
- A scrap board for the test cut
Blade diameter matters more than anything else. A 7-1/4″ saw takes 7-1/4″ blades. Don’t try to fit a larger blade — the guard won’t cover it. Smaller blades technically fit but cut less deep and look ridiculous; just buy the right size.
Step-by-step: changing the blade
Step 1: Disconnect power — completely
Corded saw: unplug it from the wall. Cordless saw: remove the battery pack. This is non-negotiable. The blade lock you’ll engage in the next step does nothing to stop the motor — it only stops the blade from spinning while you loosen the nut. If the saw somehow starts with your fingers on that blade, the lock won’t save you. Disconnected power will.
Step 2: Engage the blade lock
Most modern circular saws have a blade lock button — usually on top of the motor housing. Press it in and slowly rotate the blade by hand until the lock clicks into its detent. You’ll feel the blade stop turning.
No blade lock? Older or cheaper saws sometimes skip it. The classic workaround: clamp a piece of scrap wood against the blade teeth so the blade can’t rotate, or wedge the blade gently against your workbench. Some people use a screwdriver through a vent — I don’t love that method because slipping means a gouged housing, but it works in a pinch.
Step 3: Loosen the arbor nut (watch the thread direction!)
Here’s where beginners get stuck — literally. The arbor nut on many circular saws is reverse-threaded (left-hand thread). That means you turn it clockwise to loosen, counter-clockwise to tighten. It’s designed this way so the blade’s rotation tightens the nut during use instead of loosening it.
How to know: look for a small “L” marking, an arrow, or check your manual. When in doubt, try clockwise first — if the nut was installed correctly, that’s the loosening direction on most saws. (Some saws, particularly certain worm-drive models, use standard right-hand threads. Your manual is the authority.)
Use the wrench that came with the saw. If the nut is seized (common on saws that haven’t had a blade change in years):
- Penetrating oil first. A drop on the threads, wait 10 minutes. Don’t use WD-40 as a long-term lubricant, but as a thread-breaker it’s fine.
- Longer leverage. Slip a pipe over the wrench handle — carefully. More leverage, less knuckle-busting.
- Sharp taps, not steady force. A sharp rap on the wrench handle with a mallet often breaks corrosion better than sustained heaving, which just rounds the nut.
- Heat as a last resort. A heat gun on the nut (not the blade) for 30 seconds expands the metal. Keep it away from plastic housing.
Step 4: Remove the washer and old blade
Lift off the outer washer (sometimes called the flange), then slide the old blade off the arbor. Pay attention to two things:
- Which way the teeth pointed. You’ll replicate this with the new blade.
- The washer orientation. Some washers are slightly cupped — note which side faced out.
Handle the old blade by its center, not the teeth. Even a dull blade will open your hand. Wrap it in cardboard or an old towel before setting it aside — especially if kids or pets are around.
Step 5: Mount the new blade — direction matters
This is the #1 beginner mistake, so let’s be crystal clear.
The teeth must point UP at the front of the saw. When you’re holding the saw in cutting position (base flat, pushing forward), the teeth at the front edge should point upward — toward you. Another way to think about it: the blade rotates so the teeth cut upward into the wood from below, which is why circular saws cut on the upstroke and why the good face of plywood goes down.
Nearly every blade has a rotation arrow printed on it. That arrow must match the rotation arrow on the saw’s guard or housing. When in doubt, trust the arrows, not your memory.
Slide the blade onto the arbor, making sure it sits flat against the inner flange. If it wobbles or doesn’t sit flush, stop — something’s wrong (wrong arbor size, debris on the flange, or a bent blade).
Step 6: Reinstall washer and nut
Put the outer washer back in its original orientation, then thread the nut on by hand. Remember the thread direction — if it was reverse-thread to loosen, it’s reverse-thread to tighten (counter-clockwise to tighten on most saws).
Tighten with the wrench until firmly snug. This doesn’t need gorilla force — the blade’s rotation direction is designed to keep the nut tight during use. Over-tightening just makes the next blade change miserable and risks cracking the washer.
Step 7: Check before you cut
- Spin the blade by hand (power still disconnected). It should rotate freely without wobbling or rubbing the guard.
- Check the guard retracts and springs back smoothly.
- Reconnect power, let the saw run for 10 seconds unloaded. Listen for vibration or wobble — a new blade should run smooth. If it vibrates, power down and recheck the mounting.
- Make a test cut in scrap wood. Check the cut quality — burning, rough edges, or wandering can indicate a mounting issue (or just a cheap blade).
Common mistakes (and what they cost you)
| Mistake | What happens |
|---|---|
| Blade on backwards | Terrible cuts, burning, dangerous kickback risk — the teeth fight the wood instead of cutting it |
| Forgetting thread direction | Rounded nut, stripped threads, a 10-minute job becomes an hour |
| Not unplugging the saw | The nightmare scenario — accidental startup with hands on the blade |
| Over-tightening the nut | Cracked washer, seized threads next time |
| Wrong blade diameter | Guard doesn’t cover the blade — exposed teeth spinning at 5,000+ RPM |
| Skipping the test spin | Discovering a wobble at full speed instead of by hand |
A backwards blade deserves special emphasis because it’s so common and so dangerous. A circular saw blade mounted backwards doesn’t just cut poorly — it can grab the workpiece violently. If your first cut after a blade change feels wrong (burning smell, the saw fighting you, rough splintery cuts), stop immediately and check the direction. It’s almost always the direction.
Keep This Chart Handy — What That Bad First Cut Is Telling You
Stop cutting as soon as something feels wrong. Match the symptom to the first check. Each row stands alone — no other section needed.
| Symptom on the first cut | Check this first |
|---|---|
| Burning smell, rough splintery cuts, or the saw fighting the wood | Blade direction. Teeth must point up at the front of the saw, and the rotation arrow printed on the blade must match the arrow on the guard or housing. A backwards blade grabs the workpiece instead of cutting it. |
| Vibration or wobble at full speed | Mounting, before blaming the blade: blade flat against the inner flange, washer in its original orientation, nut firmly snug, and correct arbor size (some blades need a reducer bushing). If all of that is right and it still vibrates, the blade may be bent — return it. |
| Nut will not budge at all | Thread direction first, then corrosion: many saws are reverse-threaded, so clockwise loosens. Then penetrating oil plus 10 minutes, sharp mallet taps on the wrench (not steady force), longer leverage, and heat on the nut for 30 seconds as a last resort. |
| Burning wood, new splintering, or the saw labouring through cuts it used to eat | Blade condition, not mounting: look for missing or chipped carbide teeth. A merely dull premium blade can sometimes be professionally resharpened; a $10 construction blade is generally not worth resharpening. |
| Guard does not cover the blade | Blade diameter. A full-size saw takes a 7-1/4 in (184 mm) blade. Never fit a larger blade — the guard will not cover it. A smaller blade fits but cuts less deep. |
| Wobble found only after switching on | Skipped hand check. With power still disconnected, spin the blade by hand, confirm the guard retracts and springs back, run 10 seconds unloaded, then make a scrap test cut. |
Bookmark This Checklist — The New-Blade First-Cut Verification
Run every check below after fitting a new blade and BEFORE your first real cut. Power stays disconnected until the hand checks pass. Each row stands alone — no other section needed.
| Check | Pass standard | If it fails, stop and do this |
|---|---|---|
| Power disconnected | Corded saw unplugged from the wall, or battery pack removed — not merely switched off. | Do not touch the blade again until power is fully disconnected. A blade lock stops the blade spinning; it does not stop the motor. |
| Blade direction | Teeth point up at the front of the saw (toward you as you push forward), and the rotation arrow printed on the blade matches the arrow on the guard or housing. | Remove and refit the blade the right way round. A backwards blade burns, splinters, and can grab the workpiece. |
| Blade size and seating | Correct diameter for the saw — 7-1/4 in (184 mm) on a full-size saw — sitting flat against the inner flange, with the correct arbor size (a reducer bushing if the blade needs one). | Never fit a larger blade: the guard will not cover it. If the blade wobbles or does not sit flush, stop — check for debris on the flange or a bent blade. |
| Washer and nut | Outer washer back in its original orientation, nut tightened firmly snug with the saw’s wrench — not gorilla-tight. Remember many saws are reverse-threaded: clockwise to loosen, counter-clockwise to tighten. | Refit the washer the right way round and re-tighten to firmly snug. Over-tightening cracks washers and seizes threads for the next change. |
| Hand spin, power still off | Spin the blade by hand: it rotates freely with no wobble and no rubbing on the guard. | Power down and recheck the mounting — do not discover a wobble at full speed. |
| Guard action | Guard retracts and springs back smoothly by hand. | Clear any obstruction and re-test by hand before reconnecting power. |
| Unloaded run | Reconnect power, let the saw run for 10 seconds unloaded, and listen: a new blade should run smooth, with no vibration or wobble. | Power down immediately and recheck mounting. If mounting is perfect and it still vibrates, the blade may be bent — return it. |
| Scrap test cut | Make a test cut in scrap wood with cut-resistant gloves on, and check the result: clean cut, no burning smell, no rough splintering, no fighting the wood. | Stop cutting at once and recheck blade direction first — a bad first cut is almost always the direction — then blade condition (missing or chipped carbide teeth). |
Only when all eight checks pass is the blade ready for real work. Thirty seconds here saves a ruined board — or worse.
How often should you change the blade?
Not on a schedule — on condition. Learn the 7 signs your circular saw blade is done — but the short version: burning wood, splintering that wasn’t happening before, the saw laboring through cuts it used to eat, and visible missing or chipped carbide teeth.
A blade that’s merely dull (not damaged) can sometimes be professionally resharpened for a few dollars — worth it for premium blades, not worth it for $10 construction blades.
Keep Reading
If this guide helped, these related guides are worth your time:
- How Long Do Saw Blades Last? (Signs Yours Is DEAD)!
- Circular Saw KICKBACK: How to NOT Get Hurt!
- Circular Saw Blades: Pick WRONG = Ruined Wood!
Bookmark This Checklist — Picking the Right Replacement Blade Before You Buy
The blade change starts at the shop, not at the saw. Check every row below before you pay — each one stands alone, no other section needed.
| What to check | The rule | Why it matters |
|---|---|---|
| Diameter | Match the diameter exactly — 7-1/4 in (184 mm) on a full-size saw. | A larger blade will not be covered by the guard; a smaller blade fits but cuts less deep. |
| Rotation arrow | Nearly every blade has a rotation arrow printed on it; it must match the arrow on the saw’s guard or housing. | When in doubt, trust the arrows, not your memory — a backwards blade burns, splinters, and can grab the workpiece. |
| Arbor size and seating | Correct arbor size for your saw; some blades need a reducer bushing. | If the blade wobbles or does not sit flush against the inner flange, stop — something is wrong. |
| Teeth condition | Look for missing or chipped carbide teeth before you buy — and before you fit a blade you already own. | A damaged blade grabs unpredictably; a merely dull premium blade can sometimes be professionally resharpened instead. |
| Premium vs budget | A dull premium blade is sometimes worth resharpening for a few dollars; a $10 construction blade generally is not. | Paying to resharpen a cheap blade costs more than the blade is worth — buy new instead. |
| The saw’s own wrench | Use the wrench that came with the saw; it usually lives on the saw itself — check the handle or base. | The right wrench fits the arbor nut properly; the wrong one rounds it, and a rounded nut turns a 10-minute job into an hour. |
Which way do circular saw blade teeth point?
Up at the front of the saw (toward the operator as you push forward). Match the rotation arrow printed on the blade to the arrow on the saw’s guard.
Why won’t my arbor nut budge?
Usually corrosion or over-tightening from the last change. Penetrating oil + 10 minutes of patience + sharp taps on the wrench (not steady force) solves 90% of stuck nuts. And double-check you’re turning the right direction — reverse threads fool everyone once.
Can I put a smaller blade on my circular saw?
Physically yes on most saws, but you lose cutting depth and it looks wrong. Never put a larger blade on — the guard won’t cover it. Just buy the correct diameter.
Do I need to unplug a cordless saw to change the blade?
Yes — remove the battery. “Off” is not safe enough. It takes three seconds and eliminates the entire risk category.
How tight should the arbor nut be?
Firmly snug with the saw’s wrench — not gorilla-tight. The rotation is designed to self-tighten during use. Over-tightening only punishes your future self.
My new blade vibrates — is it defective?
Maybe, but check mounting first: blade flat against the inner flange, washer in correct orientation, nut properly tightened, correct arbor size (some blades need a reducer bushing). If everything’s right and it still vibrates, the blade may be bent — return it.
The verdict
Changing a circular saw blade is a 5-minute job that intimidates everyone exactly once. The entire safety system is: disconnect power, respect the thread direction, get the blade direction right, and test before cutting. Do those four things and it’s routine maintenance. Skip any one of them and it’s a story you’ll tell with fewer fingers.
When you’re done, take 30 seconds to appreciate how much better a fresh blade cuts — then go check whether your old blade was actually done or just dirty. You might be surprised.
Bookmark This Chart — The Blade-Change Cheat Sheet
The five things worth double-checking every single swap:
| Situation | The rule |
|---|---|
| Blade direction | Teeth point UP at the front of the saw; the arrow printed on the blade must match the arrow on the guard |
| Arbor nut thread | Many saws are reverse-threaded: clockwise to LOOSEN, counter-clockwise to tighten (look for an “L” or an arrow) |
| Blade size | Match the diameter exactly — 7-1/4″ on full-size saws; never larger, the guard won’t cover it |
| Nut tightness | Firmly snug — rotation self-tightens in use; gorilla-tight only punishes the next change |
| Stuck nut protocol | Penetrating oil + 10 minutes → sharp mallet taps on the wrench → longer leverage → 30 seconds of heat-gun on the nut (last resort) |
| Before the first cut | Spin by hand (power still off), check the guard springs back, run 10 seconds unloaded, then make a scrap test cut |
Related: While the blade is off, brush up on circular saw kickback: causes and how to prevent it — most kickback is preventable with the right setup.
Tool Worth Lab provides research-based tool guidance. Always disconnect power before servicing any power tool. If you’re unsure about any step, consult your saw’s manual or a qualified repair shop.